
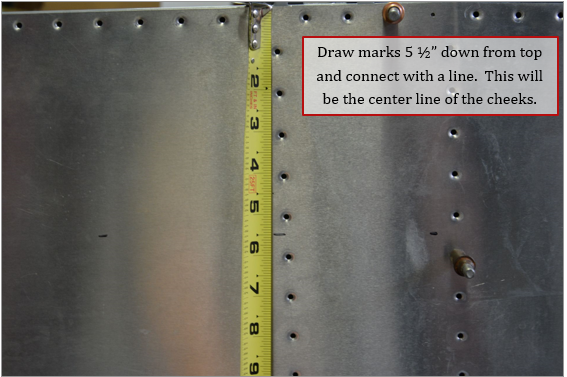
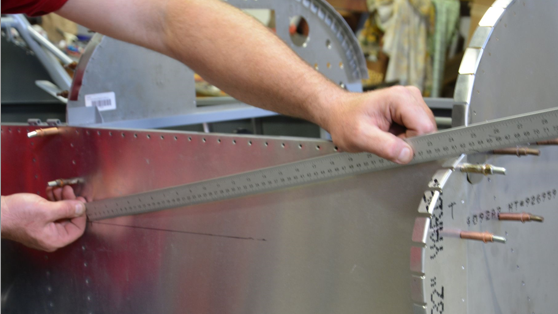
1. Make marks 5 ½” from the top of the fuselage.
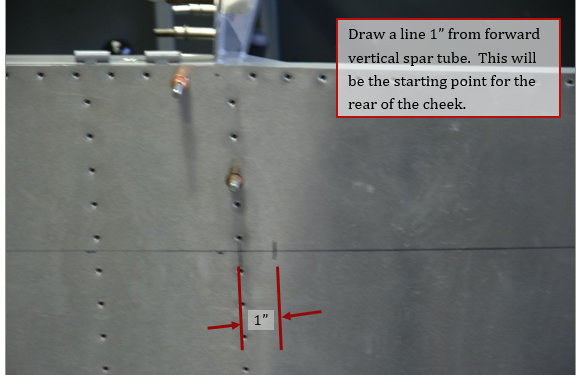
2. Draw line1” from row of holes in steel tube.
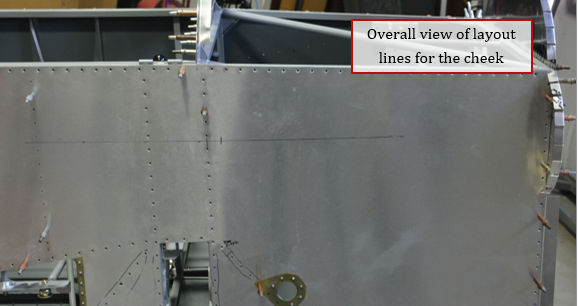
3. Overall view of layout lines for cheek,
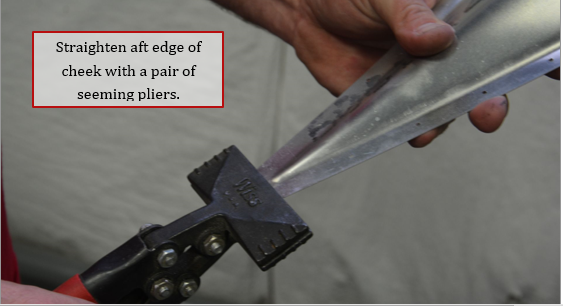
4. Straighten aft edge of cheek.
5. Use straight edge to bend tabs of former to the correct angle


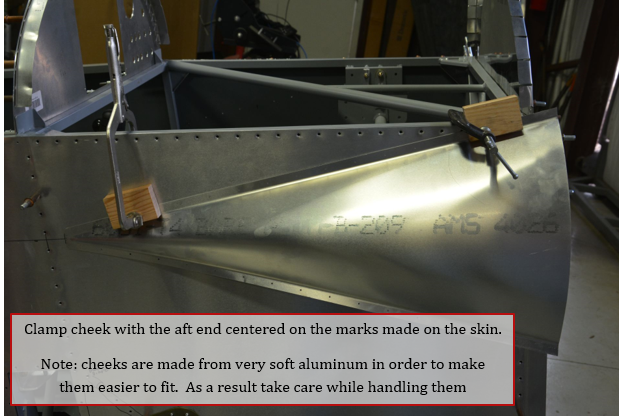
6. Clamp cheek with aft end centered on the marks made earlier
7. Check fit of cheek to the top corner of former

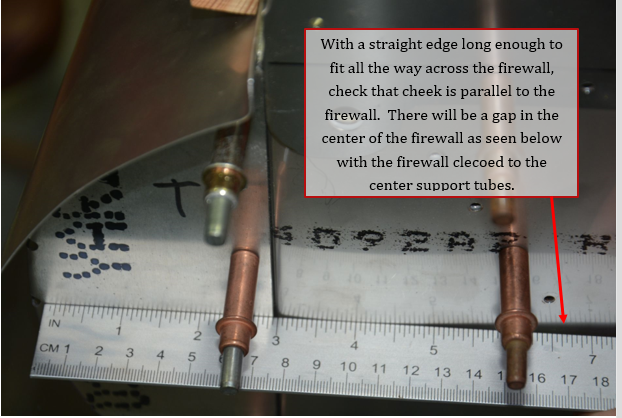
8. With a long straight edge, make sure former is parallel to the firewall.
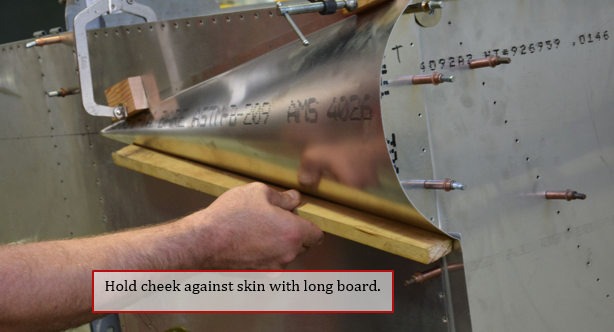
9. With a long board hold cheek to the skin to check the fit of the cheek to the former. A second person is helpful at this point.
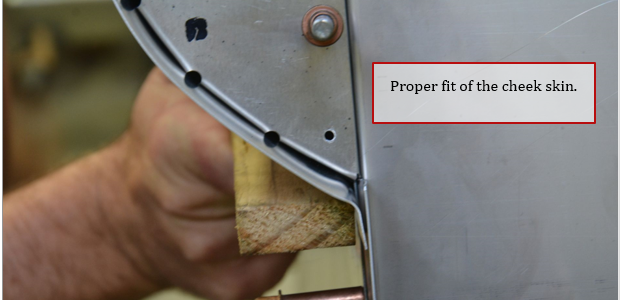
10. Cheek should be tight against fuselage skin, if it is not, move cheek forward or aft until there is a tight fit.
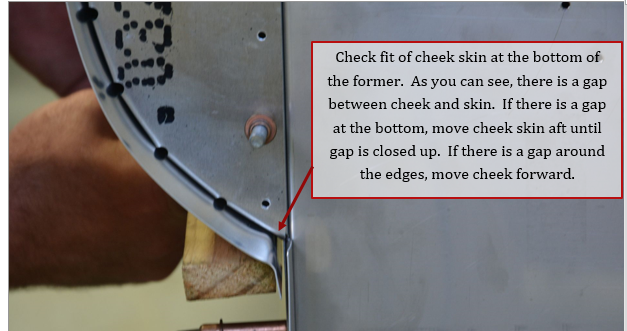
11. Below is what the cheek fit should look like at the bottom.
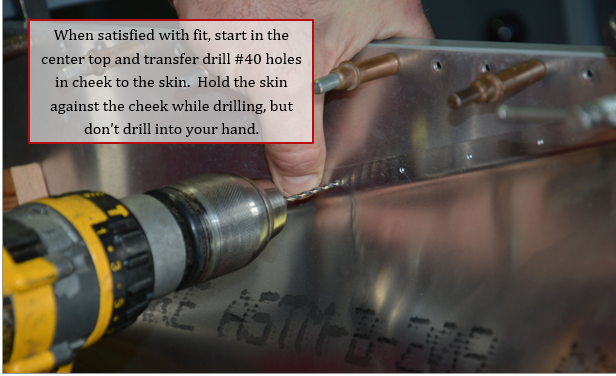
12. Starting at the center of the top of cheek, transfer drill holes and cleco as you go. Be sure to keep skin tight to the cheek while drilling.
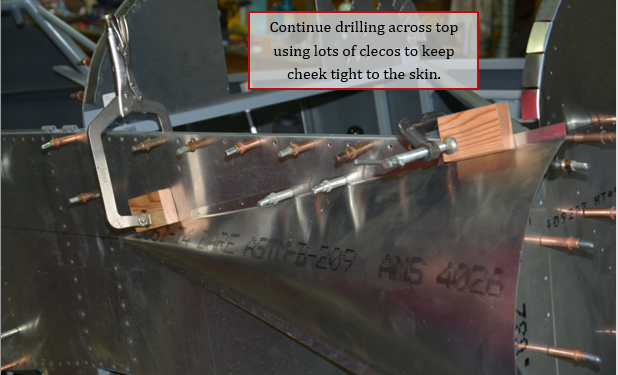
13. Continue drilling forward and aft of the center. Keep skin tight to the cheek
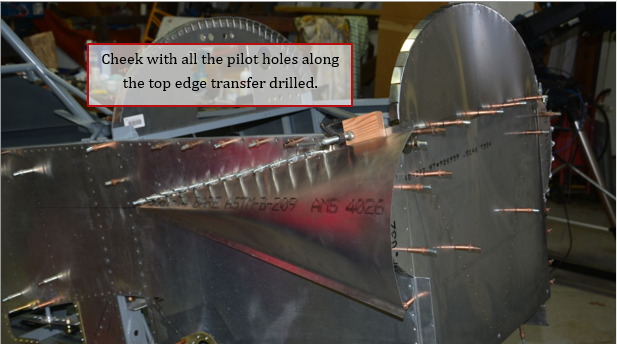
14. Cheek with all of the pre-drilled pilot holes along the top transferred.
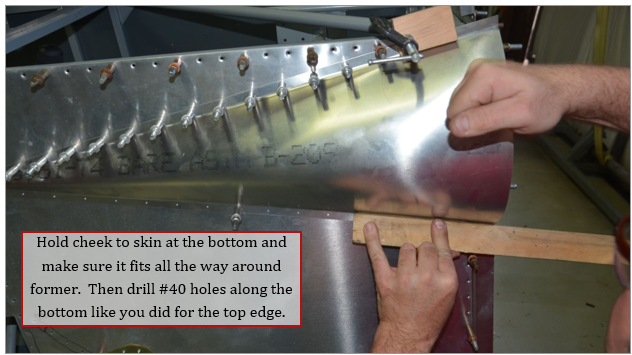
15. Making sure the cheek is pushed tight against the skin and the former, drill the bottom like you did at the top starting at the center. A second person is helpful to hold cheek tigh while you start to drill.
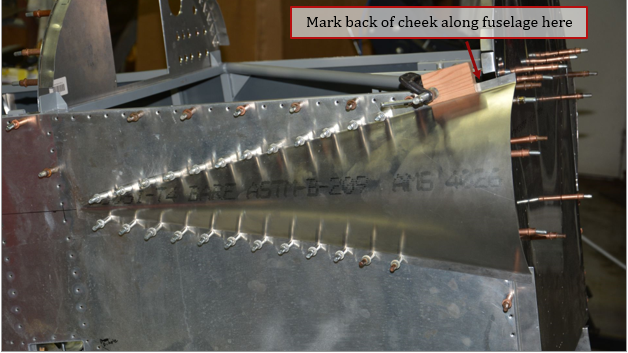
16. Cheek with all the pre-drilled pilot holes transferred to skin. Mark back of cheek along the top of the fuselage to trim.
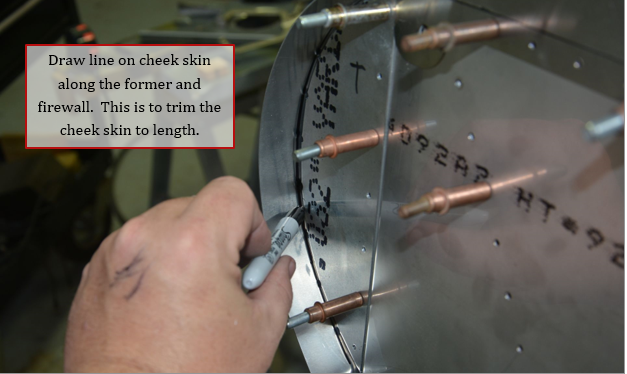
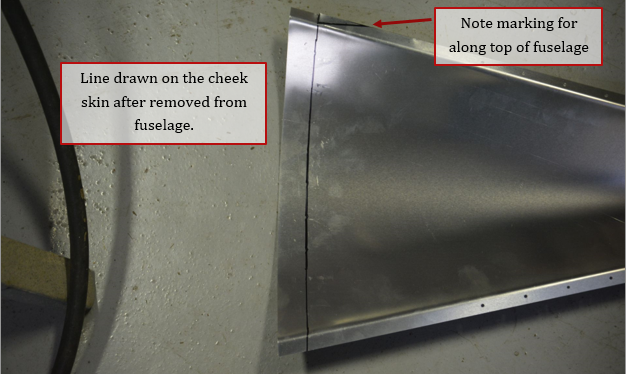
17. Draw line on cheek along the edge of the former and the firewall. This is to trim the cheek to length.
18. With cheek removed, make sure line is extended to the top and bottom.
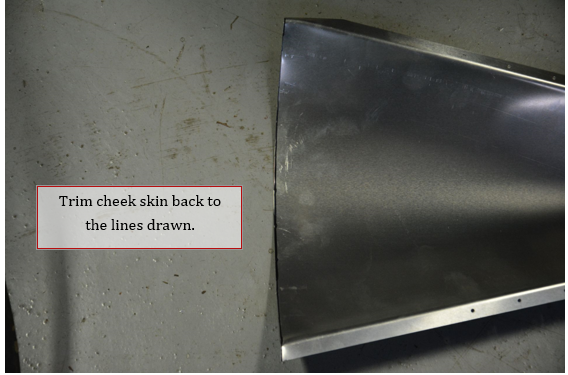
19. Trim cheek to the lines drawn.
20. Cleco cheek back onto the fuselage skin. Measure and mark holes to attach cheek to the former.

21. Drill and cleco #40 holes along forward edge of cheek.

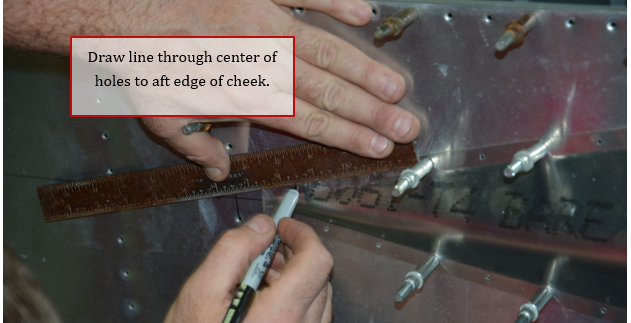
22. Draw a line through the center of the holes on the top and bottom of cheek to the aft edge of the cheek.
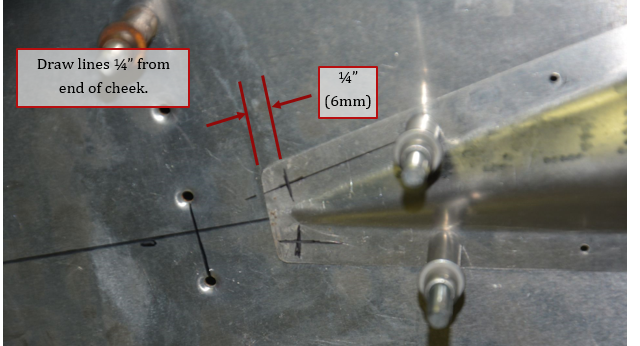
23. Draw lines ¼” from aft edge of cheek.
24. Drill 2 #40 holes in locations marked previously.

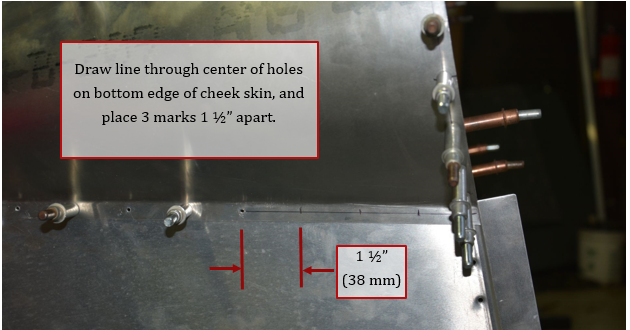
25. Measure and mark for 3 holes along bottom edge of cheek. Holes are 1 ½” apart.
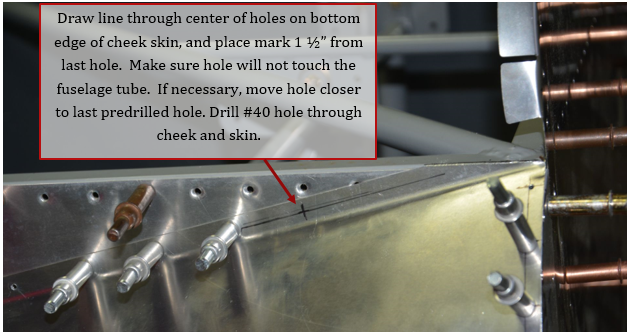
26. Mark for a 4th hole 5/8” behind row of rivet holes for the firewall. Drill all 4 holes with #40 drill bit.

27. Mark for one hole along top of cheek. Make sure hole will clear top fuselage tube. Move hole aft, if it looks like it will hit tube.
28. Remove clecos from front of skin, so it can swing away from the steel fuselage, and transfer drill one hole into cheek.
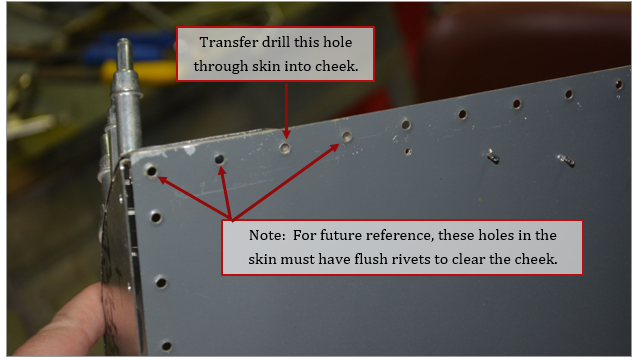
29. Repeat for the steps for this section for the cheek on the other side.
30. Remove cheeks, debur and updrill holes for rivets. When complete, cheeks can be set aside to be riveted on later. Cheeks cannot be riveted on until skins are attached later.
