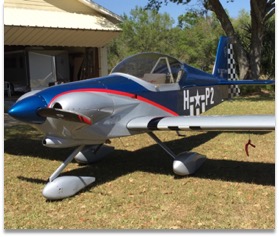
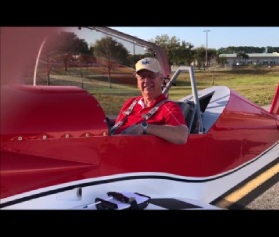
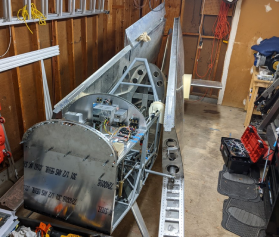
Brent Mayo, of Fernandina Beach, FL, has completed his Panther LS paint job – and it looks great! He sent over the photos below yesterday.
Brent ordered the decals you see from us. The checkerboard rudder is a 3M vinyl decal in one piece, perfectly matched to line up with your rudder. The decals you see on his wing are our 60″ version. We also offer a smaller 30″ version. The decal of the Panther on the vertical stab is also one we offer. He had the one on the flaps made by a local shop.
Brent is an experienced builder. You can read more about Brent and his Panther build here. He decided to wait until he had some hours on the airframe before painting.
Brent painted the airplane himself. Here is what he had to say about the experience.
“I decided to use the Stewart System EkoCrylic for my Panther project. After reading all the horror stories and talking with several RV builders that had good results and experience using this system, I decided to give it a go. One of the main reasons for wanting to use the Stewart System was that I would be painting in my garage, turned paint booth, so I didn’t want the smell or solvents in the house.
One of the first things I learned from talking with others is the instructions must be followed to the “T”, but the over all process is pretty simple. You must have a large air compressor (80 gal), recommended DeVilbiss finish line 4 paint gun, and I used a Camair Q3 filter with high volume air hose fittings – not the standard ones. Another trick I learned was to coil a 25 foot air hose in a five gallon bucket with ice over the hose to cool the air before it reaches the Camair filter. This cools the air so the water can drop out before reaching the camair filter.
Now for the prep process. The first thing is to degrease the parts with Stewart System heavy duty degreaser applied with a spray bottle. One quart is enough for the complete project. After degreasing you apply the Stewart System etch using a spray bottle and maroon scotchbrite pad scrubbing the part and allowing the etch to stay on for about four minutes before rinsing off with water. Do not let etch dry on the part, keep it wet. Allow the part to dry over night before starting the priming process.
The primer is super easy to use. Mix prime 10:1 with distilled water. The primer should go on smooth, if not adjust air pressure or viscosity of primer. Apply two cross coats of primer allowing 10-15 minutes between coats.
When finished with primer pour left over back into primer can so there is no waste and clean spray gun with water. One gallon was enough for my Panther but all my fiberglass parts had been preped and primed before my first flight.

After the primer dries 30-45 minutes, sand primer with 320 open coat sand paper being careful around rivet heads and high spots, so as not to sand through primer. After sanding wipe down primer with a wet NEW UNWASHED wash cloth or hand towel to remove sanding dust or you can blow part off with clean air or do both. Washed towels could contain silicone from the washing process which could contaminate your part. Be very clean.
After waiting 3-4 hours for primer to completely dry you can then begin the paint process. First blow part to be painted off with clean dry air using a unwashed cloth to wipe part down and then using a tack cloth to wipe down the part. You want to use a tack cloth made for waterborne paints. Now you are ready to mix the paint. Using a gram scale mix paint 4:1:1 and be sure to wear your respirator while pouring in catalyst. This when the paint is most dangerous because the catalyst is looking for moisture. (Lungs, eyes, etc) Allow mix to set 5 minutes before adding distilled water then wait another 5 minutes before spraying. What worked for me was to start out with the fan control wide open and the fluid control 3/4 turn open. You want to apply a fog coat with about 50% color saturation for the first coat. Wait about 10 minutes and then start applying second coat but open fluid knob another 1/8 of a turn and shoot for 90% color saturation with no shine or wet look. Wait 10-15 minutes checking paint tack with your knuckle for paint tack but with no paint transfer to knuckle. Third coat open fluid control another 1/8 turn and color saturation should be 100% now with no shine or wet look. Allow paint to tack up like before but may take 20+ minutes depending on conditions. Now for the fourth and last coat open fluid control another 1/8 turn for a total of 1 & 1/8 turn open on the fluid control. If needed adjust fluid knob or air press to achieve a smooth wet look with shine behind the gun without running paint. It takes a little practice to get the hang of this last coat, for me anyway. The paint will flow out more during the drying process. When finished painting wash paint gun with water for easy clean up. Left over paint can be allowed to dry in a cup and then disposed of in the trash. Non hazards.

Other things I learned was to wipe part down with 90% isopropyl alcohol before priming with a unwashed cloth or a lint free paper towel and don’t touch part with bare hands afterwards. I didn’t like wiping part down with alcohol after priming. It made the primer soft. Anyway, it didn’t work for me so I just used a wet unwashed cloth and then tack ragged before painting. There were a couple parts were I had to sand down and respray because of beginner mistakes. To do this, after the part dries overnight sand down part with 320 wet or dry, wiped down with 90% isopropyl alcohol, and then tack rag part. Next apply a tack coat like the first coat and allow paint to tack up, then apply wet coat. Don’t forget to open fluid control 1 1/8 turn for wet coat.

I liked the over all Stewart System paint process especially the no, or very little, smell and the water clean up. I ended up using a quart of HD cleaner, a quart of Etch, one gallon of smoke gray primer, one and half gallons of Insignia white paint, and a quart and half of sterling blue paint. The black is vinyl from SPA. The paint process took me six weeks to complete working mostly on the weekends and a few evenings.
Painting is not for everyone, but by doing it myself I saved a lot of money. From my estimates I have about $2,000 in the paint job and that’s with purchasing the air compressor, paint gun, and Camair filter. I probably missed a few details but hopefully this will help some of you Panther builders in deciding your paint process. Stewart System sells test paint at 50% off so you can practice using poster board before deciding if it’s right for you. I sprayed several practice pieces on poster board setting up my spray gun and just leaning more about the paint itself. Good luck!”
– Brent Mayo SN 053


