When riveting an aluminum aircraft part to it’s mate the goal is a tight, non-rotating, no proud stem, flush fit.
When using blind rivets the most aesthetic outside skin to mating surface option is to use a flush blind rivet. This requires dimpling or counter sinking of the one or the other, or both, of the mating surfaces. For the thinner sheet metal (under .040 or so) dimple dies are used. There are different angles of dimple dies.
Most common, in the current market, for experimental aluminum homebuilt aircraft are the 100° and 120° dimple dies for the #30 or 1/8th hole size. Most kits that are match tooled, or have the skin drilled and require the hole to be drilled to the mating surface, come with the pilot hole drilled for a #40 (3/32″) hole. The procedure requires you to drill through with a #40, if needed, and then up-drill to the #30 (1/8″). Then de-burr the hole, dimple and then rivet with a countersunk 120° rivet.
This process has worked well in the past. Recently there have been questions among builder communities, including ours, that have asked “Can we get a tighter rivet fit?”
**PLEASE NOTE** – This procedure option below ONLY applies to two outside surfaces (no-one cares if inside surfaces are flush riveted) that are a total of thinner than .080″ total. If you choose to use this procedure your steps would need to be modified from the SPA Builder’s Manual to accommodate. (IE – Do Not up-drill to #30 before dimpling…)
There has been a development in this process recently by Cleveland Tool. Their theory was to develop a die to dimple the skin and mating surface at the #40(3/32″) hole with a 120° degree die, after de-burring, to result in a hole that would create a tight fit 1/8″ rivet set.
Cleveland calls these dies DIENQ. They are currently listed at $50 a set.
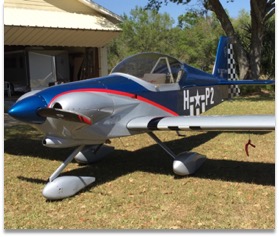
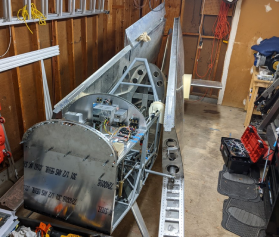
These DIENQ dies were recently released for public purchase and we decided to put them to the test. After all, our Panther aircraft kit was the prime candidate for benefitting from this new tool if the results were as indicated. Our only concern was that using the dimple die after de-burring would stretch the metal around the rivet hole and cause stress fractures.
Paul Salter – who is in the midst of building his Panther, decided he was going to put the dies to the test and see for himself if the suggested process and new dimple die would make a difference. Plus he got to buy a cool, new magnification tool to add to his engineering arsenal!
Here are his results, in his words:
SPA bought a set of these dies and I decided to see if there were any signs of micro cracking around the edge of the dimple. I used a Dino-Lite USB microscope hooked to a standard laptop to inspect and optically measure the holes in 0.020”, 0.025” and 0.032” 6061-T6 aluminum.
First step was to inspect and measure, at 50 power magnification, a hole drilled with a #40 bit. Notice the slight triangular shape of the hole. This is common for drilling with a standard drill bit, and is more pronounced the harder you force the drill bit. This is also why reamers are typically used to finish a precision holes as they make a round hole. But the maximum size of the hole is the standard 0.098” #40 hole. This hole has not been de-burred.

Next, the hole was de-burred using a 3/32” burr-away de-burring tool.

Next, the hole was dimpled using the DIENQ dies. The final diameter of the hole ended up at a perfect #30 hole.
One note: The holes that were de-burred by hand ended up slightly smaller, and was too small for the rivet to fit. The Burr-away removed some material and enlarged the hole. If you get too aggressive de-burring, your holes might be too large. If not de-burred enough, then you might have to upsize the hole to #30.

#40 Hole Dimpled Showing Dimensions
Next is the same hole with no dimension circle. Note the hole is now much closer to round, and no cracking has been detected at 50x magnification.

Next, the same hole was looked at with 200x magnification, this is just one portion of the hole, but no cracking was found around the hole.

I also used the standard technique of a #40 hole, upsized to #30, deburred by hand (no burr-away) and finally dimpled using the standard 120 degree dies. The hole started out at 0.126”, and after dimpling it was enlarged to 0.133”. That is approximately 0.005” over the standard #30 hole diameter for 1/8” rivets.

Conclusion, the DIENQ dies worked better than expected, and made a very clean dimpled hole at or slightly smaller than the recommended hole size for Cherry N and Cherry Q rivets. Depending on how the holes are de-burred, the hole may need to be enlarged with a #30 drill bit. The smaller holes should help make a tighter riveted joint.
The pictures were taken with the dimples in 0.025” 6061-T6 aluminum. Other metal thicknesses with 0.020” and 0.032” 6061-T6 aluminum were also tested and found to have no significant difference.