Note: the P-F-TC-tail wheel socket is a structural part of the airframe. If you are building airframe as a tri gear the socket is still needed. It serves as the lower connection of Tail Cone and vertical stab, in both tri-gear and tail-dragger models. In the tri gear it also mounts the tail skid/ tail tie down.
Note: We recommend drilling the tail wheel spring to the P-T-TC-tail wheel socket, and the tailwheel itself to the spring before permanently installing the P-T-TC-tail wheel socket in the tail cone. See 6.10.1
1.Remove P-F-T-aft deck and P-F-TC bulkhead 5
2.Fabricate qty2 P-F-TC- spacers from P-F-TC-spacer stock (P6511)
a.Per plans sheet P-F-TC-bulkheads/misc details (detail center right) save left over stock for future use.
3.Bevel edge of spacers slightly so they fit into “radius” of lower longeron as shown in photos and plans sheets
4.Flip TC onto side (using 2x4 blocks or proper saw horse spacing as before to protect any clecos in TC side)
5.Layout the tailwheel spring mount mounting holes as shown on plans sheet P-F-TC-bulkheads/misc details (right lower)
6.Drill to #40
7.Locate the spacers and P-F-T-tail wheel spring mount (P6601) a shown on plans sheet P-F-TC-bulkheads/misc details and clamp to lower longeron with small c clamps.
8.Reinstall P-F-TC bulkhead 5 and cleco in place.
9.Verify the spacers and tail-wheel spring mount are located per plans.
10.Drill the qty 4 tail wheel spring mount bolt holes through the lower longeron #40 and cleco.
11.Up drill to #30 and cleco.
12.Flip tail cone bottom down (using 2x4 blocks or proper saw horse spacing as before to keep protect any clecos in TC bottom)
13.Remove bulkhead 5
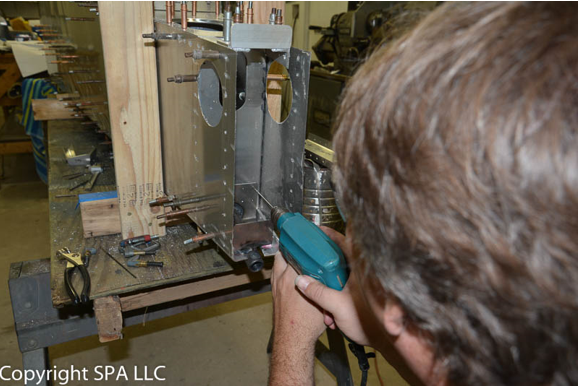
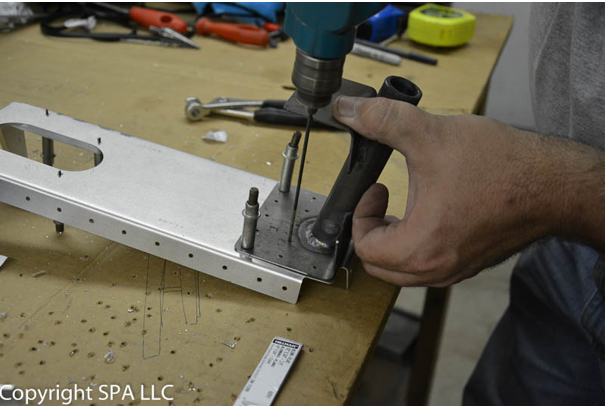
14.With tail-wheel spring mount firmly cleco-ed to lower longerons and using long (6-12 inch) # 30 bit, drill the upper row of tail-wheel spring mount holes to bulkhead 4 as shown below and cleco.

15.Remove one of the tail wheel spring mount bolt clecos at a time and drill (3/16) to a “tight fit” for the AN525-10R12 bolt and cleco in place.
16.Repeat for remaining 3 bolts.
17.Remove the tail wheel spring mount and bulkhead# 4.
18.Cleco the tail wheel spring mount to bulkhead 4 with the top row of bolts.
19.Using an angle drill if available, drill the remaining #30 holes.
Note: If no angle drill is available you can also use a “strap duplicator, or simply a long #30 drill bit at slight angle as shown below to drill the remaining holes
 .
.
20.Debur the tail wheel spring mount and bulkhead #4
21.Debur lower longeron at the 4, 3/16 mount holes
22.Debur the spacers
23.Reinstall bulkhead #4, spacers, tail wheel spring mount, and bulkhead #5 and firmly cleco in place
