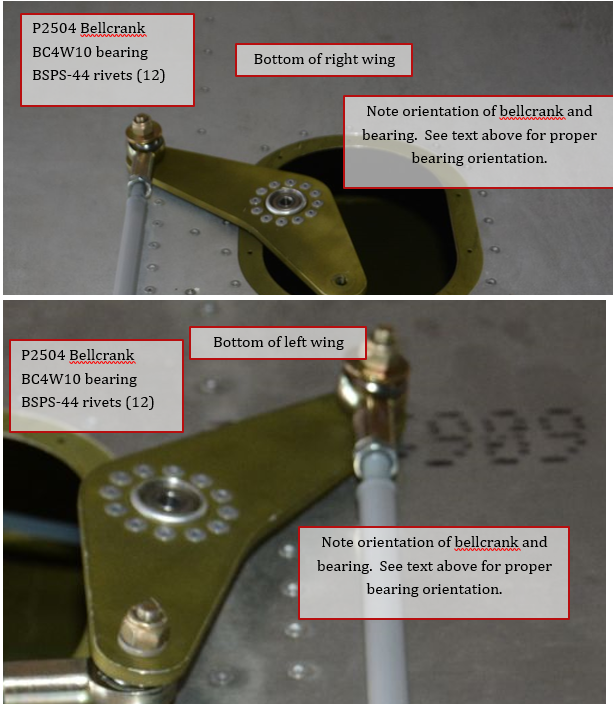
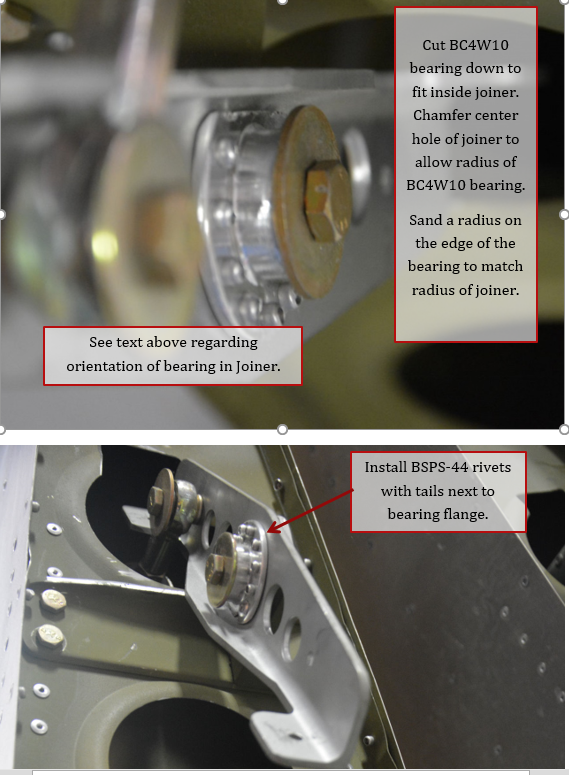
1. There are 2 pairs of aileron joiners that work together to transfer the control stick movement to the ailerons. These joiners work in a Push-Push configuration and allow the controls to automatically connect/disconnect when you unfold/fold the wing. The 2 joiners in each pair are identical with the exception of how the flanged bearing is installed.
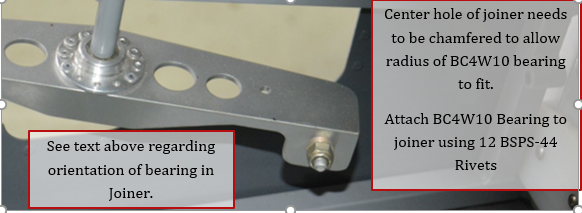
2. Assemble 2 joiners P2504 as shown for the wings. BC4W10 Bearing needs to be cut down to fit inside radius of the Joiner, round the edge to fit the radius. Center hole of joiner needs to be chamfered to allow radius of BC4W10 bearing to fit.
Note: Refer to section 4.17 Elevator reversing arm in Fuselage Part 3 manual to see pictures of bearing and retainer flange, the side of the bearing with the inner bearing retaining flange should go through the hole in the bellcrank.
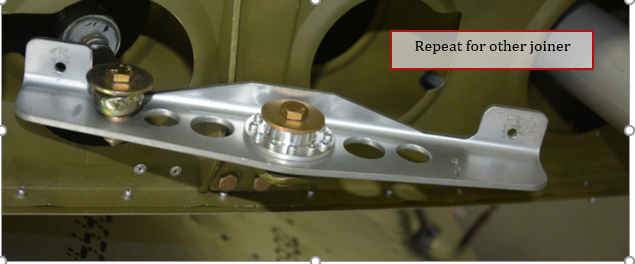
3. Assemble 2 joiners P4508 for the fuselage as shown. Chamfer center hole of joiner to allow bearing to fit. Install BSPS-44 rivets to attach bearing to joiner.
Note: Refer to section 4.17 Elevator reversing arm in Fuselage Part 3 manual to see pictures of bearing and retainer flange, the side of the bearing without the inner bearing retaining flange should go through the hole in the bellcrank.
4. Assemble 2 bell cranks P2504 with BC4W10 flanged bearings as shown for the wings. The edge of the center hole will need to be beveled to give room for the radius of the bearing flange. Refer to section 4.17 Elevator reversing arm in Fuselage Part 3 manual to see pictures of bearing and retainer flange, the side of the bearing without the inner bearing retaining flange should go through the hole in the bellcrank. Note that the Left side bellcrank is opposite of the right side bellcrank.