Caution: Rod ends should have minimum 1.5x thread diameter of threads into the rod end for safety. MW-5s need 15/32 inch (11.9 mm) minimum. In general all rod end connections are designed to be threaded almost fully to set the push rod assembled length. If for proper adjustment the push rod needs to be shortened after fabricating, extra threads are available, and can be trimmed to allow a slightly shorter length.
1. The ends for the long aileron pushrods in the wing are assembled in a very similar manner to the long elevator pushrod that was assembled in Part 1.
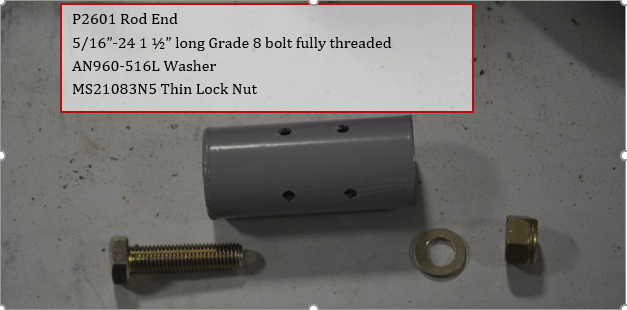
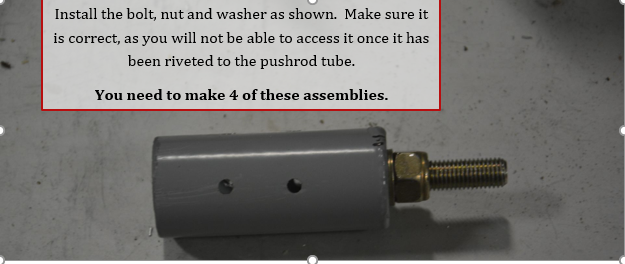
2. Install Bolt and nut assembly on P2610 Rod End as shown


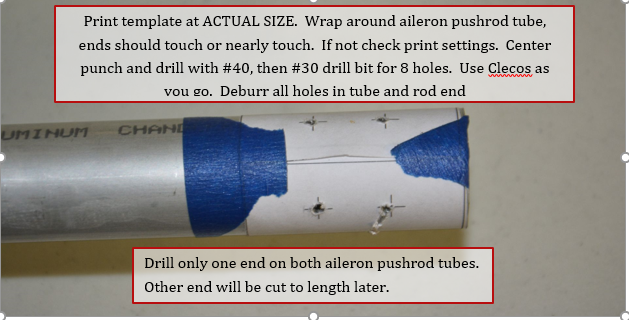
3. Printout the rivet pattern templates available on the website at
http://flywithspa.com/documentation/panther/pushrodrivetpatterns.pdf
Use the patterns for the ailerons.
Be sure to select ACTUAL SIZE in print options for Adobe Acrobat Reader. Cut template out, and wrap template around tube as shown. Both ends should touch or at least be very close to touching. If it doesn’t you need to check your print settings. Tape in position. Use a center punch and make a center mark at each “+” on the template. There will be 8 rivet holes in total. Leave the template on until all holes are drilled.
Only do this on one end of each pushrod. The other end will be cut to length and assembled later.

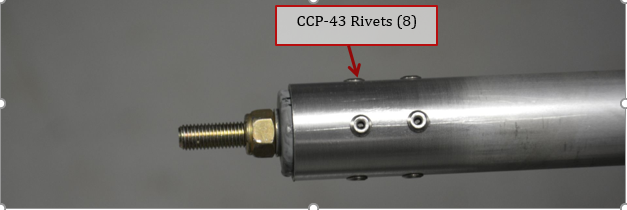
4. Install 8 CCP-43 rivets through aluminum tube and into the steel end fitting.

5. Press a 1/4” ID 5/16” OD bushing into MW5 rod end. Install AN316-5R check nut and MW5 Rod end. Screw rod end on all the way (some grease will ooze out of the rod end), the back off about 1-2 turns. This will give you some adjustment later on. Finished end of pushrod is shown here. This can be done to all 4 pushrod ends now. Remember, only 2 of the steel pushrod ends should be riveted to the aluminum tube at this time.
Note: Rod end must have 15/32 inches (11.9mm) minimum of bolt thread into the rod end

