
NOTE: The bottom skin is being installed now, as the control stick, wing guides and elevator balance spring all attach through the bottom skin. It also makes it easier to get in the aircraft to set the brake pedals to the correct position.
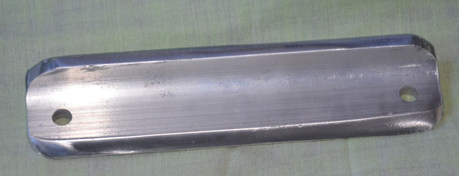
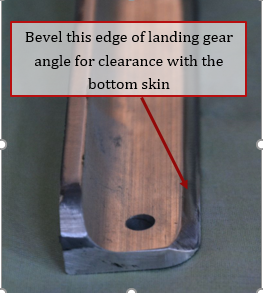
1. If not already done, bevel bottom edge of landing gear angles. This allows less of the angle to possibly stick through the bottom of the fuselage.
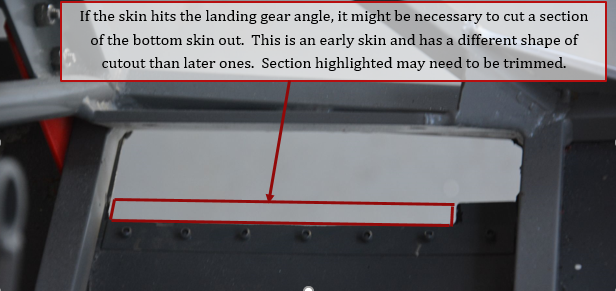
2. Fit skin against bottom of fuselage and check clearance around the landing gear legs. The bottom of the landing gear angle is very close to the bottom skin of the fuselage, and on some aircraft it might push the bottom skin down some. If it hits anywhere, it might be necessary to cut the skin.
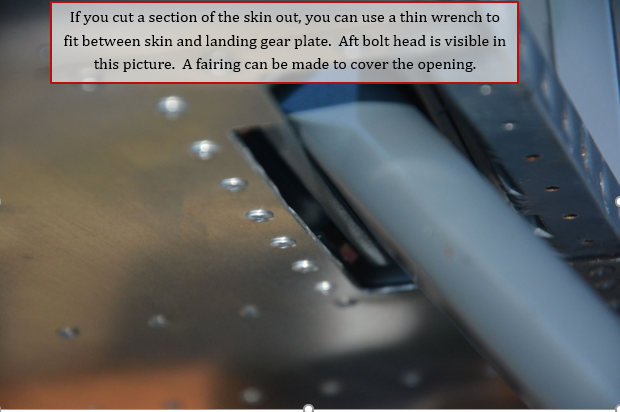
3. The following pictures show some ways to get to the landing gear bolts once the skin is in place. I installed the angles on my fuselage with the bottom skin already in place.

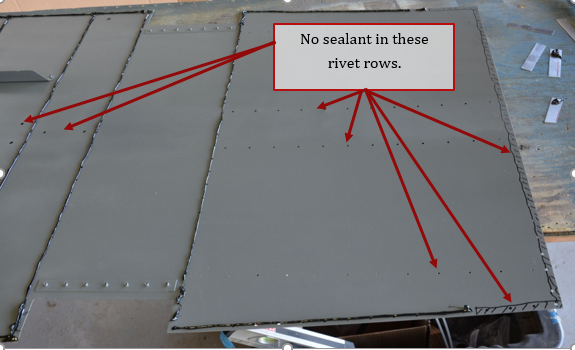
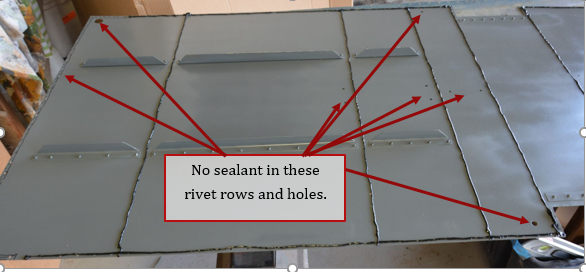
4. At the front of the bottom skin, mark out the row of rivets that attaches to the firewall and 4 rows back from firewall. We do not want to install rivets here yet. This allows the firewall to be installed later. Having the firewall off helps while rigging the wing.
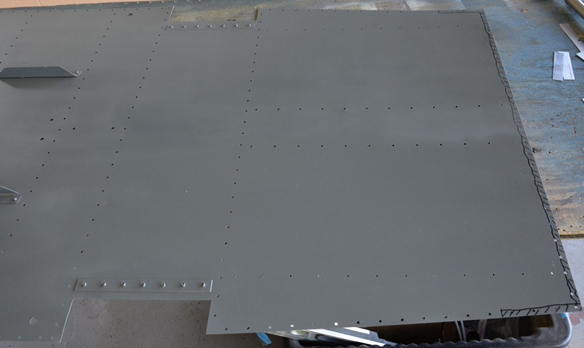
5. At the rear of the bottom skin, mark out the row of rivets that attaches to the bottom tail cone skin and 4 rows forward. We do not want to install rivets here yet. This allows the tail cone skin to be installed later. Having the bottom skin of the tail cone off helps with the installation of trim cable and any wiring.

Recommended – using sealant on skin to fuselage cage
An option to consider is using Aerolife single component polyprotech sealant between the skin and the fuselage frame. This is to help seal the bottom fuselage tubes from getting water into them. With the prototype Panther, there were several times with the canopy open, we got some water in the fuselage, and it would drain between the skin and the tubes. It also gives a stronger bond between skin and fuselage for more strength. This particular sealant is a single part (no mixing) which comes in a caulking tube and dries with the humidity in the air. However it is not recommended on the fuel tanks, as it appears to slightly weaker in testing than the 2 part sealant and it can take up to 3-4 weeks to dry completely. In this application, however, it works well. If you are going to paint the inside of the skin, now is the time to do it, before installing sealant.Lay a bead of sealant over all rivet holes that go into the fuselage tubes as shown below. When installing the rivets, this sealant will also seal them, without having to dip each one. Keep the bead relatively thin, as it will spread when pressed against the frame. There is less cleanup also. Be careful not to get any sealant in the holes for the wing adjuster, as it will gum up the threads in the nut.
6. Install CCP-42 stainless rivets in all holes except for the ones marked previously.
