1. Prepare all parts according to Parts Preperation
*NOTE – The “centerline” on P-T-HT-rear spar channels is drawn 7/16” from the forward face of channel! Also mark the centerline of the outboard rib attach holes across the top and bottom outside flanges of the all spar channels. These are important keys to insuring proper skin and hinge fit!
2. Spar channels and stiffeners
a.Bevel edges of the spar stiffeners per drawings
b.Trial fit the spar stiffeners to the spar channels with clecos
c.Trim the edges of the spar channel where they meet in the middle if needed
d.Verify straightness of spar assembly with a long straight edge
e.Ream the spar stiffeners and the spar channels with a #30 drill.
f. Disassemble de-bur and counter/ dimple as necessary
*NOTE – center 4 holes of each spar flush with flush side noted on plans
g.Re-attach with 1/8th” clecos and rivet with appropriate rivets per plans
i.NOTE – Rivet direction on plans
ii.NOTE – must use CCP/CCC (stainless) or optionally AN 470/ 426 AD
iii.NOTE – Do not rivet the holes that have ribs attaching to them – see plans
iv.NOTE – If you intend to use flush rivets to attach skins you may wait to rivet the stiffener to the rear spar channels until you have fitted the skins and hinges. This allows much better clearance for dimple dies. You can also grind the dies flat on one side if needed
3.Cleco the framework together according to the plans
4.Updrill to a #30 hole. Disassemble, de-burr and rivet with hardware according to plans
5.Fixturing the Frame Work
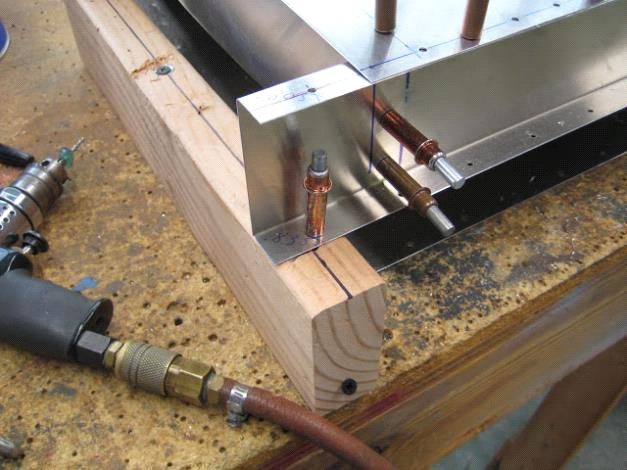
a.Level and secure a pair of 2” x 4” wood blocks, 20” in length, 81” apart on your work surface. Verify the two blocks are parallel to each other and the top surfaces level or in same plane. See plans.
b.Verify Tail structure is square by measuring diagonally to equal points. Ensure no forward or aft bow of framework.
c.In the portion of the HT spar channel which is out board of ribs. Drill a hole and Cleco or screw through the flange and into the blocks at each end.
i.NOTE – you will need to “adjust” the flange of the spars out board of the last ri

ii.b so they lay flat against the blocks.
iii.NOTE – verify forward/aft straightness of frame work and secure in center as needed.
iv.Do not move forward with fitting skins until frame work is level (no twist and straight!
