
1. Tape wing tip P2046 (right) P2047 (left) in place.
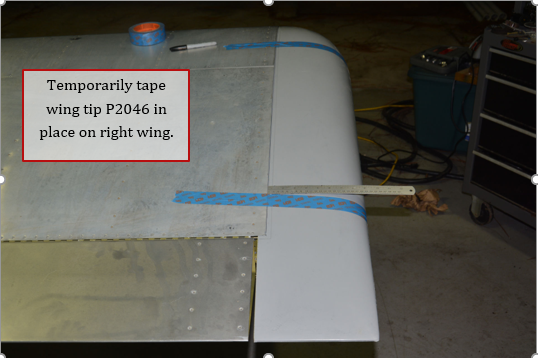
2. Measure the gap between the edge of the wing and edge of the joggle for the skin in the fairing. Check for the largest gap. Make note of this measurement, as it will be the amount you will cut from the edge of the fairing. Repeat for the bottom of the wing.
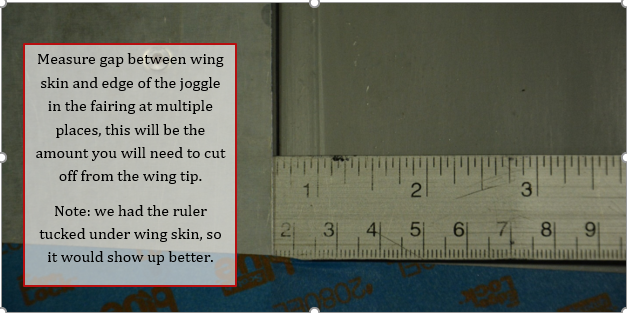
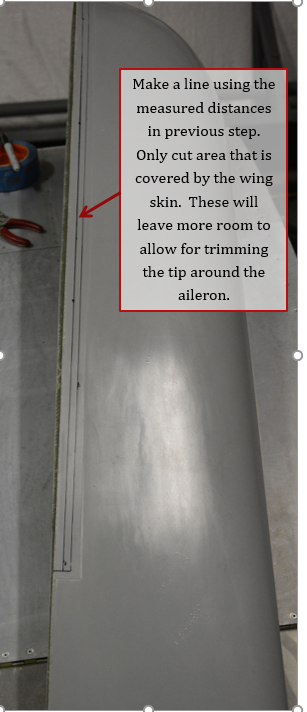
3. Make a line on fairing same distance in as the largest gap measure in previous step for the top of the fairing. Repeat for the bottom of the fairing, using the largest gap for the bottom of the wing. End the cut line approximately at the rear spar of the wing.
Cut the tip on the line marked using a cut off wheel in a grinder, be sure to use a dust mask and eye protection when cutting fiberglass.
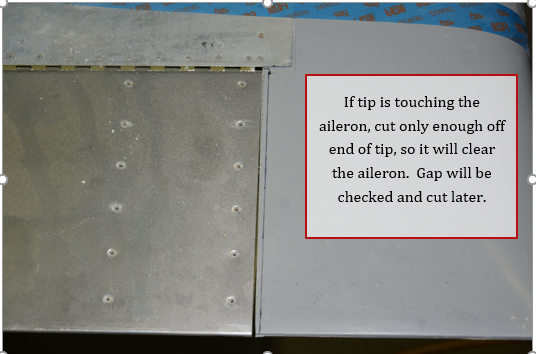
4. If fairing is held away from edge of the wing by the aileron, trim just enough off the edge of the fairing to clear right now. The final gap will be checked and trimmed later.
5. Verify fit of the tip. Make sure leading edge is in line with the leading edge of the wing. Verify there is no gap between the skin and the edge of the fairing joggle. Tape tip back in place.
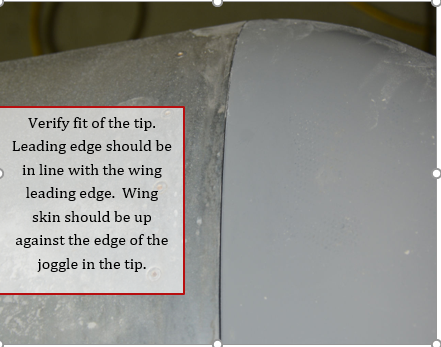
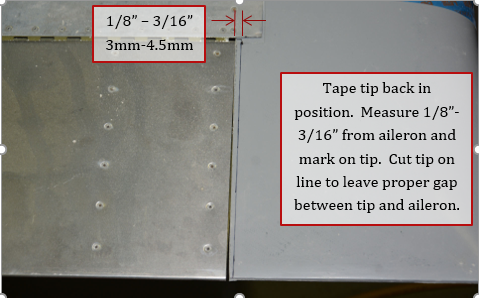
6. Measure and mark a line out from the edge of the aileron approximately 1/8” to 3/16” on both top and bottom of tip. Trim tip to this line, this will make the required gap between the tip and aileron.
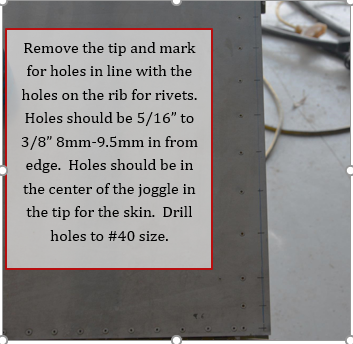
7. Remove tip, mark and drill for #40 holes in line with holes on the last rib of the wing approximately 5/16” to 3/8” in from the edge. Holes should be in the approximate center of the remaining section of the tip that the wing skin covers. Mark and drill all the way around the tip.
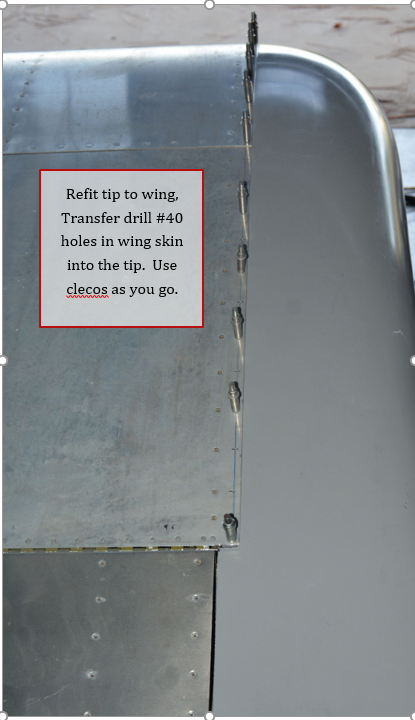
8. Replace tip and after aligned properly, transfer drill #40 holes in skin to the tip. Cleco tip into position as you go.
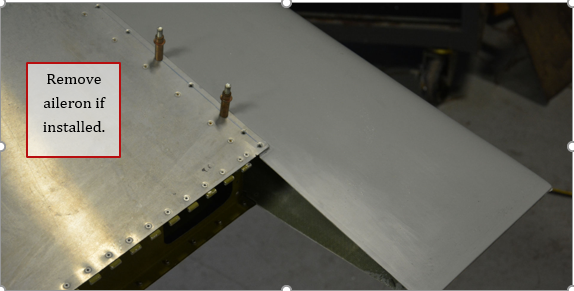
9. Remove aileron if installed,
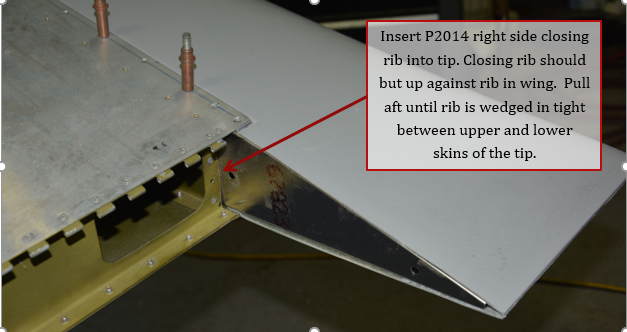
10. Slide closing rib P2014 (right) P2057 (left) into opening of the tip. Pull rib aft until it is wedged tight between the upper and lower skins of the wing. Note, the closer rib will extend into the wing area about an inch or so. This will set the proper taper for the aft end of the tip. The rib should be flush with or nearly flush with the edge of the tip. Hint, an allen wrench with the L-shaped end in the closing rib tooling holes, can help you move the rib in position.
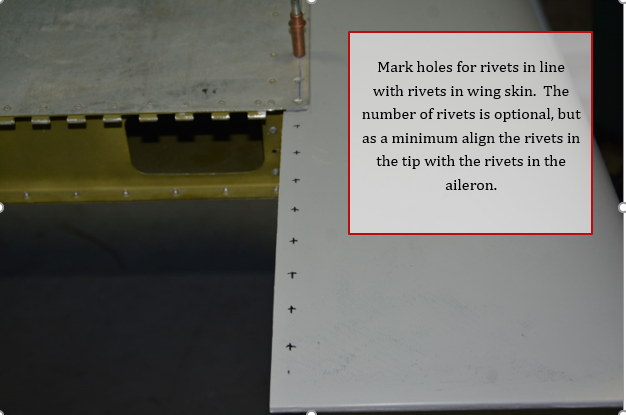
11. Draw a line for the rivets in line with the center of the rivet holes you drilled in a previous step. Rivet spacing is up to you, at the minimum use line up rivets in closure rib with the rivets in the aileron for a uniform look. More rivets (shown here) can be used to keep tip flat against rib.
12. Another view of rivet hole markings looking straight down. Note the rib extends into the wing, and will overlap 2 holes previously drilled in the wing skin and tip.
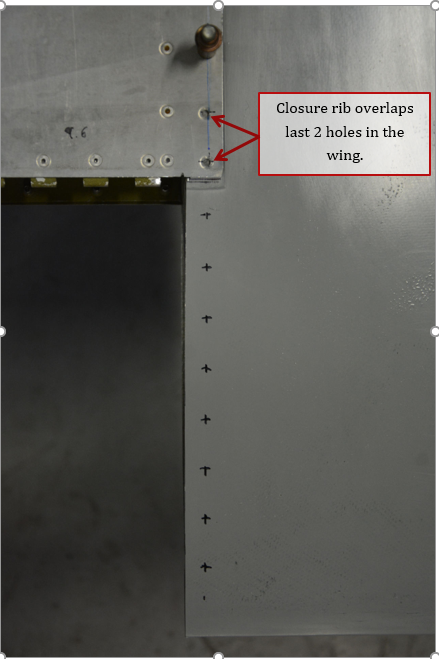
13. Transfer drill the 2 holes in wing skin into the closure rib.
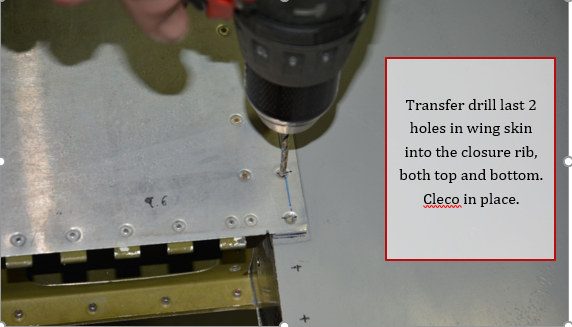
14. Drill #40 holes at the marks make in earlier step, cleco as you go. Start at forward edge and work aft to minimize gaps between tip and closing rib.
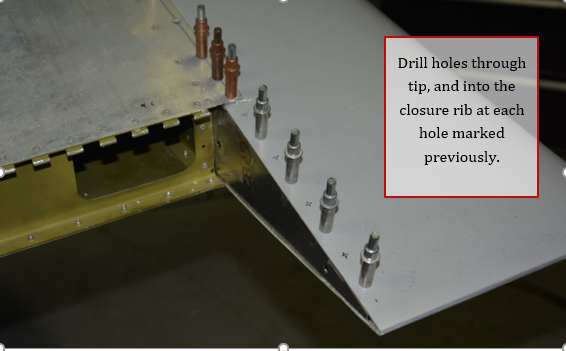
15. Repeat for the bottom of the tip.
16. Up drill all the holes to #30, deburr. Dimple and countersink as required for your preference of rivets. Note: if skin is dimpled; fiberglass is counter sunk.
17. Finished tip installed and riveted to the right wing with BSC-43 or BSPS-43. If preferred, tip can be installed with screws and nut plates (not provided with kit). Tips are not required to be removed for inspection. They would only need to be removed if you mount something in the tip (strobe light power supply as an example).
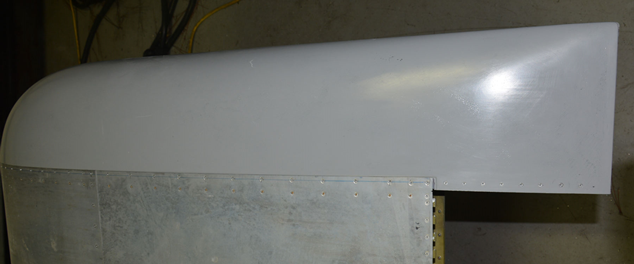
18. Repeat for the left wing.
19. Congratulations, at this point your wings should be complete with the exception of body work.
