NOTE: read through this entire section and understand the adjustments before you start. While not difficult, the small tolerances requires a good understanding of how the adjusters work and how the wing and pins react.
1. Adjusting the front spar guides takes some trial and error and close attention to details. The pins are only .007” to .010” smaller than the holes in the wing and fuselage. It does not take much for a pin to go from extremely tight to fairly loose. Do everything with very small adjustments, approximately a 1/8 to a 1/4 of a turn of the adjusters at a time. Adjusting one side can also affect the other side slightly. Be patient and do not get frustrated.
NOTE: How much time you want to spend on this is also affected by how often you will want to remove or fold the wings. If you plan on folding the wings fairly regularly, spend the time to get this right. If you will rarely or never fold them, just get the adjusters close, you might still need an assistant to get the pins in or out later, however it will still be much easier to remove the wings than many other aircraft.
2. With both wings still pinned in place, adjust the 2 upper and 2 lower adjusters, until they barely touch the spar. Then give approximately another 1/8 of a turn.
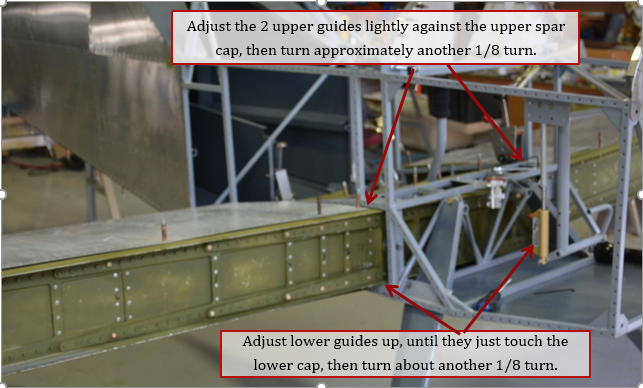
3. To start the adjustments, it is easiest to remove the right wing and set it aside. Working with just the left wing allows you to adjust the pin easier, along with getting an idea of how the adjusters work. Below are some pictures of what to look for while aligning the wing pins.
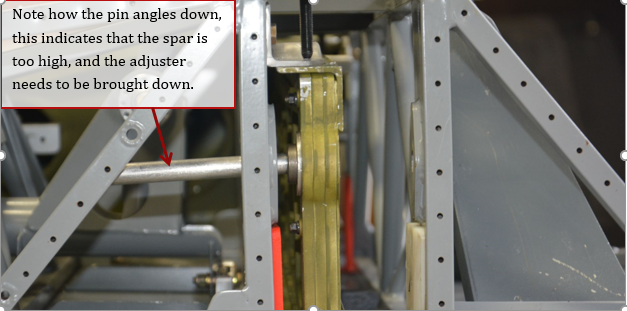
In this picture, you can see the wing pin is angled down at the rear, which means the upper guide needs to be adjusted down.
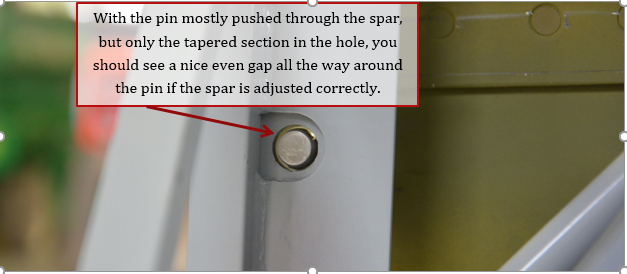
In this picture, the pins is pushed most of the way into the forward fuselage hole. You want to see a nice even gap between the pin and the hole.
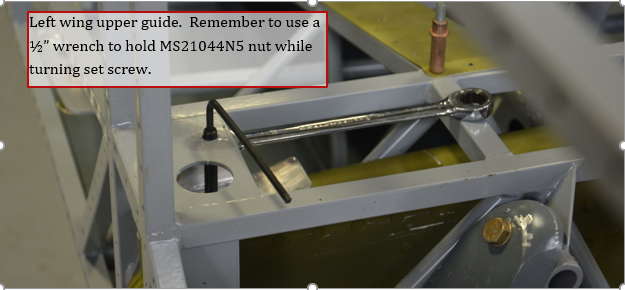
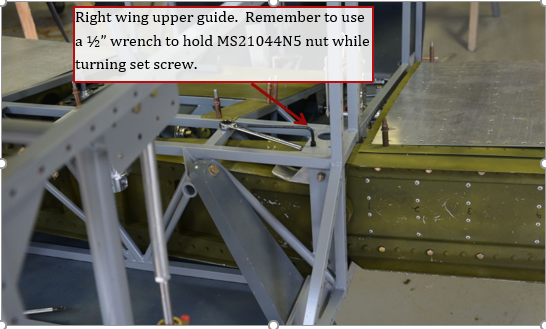
4. There are 2 adjusters for each wing, one upper and one lower. The upper ones require a ½” backing wrench to hold the nut in place while you turn the set screw with an allen wrench. Make a small turn, then try sliding the pin in and out, if it is still tight, then adjust the set screw some more and try again. Remember only move the set screw in small increments.
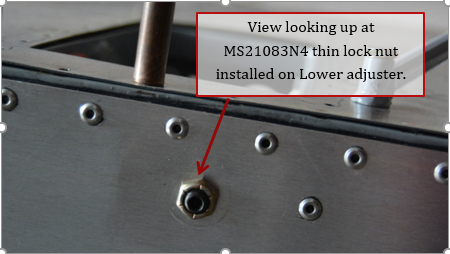
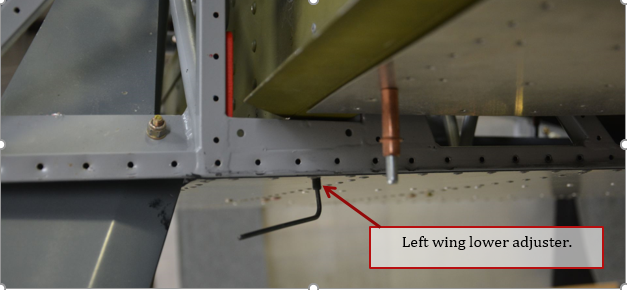
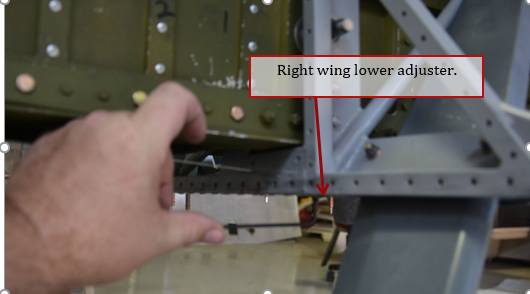
5. The lower adjuster has a set screw that sticks through the bottom skin. You just need to turn the allen wrench. This adjustment can be made easier with one person moving the pin, while the other turns the adjuster screw. Again small turns of the screw, until the pin slides in and out easily.
6. Go back to the other side and try that pin again. Don’t be surprised if it has tightened up some. Readjust the set screw until the pin slides easily. This requires even less of a turn than the initial setting.
7. Continue back and forth until both wing pins slide in and out easily.
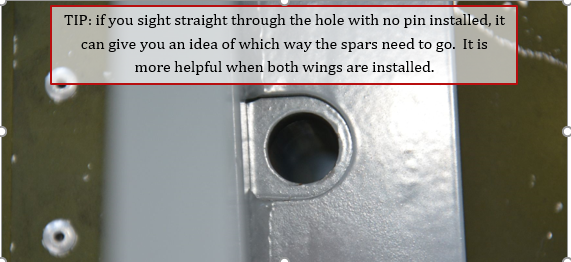
8. Another tip is to sight down the hole in the front portion of the spar box. If everything is aligned, you should see a smooth hole all the way through. If the spar is out of alignment, there will be a ridge. This can give you a good idea of which way to go. This is more with useful with both spars in place, than with only one spar in place.
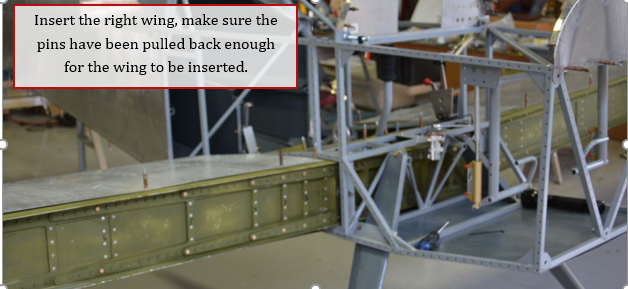
9. Slide the right wing in with an assistant.
10. Right wing upper guide adjuster.
11. Right wing lower guide adjuster.
12. Adjusting the right wing requires the same procedure as the left, but is slightly more difficult because you are trying to slide the pin through both wings now. It is easier to sight through the spar pin holes to check alignment at this point, and adjust as necessary. Once it gets close, start using the pin and try sliding it in and out.
NOTE: It may be necessary to reset the left wing adjusters to allow the pin to slide easily through all 4 holes.
13. A pin can be also hard to slide in and out if the rear spar is too far out of adjustment. This is why we checked the rear spar first, and also why we don’t want to move the rear spar more than about a 1/16” from the original 2” setting.
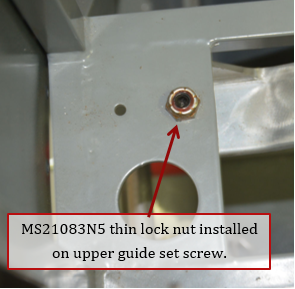
14. Once you are happy with how the pins slide in and out, you can start locking down the adjusters carefully. The upper adjusters use an MS21083N5 thin lock nut, and the lower ones use a MS21083N4 thin lock nut. Carefully tighten the nut while you hold the set screw in place with an Allen wrench. On the bottom, pay particular attention not to turn the set screw. Check the spar pins again to make sure you didn’t change the adjustment.
