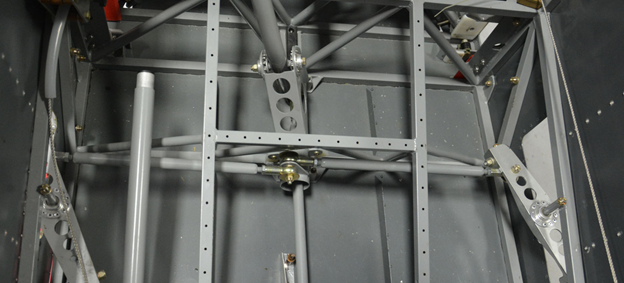
1. Overall view of the aileron joiner pushrod assembly installed in the fuselage.
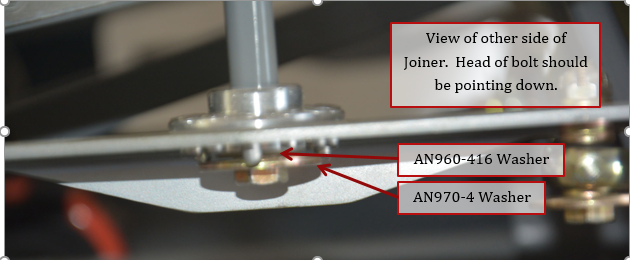
2. Install aileron paddles in fuselage using AN4-26A bolt. Bolt head should be pointing down, to allow room for the joiner mounted on the wing. Repeat for other side.
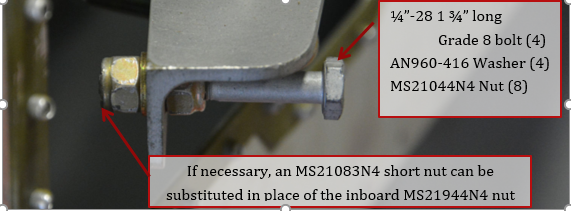
3. Install 4 Grade 8 bolts ¼”-28 1 ¾” long 2 on each joiner. Thread one MS21044N4 nut on in reverse all the way up until it touches the shank. Install a second MS21044N4 nut and AN960-416 washer to hold bolt in position. These bolts act to push against the joiner mounted in the wing, and will be adjusted later after the wings are reinstalled.
4. Press ¼” ID 5/16” OD bushings into 4 of the MW5 rod ends. Install an AN316-5R thin checknut and MW-5 rod end on each end of the 2 P4611 Joiner pushrods. Thread the MW5 rod ends on all the way.

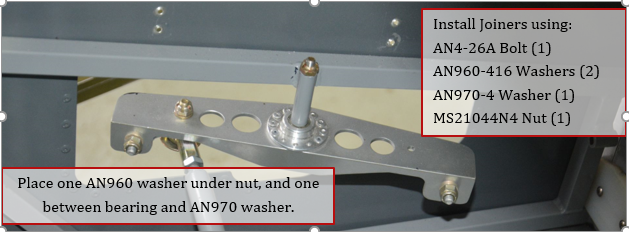
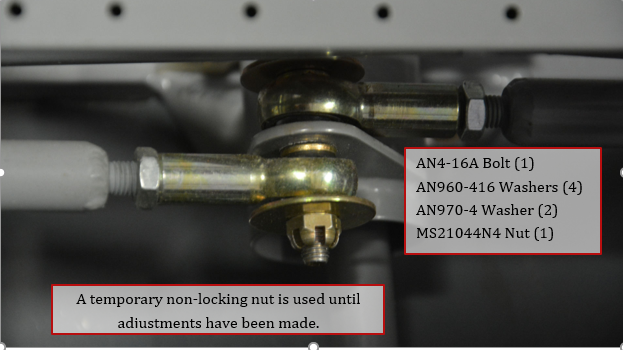
5. The P4611 Joiner pushrods are attached to the control stick tab with an AN4-16A bolt. The right pushrod is in front of the control stick tab, and the left one is aft of the tab. AN960-416 washers are used on both sides of the MW5 rod ends. AN970-4 washers are under the head of the bolt and nut and act as a safety retaining washer
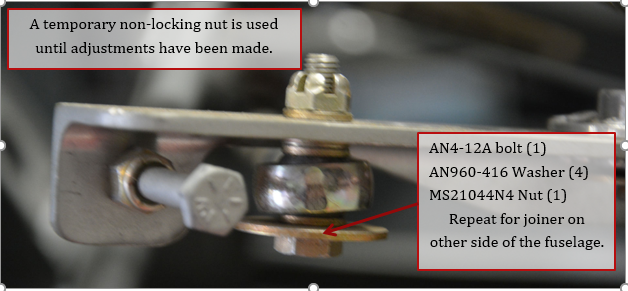
6. Pushrod is attached to the Joiner using an AN4-12A bolt. Do this for both sides.
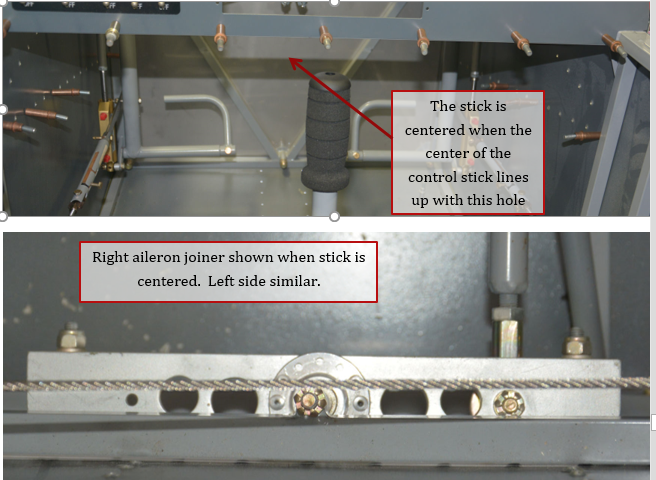
7. With the control stick centered adjust the length of the pushrods until both joiners are parallel to the fuselage. To verify the joiners are parallel, measure between the joiner and the fuselage on both ends, both measurements should be the same.