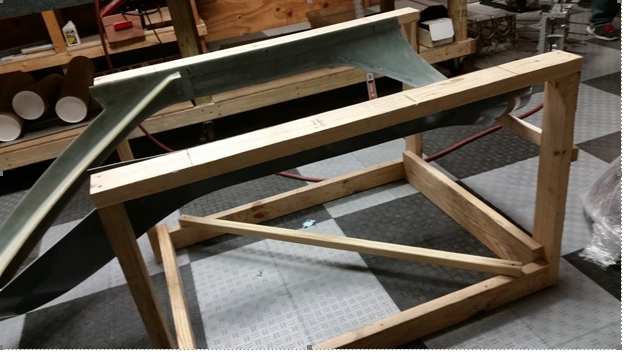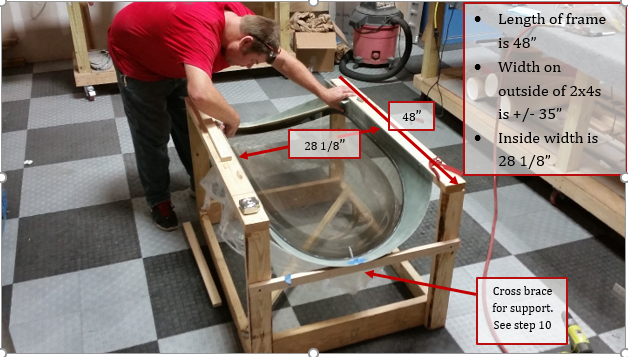
1. We have found that it is easier to fit the canopy bubble into the skirt if both are inverted and use gravity as an advantage. You can also flip this fixture on its side and back to work easily with all sides of the canopy structure. Here is a photo of the frame we found most useful in our shop.

2. As you can see it is simply a few 2x4s and a couple of 1x1 cross brace. Another option is to build the top part of the frame and rest it on saw horses. Use the dimensions below to build your version of the frame.

3.IF you choose to do this on a bench you will need a flat level surface such as a 36x48 inch piece of 3/4 inch plywood on two level saw horses, or a flat wood top bench. Secure qty 2 “2x4” boards approx. 36 inches long onto the table 28 1/8 inches apart.
4.Verify the structure is parallel and “square” to each other.
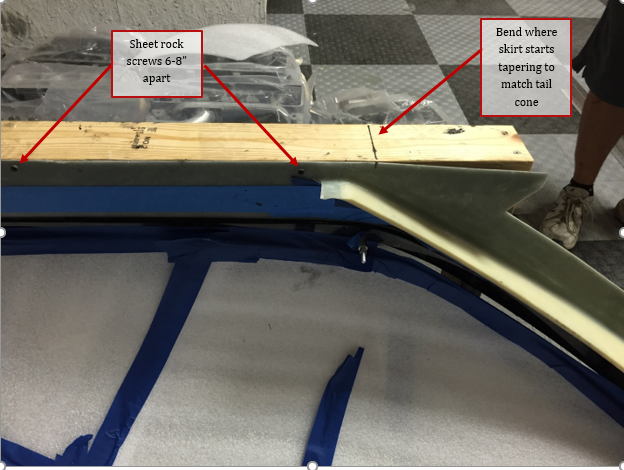
5.On the bottom aft end of the canopy skirt mark the center “bend” where the skirt starts tapering to match the tail cone.
 6. Set the skirt inside the 2x4 boards, and line up the marks from step 7 with the end of the 2x4s
7. Sight across the sides of the skirts left and right side tops (on bottom if upside down) are parallel to each other. This is for aesthetics only
8. When satisfied attach the skirt to the 2x4s with sheet rock screws through the fiberglass into the 2x4s spaced about 6-8 inches apart along the lower edge.
9. Attach a piece of wood across the front, above the canopy bow, and screw in to stiffen the front.
Note: Use Cation here not to drastically distort the front of the skirt. If this area gets distorted upward (in normal orientation) it will cause a gap around the front when you fit the skirt/bubble to the airframe. Slightly pre loading this approx. 1/8-3/16 inch downward (in normal orientation) will help prevent this. Cover screw with tape so it won’t scratch the bubble. See Photo above.
