Note - Do not updrill the upper longeron to a number #30 at this time (the upper turtle deck skin will overlap and you don't want to drill until you've drilled the upper turtle-back skin)
Bend side skin and lower skins
The P-F-TC skins (P6404, P6405) and P-F-TC bottom skin (P6406) need to be bent slightly along front edge to flow nicely into the forward fuselage skins. Use photo below and dimensions on plans sheet P-F-TC-lower TC (top right corner) as a guide.
Photo Coming Soon
Start with the Lower Longeron
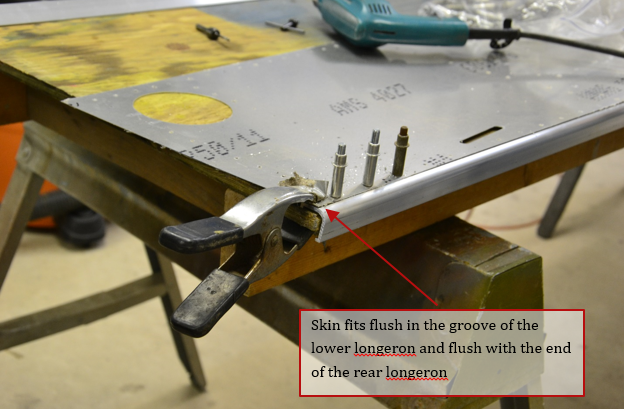
1.The rear fuselage skin lines up flush with the rear lower longeron's.
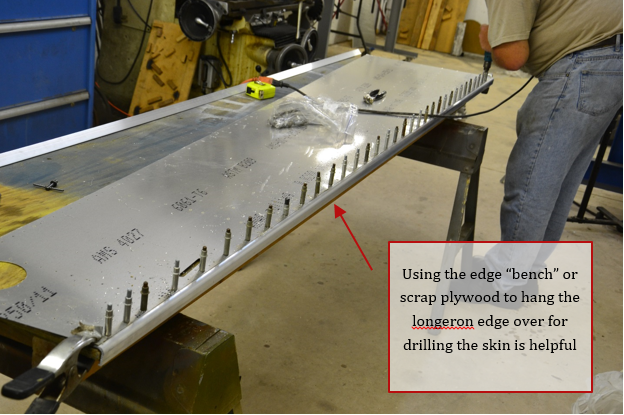
2.We recommend hanging the longeron over the edge of your table and drilling the longeron as depicted in the photos below. Use care so the skin fits fully into but tight against the “step” in longeron
3.Work your way from aft end forward, drilling and clecoing every few holes # 40 then go back and drilled in between holes.
4.Then up drill to #30 holes.


Drilling the Upper Longeron
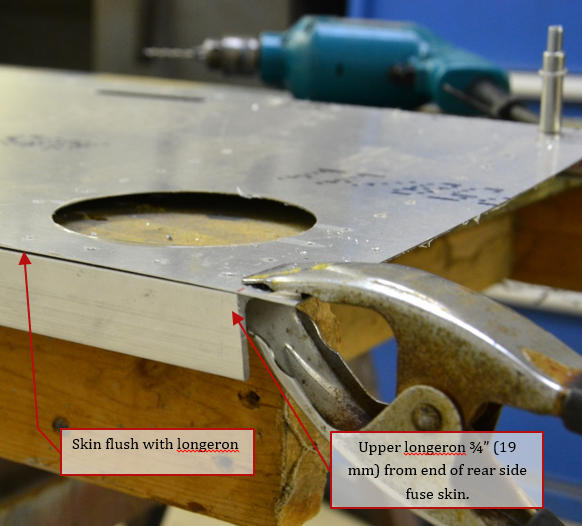
1.Unlike the lower longeron the upper longeron is not flush with the rear fuselage skin at the aft section.
2.The upper longeron is offset ¾” (19mm) forward from the rear edge of the skin.

3.The upper longeron top edge is flush with the top edge of the side skin
4.Make sure you lineup the skin with the longeron to keep the longeron straight.
5.Start at aft end and skipping every few move forward drilling and clecoing #40
6.Go back and drill remaing holes to #40
Note - Do not drill the upper longeron to a number #30 at this time (the upper tail cone skin will overlap and you don't want to up drill until you've drilled the upper tail cone skin)
Fitting the Stiffeners
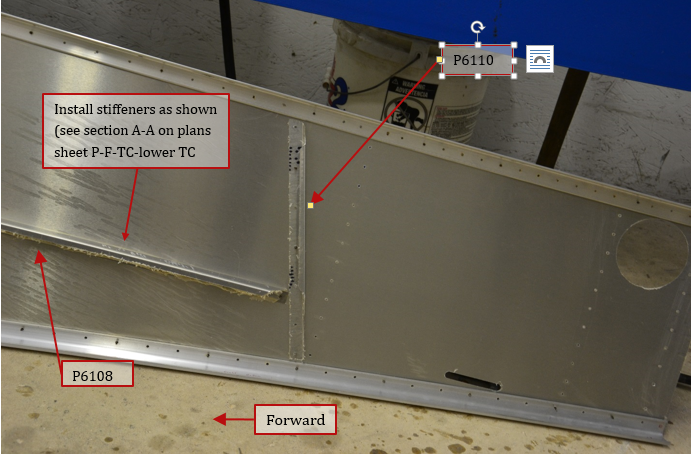
1.Prepare parts ,P-F-TC-stiffeners 1-4 R/L (P6104 qty 2, P6106-P6111) according to the instructions.
2.There are four stiffeners along the tail cone skins on each side.
3.Cleco these in place at this time using the plan sheet P-F-TC-lower TC and photos below to show orientation.
4.Note: If needed due to limited number of #40 clecos the stiffeners and LOWER (see notes above) longeron can be can be updrilled to # 30 at this time. They can also be, deburred, longerons countersunk, and stiffeners/skins dimpled (if using flush rivets) and riveted at this time. See plans for rivets callout.

