
Note – When cutting to length leave a little extra room so you can smooth the edges with a belt sander, sand paper or file for a smooth edge.
Note – If you have received your longerons after 7/1/2014 they are most likely trimmed to the proper angle already and you can skip to the next section.
Lower Longerons
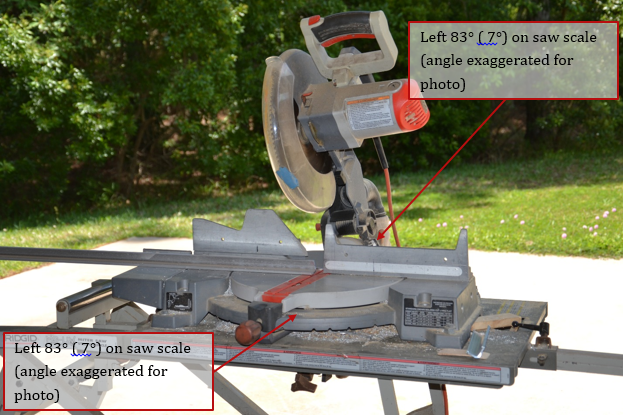
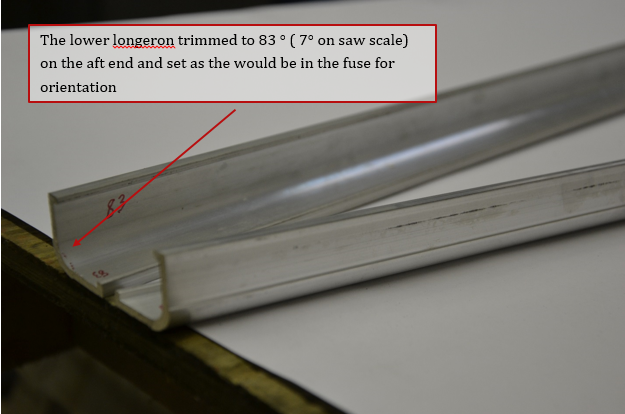
In order to get a nice flush fit for the longerons to the rear bulkheads and the forward fuselage welded cage you'll be cutting a slight angle off of the longeron using a compound miter saw with a standard wood blade. For ease of cutting the lower longeron, end angles are adjusted slightly from the “true” angles. This allows both the side and bottom angles to be set the same and the right and left longerons to be identical. The correction angle is less than 1° for each so it isn’t noticeable when assembled.
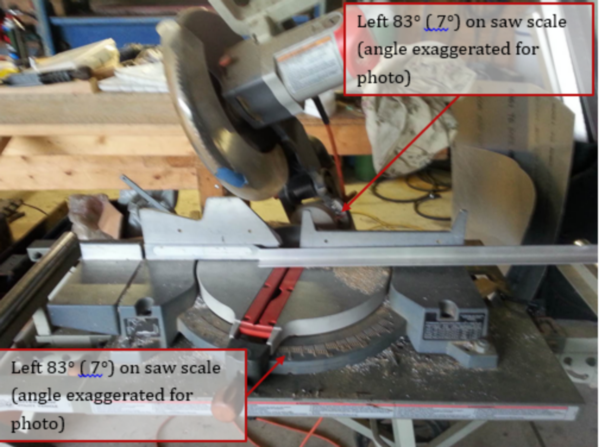
1. Set your saw with the vertical 83° to the left and the table 83° to the left (7° on saw scale)
Note: your saw is likely marked so that an 83° cut will read 7° on the saw angle scale
2. Place a longeron on the table with it extending to the left and trim off a small amount. This will be the front of the longeron . (mark this end front)
3. Repeat with second lower longeron
4. Mark the lower longeron length per plans 101 1/8 (2568.6mm)
5. Using saw setting from first cuts lay lower longeron on table extending to the right. Cut at your mark
Noting that saw blade should be on left side of line to compensate for blade thickness.
6. Repeat on second lower longeron
Upper Longerons
The upper longerons are simply aluminum angle delivered to the builder.
1.Starting with the rear of the upper longerons lay them out on the table and mark one right and one left.
2.Lay them out the same way you did the bottom ones, except that the flanges point down instead of up. and you have a right /left
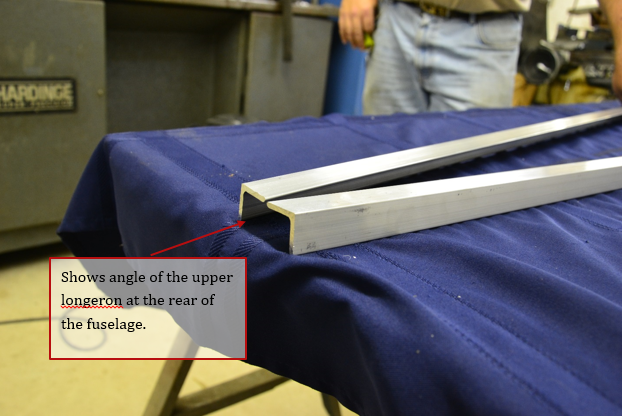
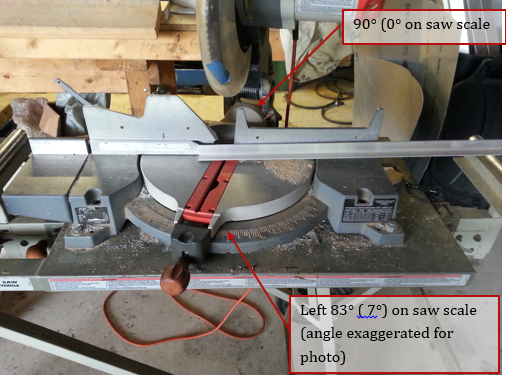
3.On the upper longerons the vertical flanges (sides) is 90° (0° on the saw scale) ,the horizontal flanges (tops) are 83° (7° on saw scale) on both the forward and the rear angles. The end cuts are parallel to each other
4.Start with right longeron. Set the vertical at O° and the table set for 83° cut (7°on saw scale) to the left. Flip the longeron over with top, down against the “table” and the side against the “back stop” of saw. longeron will extend to the left. Trim a small amount off the longeron this will be the front of the right longeron.
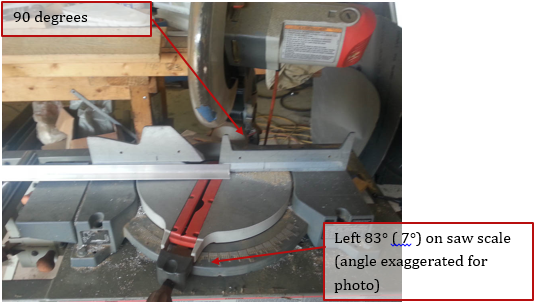
5.Without changing the saw simply slide the longeron down table so that it now extends to the right, to the mark (99 7/8 inchs 2536.8 mm) noticing that the saw blade needs to be to the left of you mark to compensate for blade width and cut
6.Now set the saw with the vertical at 0° and the table set to make a 83° (7° on saw scale) to the right. Flip the left longeron over so top is on table and the side is to back stop and extending to the right. Trim a small amount off. This is the front of the left longeron.
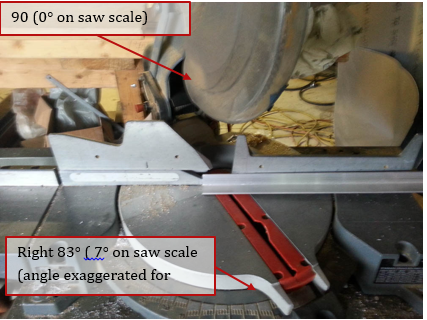
7.Without changing the saw simply slide the longeron down table so that it now extends to the left, to the mark (99 7/8 inchs 2536.8 mm) noticing that the saw blade needs to be to the right of you mark to compensate for blade width. Make the cut
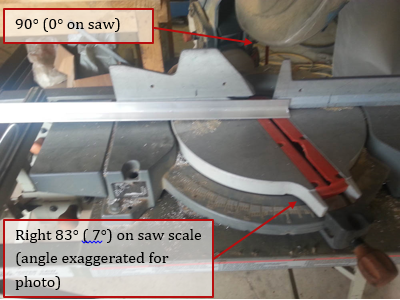
8.File/sand ends smooth
