
Note: The balance weight (PS-6906) is made from lead. Use gloves while handling and a respirator while drilling, sanding, or cutting the lead.
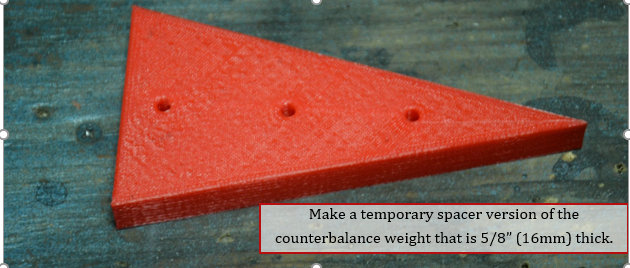
1. The counter balance weight (PS-6906) weighs approx. 4 lbs. and can be difficult to handle. We recommend using the counter balance as a pattern to make a temporary spacer version of the counterbalance weight from wood or any other material 5/8” thick. The one below was 3D printed, like all the parts shown in this section, used when we were testing the part fit.
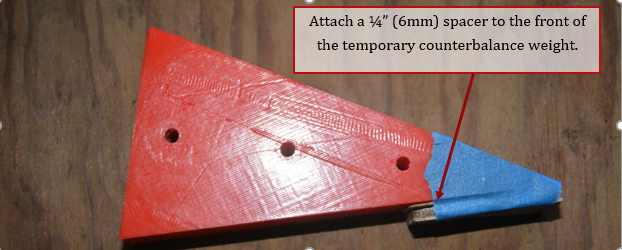
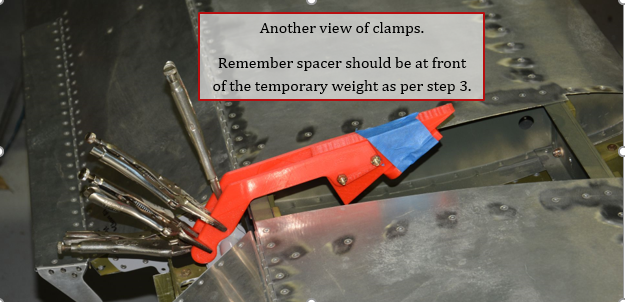
2. Attach a ¼” spacer to the front of the counterbalance weight. Some pictures show a thicker spacer further back, but the ¼” spacer in front is the preferred position.
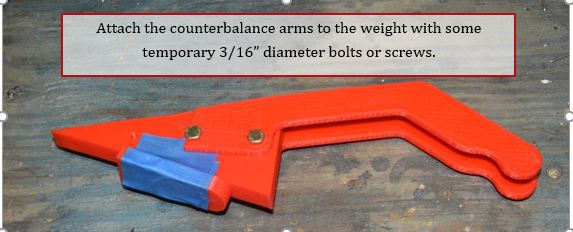
3. Attach counterbalance arms (PS-6513) to the temporary weight with any 3/16” diameter bolts or screws. Only 2 of the 3 holes needs hardware installed.
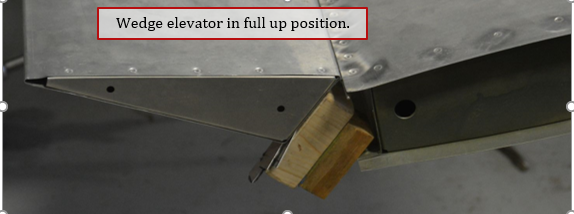
5. Wedge elevator in full up position with temporary blocks.
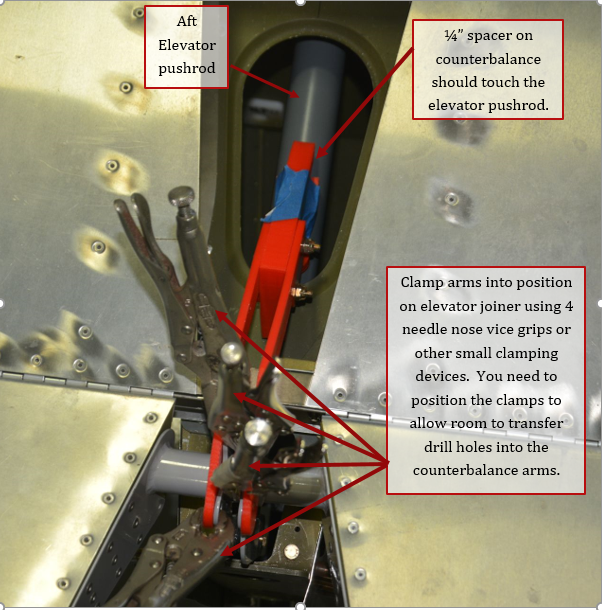
6. Clamp counterbalance weight assembly into position on the elevator joiner using 4 needle nose vice grips or any other small clamp. The clamps need to be small enough to position and leave room to transfer drill holes into arms. The spacer on the counterbalance weight should be touching the aft elevator push rod. IMPORTANT: Make sure the elevator is in the full up position, if it is not, counterbalance could hit the pushrod and cause control problems.
7. Another view of the clamps holding the counterbalance assembly in position.
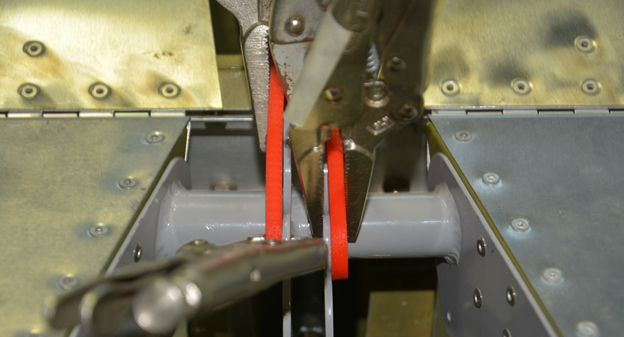
8. Closeup of clamps.
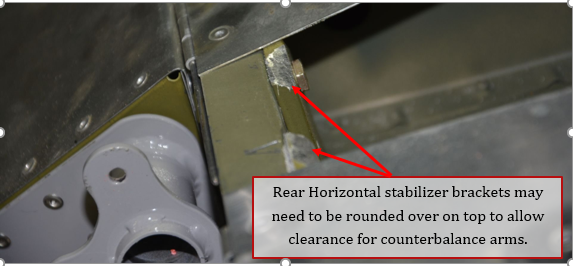
9. Horizontal rear attach angles may need to be rounded over to allow for the counterbalance arms. Only remove amount necessary to clear the arms with the elevator full up.
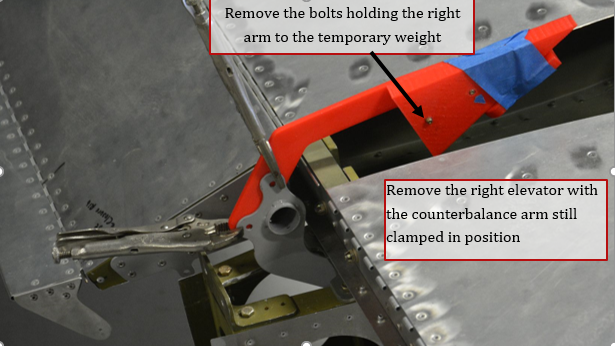
10. Undo the bolts holding the temporary weight to the arms. Remove the right elevator with the counterbalance arm still attached.
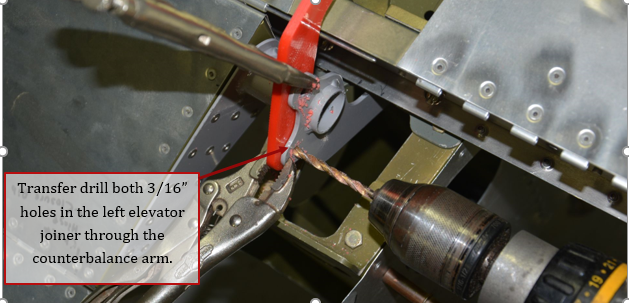
11. Transfer drill 3/16” hole into the counterbalance arm on the left elevator.
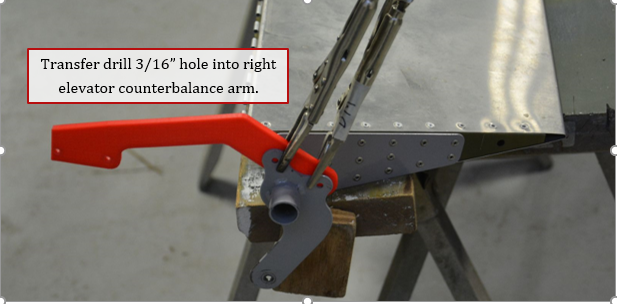
12. Transfer drill the holes in the right elevator joiner through the counterbalance arm.
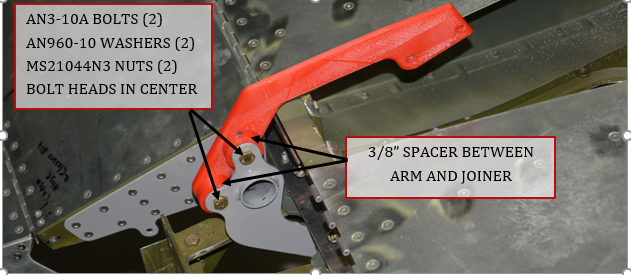
13. Bolt left counterbalance arm to joiner with a 3/8” spacer in between using AN3-10A bolts, AN960-10 washer and MS21044N3 nuts. Repeat for the right elevator.
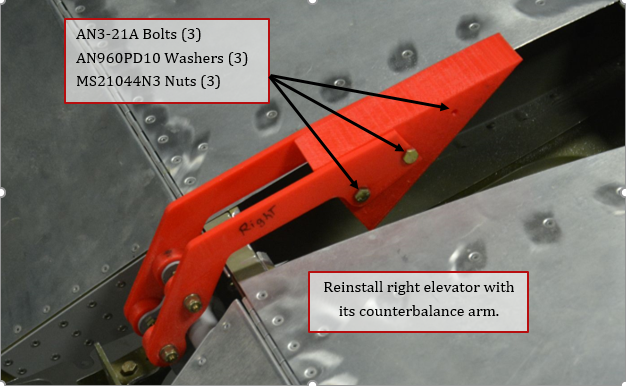
14. Reinstall right elevator and install 3 AN3-21A bolts, AN960PD10 Washers and MS21044N3 nuts. Picture only shows 2 of the 3 AN3 bolts.
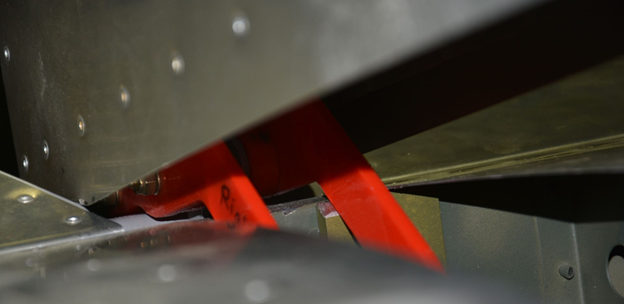
15. Another view of weight and counterbalance arms.
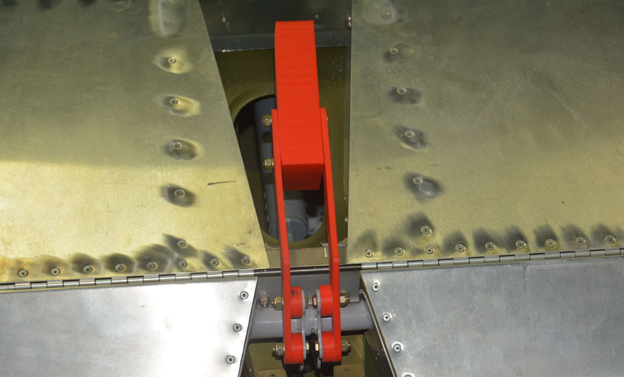
16. Reinstall vertical stabilizer temporarily. Check to see if the counterbalance weight clears the bottom rib of vertical stabilizer with elevator in full down position.

17. Also check that the weight clears the elevator pushrod and the vertical stabilizer rear spar when elevator is in full up position.
18. The counterbalance weight is larger/heavier than necessary, and some weight needs to be removed from it by drilling holes or cutting down edges. It is best to remove as much as possible from the tallest section on the aft portion of the weight. The counter balancing should be done after the elevator has been painted to account for the extra weight of the paint.
