
1. Install rudder using hinge pin provided with the hinge.
2. Printout the rudder angle template available on the website at
http://flywithspa.com/documentation/panther/rudder_angle_template.pdf
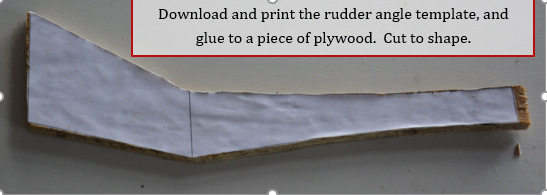
Be sure to select ACTUAL SIZE in print options for Adobe Acrobat Reader.
3. Glue to a piece of plywood and cut and sand to the lines.
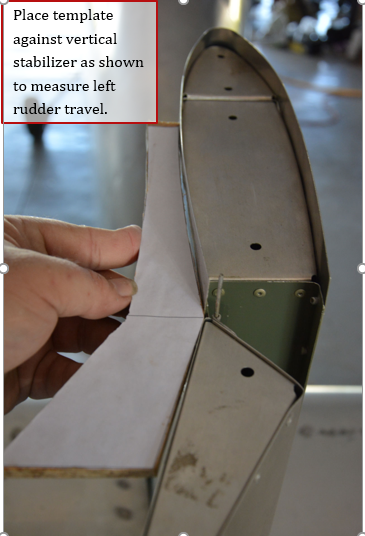
4. Place template against the top of the vertical stabilizer as shown, and move rudder to the left until it touches the template. Note the line in the center of template is at the hinge pin.
5. Measure the distance between the fuselage tailcone and the tab on the rudder control horn.
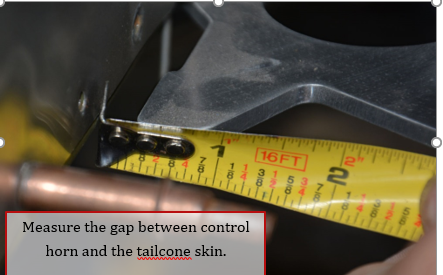
6. A properly installed vertical stabilizer and rudder should have approximately a 1/8” gap. 1/8” stop plates are included in the kit. If your gap is different, you need to make a plate the thickness of the gap you have. Reasonable plate thicknesses are between 1/16” (1.5 mm) and ¼” (6.3 mm). If you need more or less, check your vertical stabilizer and rudder installation as you may have a problem. You must have at least room for a 1/16” plate to act as a stop.
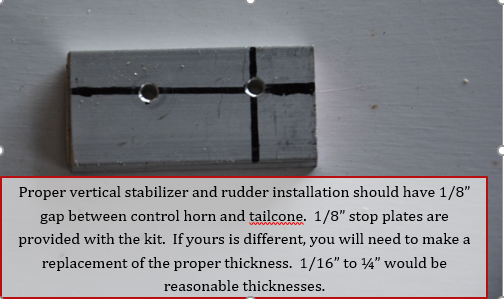
7. Draw a line between the centers of the last 2 holes at the bottom of the tailcone, on the lower longeron.
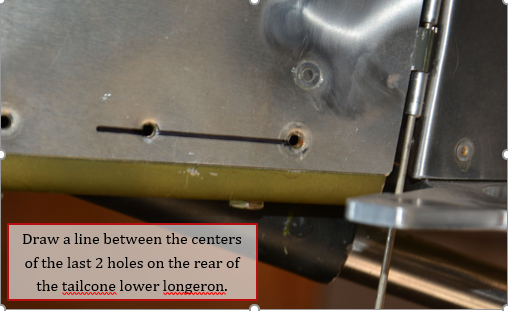
8. Mount plate with one hole on plate in last hole on lower longeron. Rotate plate until the line drawn in previous step is centered in the forward hole of the plate. Transfer drill the forward hole into the lower longeron. Up drill holes to #30.
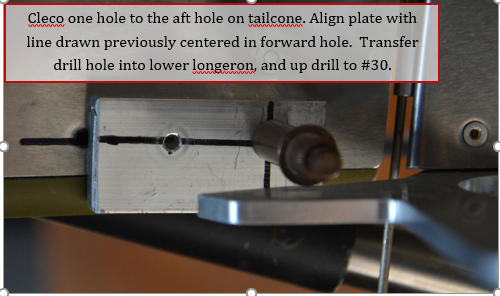
9. Recheck the rudder throw with the template. If necessary, the tab on the control horn can be filed/sanded down to obtain the proper angle.
Note: The rudder has a great deal of authority, and it is not absolutely necessary to get the exact angle of 25 degrees. If you can get within a couple of degrees of 25, that is acceptable. Any angle over 28 degrees you run the risk of the rudder hitting the elevator trailing edges.
10. Flip template upside down, and place against the top of the vertical stabilizer and move the rudder to the right until it touches the template.
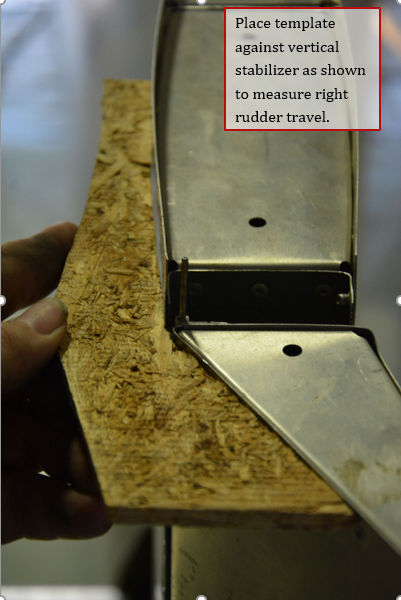
11. Repeat steps 5-10 for making and adjusting the rudder stops on the right side.
12. When rudder travel has been properly adjusted, countersink the holes in the plate and install using BSC rivets of the appropriate length. If using the provided 1/8” plate, the rivets should be at least a BSC-45. Flush rivets should be used as the rudder stop may come close to the rivet head.
