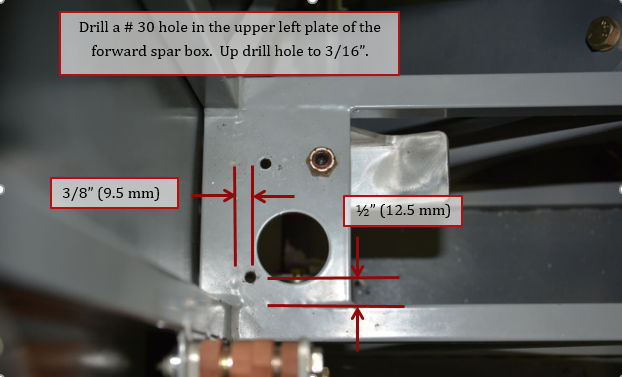
1. On the left side forward spar top plate (just in front of the throttle quadrant) drill a #30 hole 3/8” in from square tube and ½” forward of the rear square tube. Enlarge hole to 3/16” and deburr. In late model kits, this hole may already be drilled.
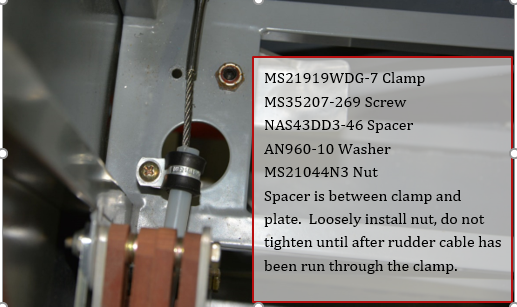
2. Install MS21919WDG7 clamp using MS35207-269 screw, NAS43dd3-46 Spacer, AN 960-10 washer and MS21044N3 nut. Spacer should be between the clamp and the spar plate. Loosely install nut, as we will need to install a nylon tube in the clamp, and run the rudder cable before it can be tightened.
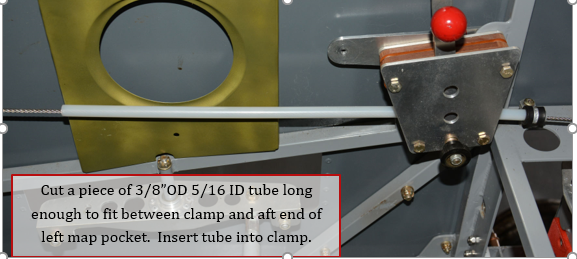
3. Cut a piece of 3/8” O.D. 5/16” I.D. tubing so that it will start at the clamp and run to the aft end of the left map pocket as shown. Run tubing through the throttle quadrant between the mixture and throttle levers and into the clamp. The tubing should be flush with the forward edge of the clamp. The tubing is required as the rudder cable will be in close proximity to the throttle, elevator trim lever and cable.
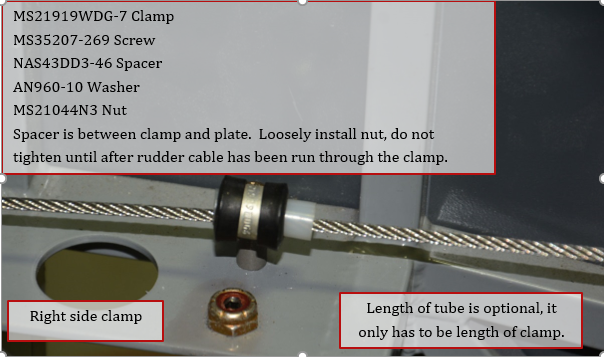
3. Install a similar clamp arrangement on the right side. There is already a hole for the screw in the right side plate.
Note: Tubing is only required to be inside the clamp on the right hand side, but there is enough tubing provided to extend it to the aft end of the right map pocket if desired. The tubing can help from keeping your arm from hitting the rudder cable, and the rudder cable from possibly hitting the map pocket.