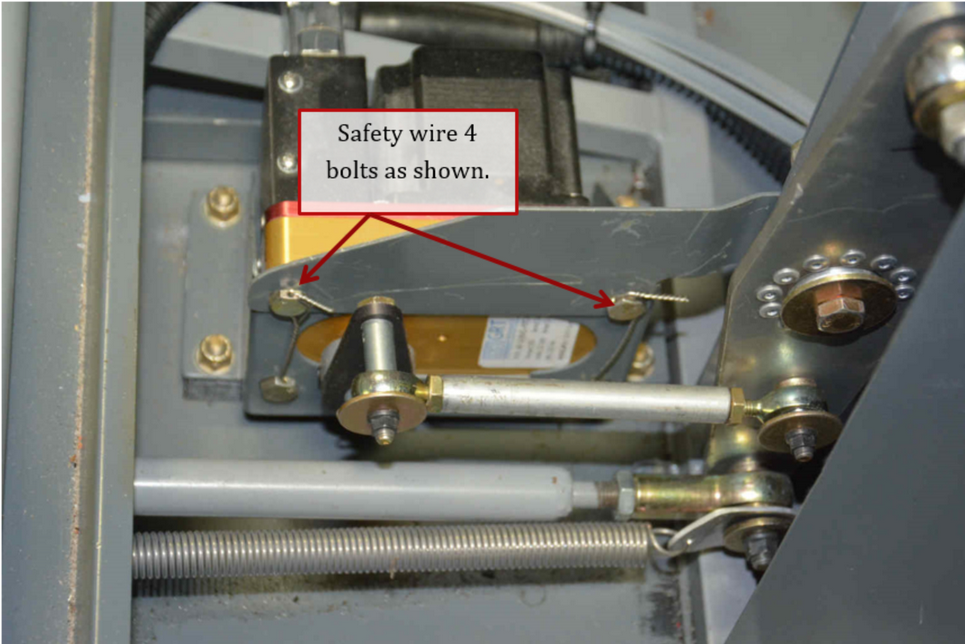
1. Using the standard GRT mount, temporarily install the servo and the pitch brace bracket using 4 AN3H-4A bolts. Set it in the aircraft on the 2 5/8” tall spacers in the approximate location shown.
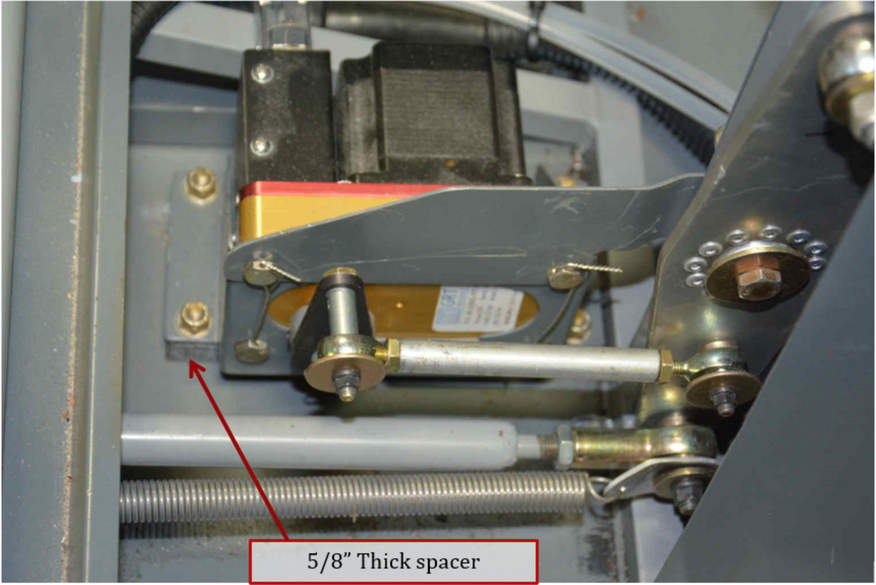
2. Make the pushrod by cutting the provided GRT pushrod to 2 7/8”, drill and tap the cut end for 10-32 threads. Install provided MM-3 rod ends and AN315-3R check nuts.

3. Drill a 3/16” hole 2” below the center pivot hole on the elevator reversing arm. This hole should be on the vertical centerline of the reversing arm.
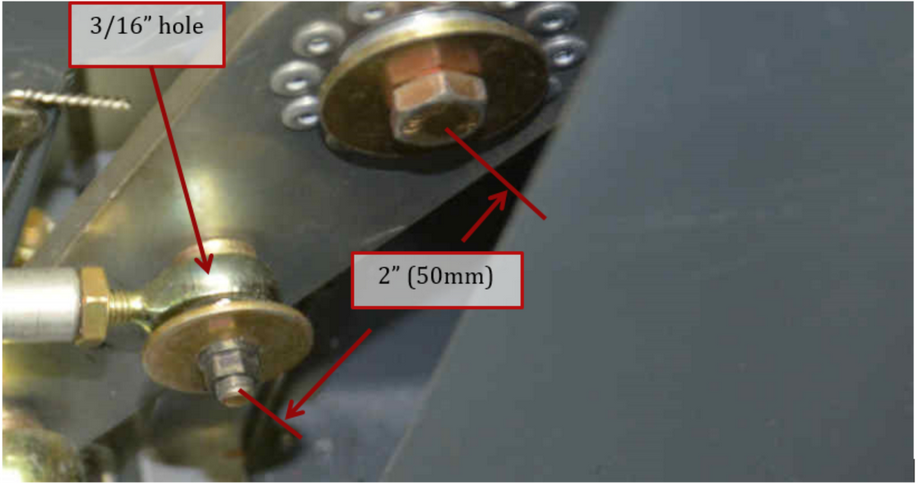
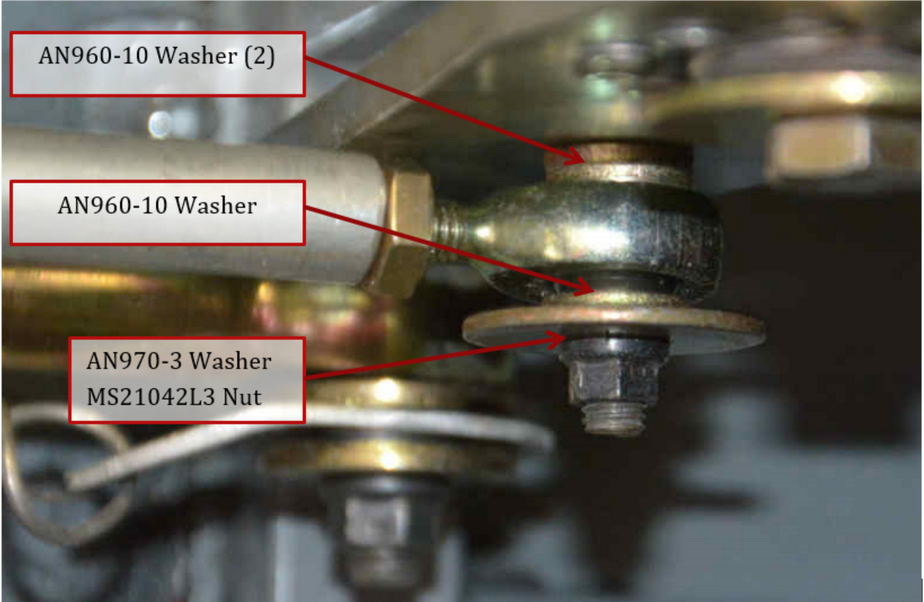
4. Install the pushrod onto the reversing arm using AN525-10R16 bolt, 3 AN960-10 washers, AN970-3 washer and an MS21042L3 nut. There are 2 AN960 washers between the rod end and the reversing arm.
5. Adjust and install the pushrod onto the outermost hole of the servo arm AN3-14 bolt, NAS43DD3-40 spacer, AN960-10 washer, AN970-3 washer and an MS21042L3 nut.
Note: the servo arm should be pointing straight up with the elevator in the neutral position.
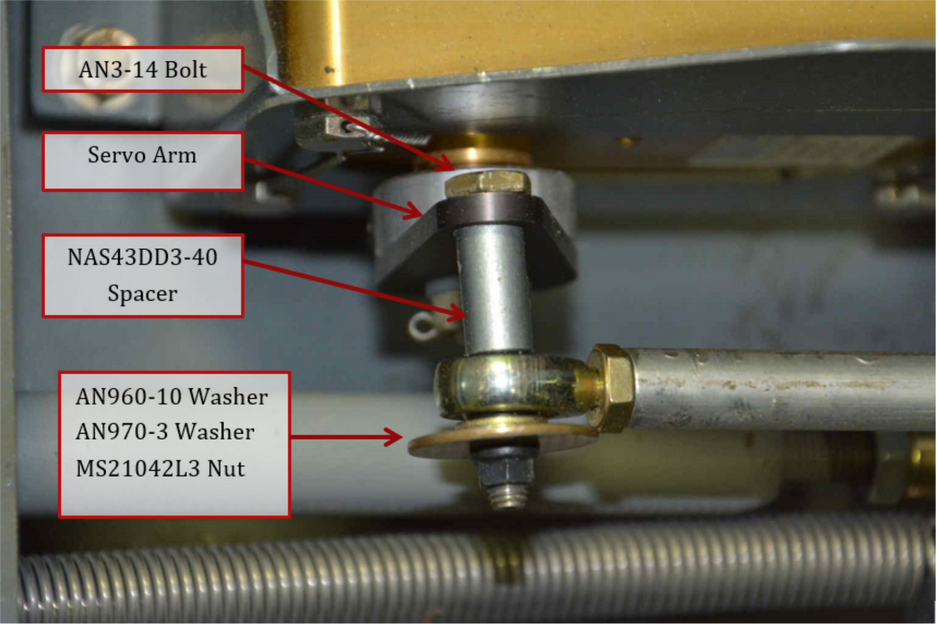
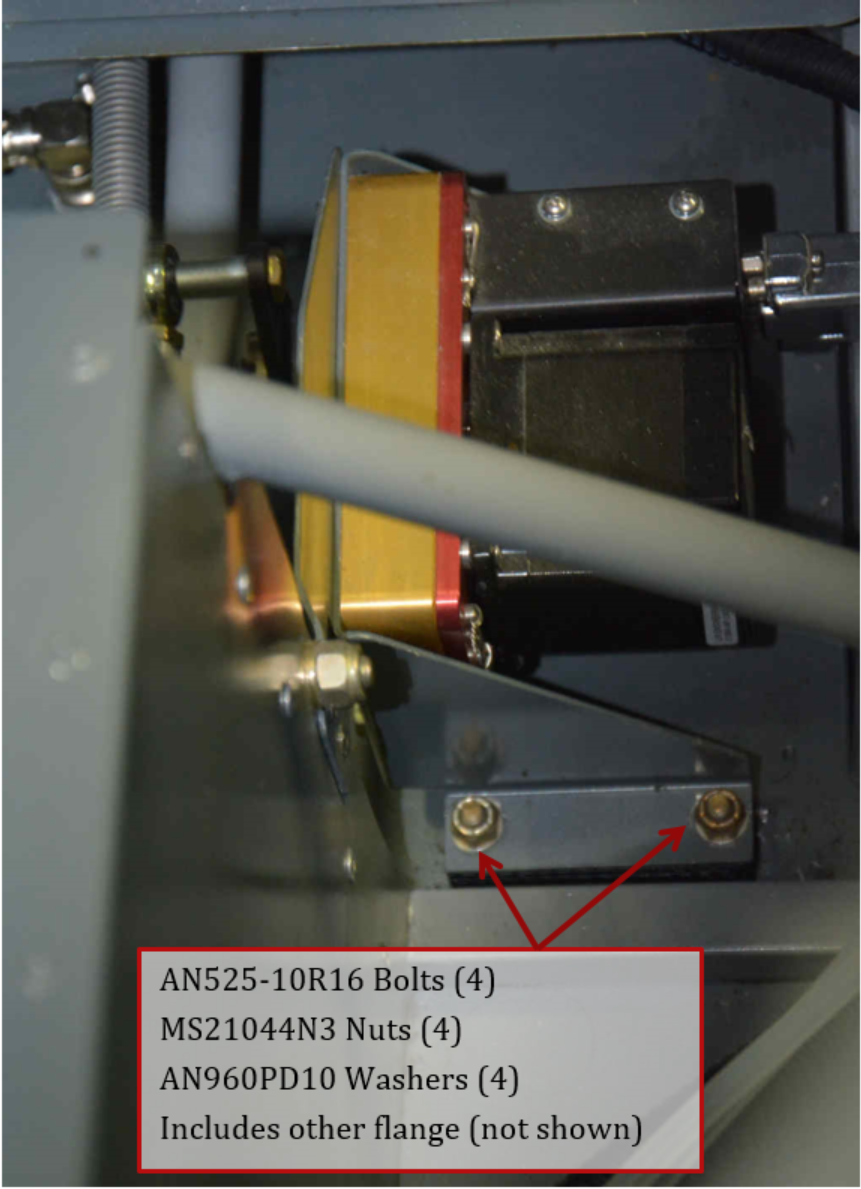
6. Move servo assembly until the pushrod is parallel with the elevator pushrod and the control stick can be moved through its full range without any binding or contact. The rear tab of the servo bracket should be nearly touching the steel tube on the floor. The joggled tab should be touching the vertical steel tube and tunnel wall. The tab may need to be cut down. Transfer drill 4 3/16” diameter holes through the mounting bracket and into the floor. Install 4 AN525-10R16 bolts using 4 AN960PD10 washers and 4 MS21044N3 nuts.
7. Drill 2 #40 holes through the tab of the brace into the vertical steel tube. Up drill to #30, deburr and install 2 CCP-43 rivets.
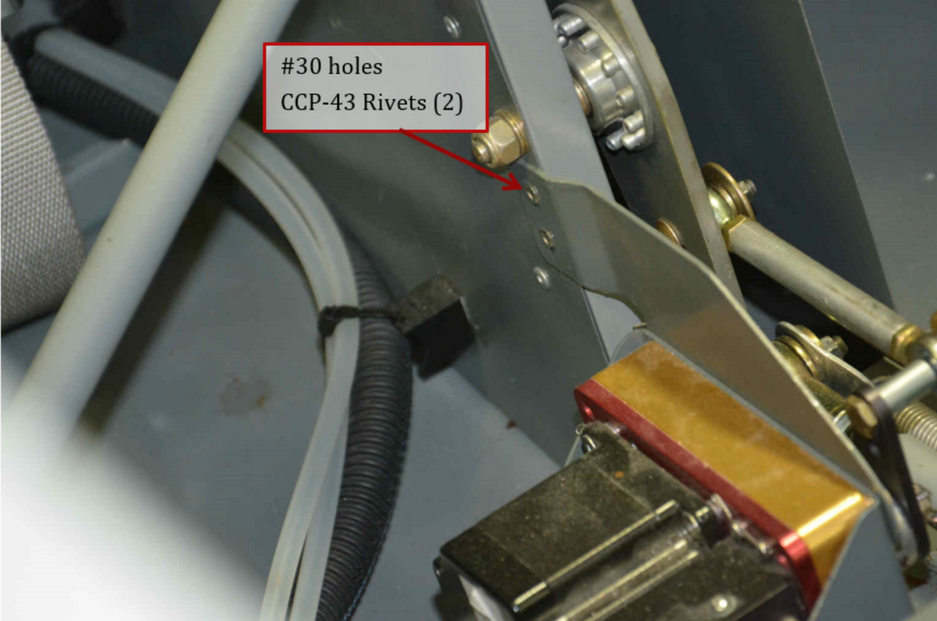
8. Check that all the hardware is properly secured and the servo arm is vertical when the elevator is neutral. Safety wire the bolts mounting the servo as shown.
