The SPA Rivet Squeezer was designed to be used by one person on a workbench. This device is easy to use. You can sign up to have it shipped to you on the Panther Builders Cave. The device is free to use, you simply pay shipping. DO NOT sign up unless your spars are prepped and ready for assembly, properly labeled and you have all of the necessary hardware. You only have 7 days of working time with the rivet squeezer, so you need to be ready when you receive it. See below for a short video on how to use the squeezer.

SPA Spar Rivet Squeezer
1.Mount the squeezer to your building table. Having the rivet squeezer fixed to your table helps immensely when working by yourself. You can use a few 1x2 pieces of scrap wood screwed to the bench on all 4 sides to hold the squeezer in place.
NOTE: To most efficiently squeeze the rivets in a spar, you will need a space approximately 25 feet (8+ meters) long. A smaller space can be used, but the squeezer will have to be moved occasionally and remounted.
2.Use a couple scrap pieces of 2x4’s to help support the spar on the table. A roller stand is suggested to help support the spar when the end is off the table. Set the height of the roller stand such that the spar is still resting on the 2x4. The added friction of the spar on the 2x4 will help keep the spar from moving as easily while squeezing the rivets, but will still be easy to move to the next rivet.
NOTE: When squeezing rivets near the center of gravity of the spar, there will be a greater tendency of the spar to move, and will have to be held in place. Some lateral movement of the spar is required due to the operation of the squeezer; however, if the spar is not held 90 degrees to the squeezer, then the tails will not form correctly.
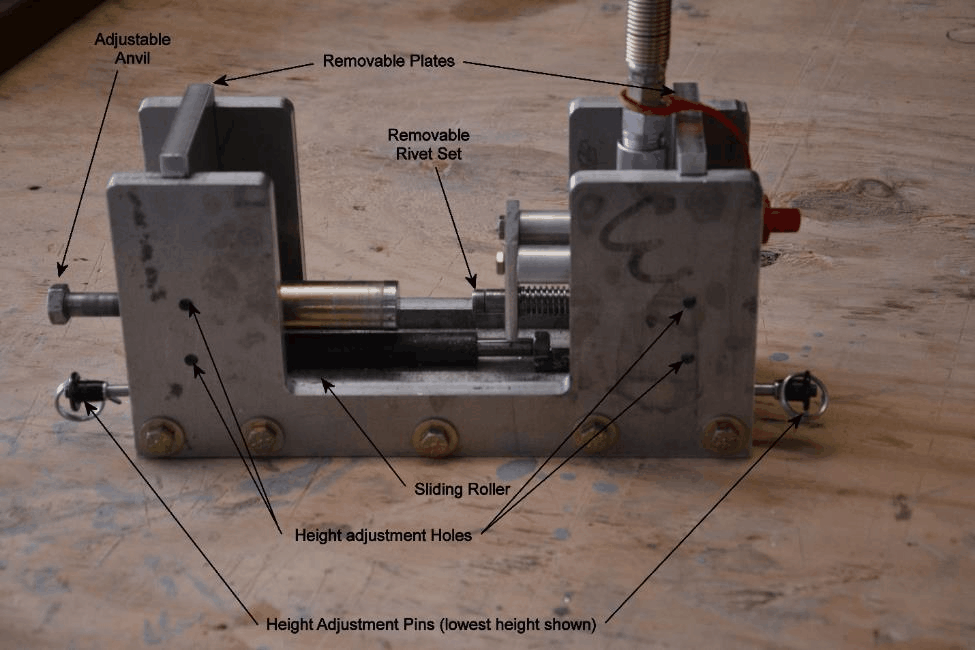
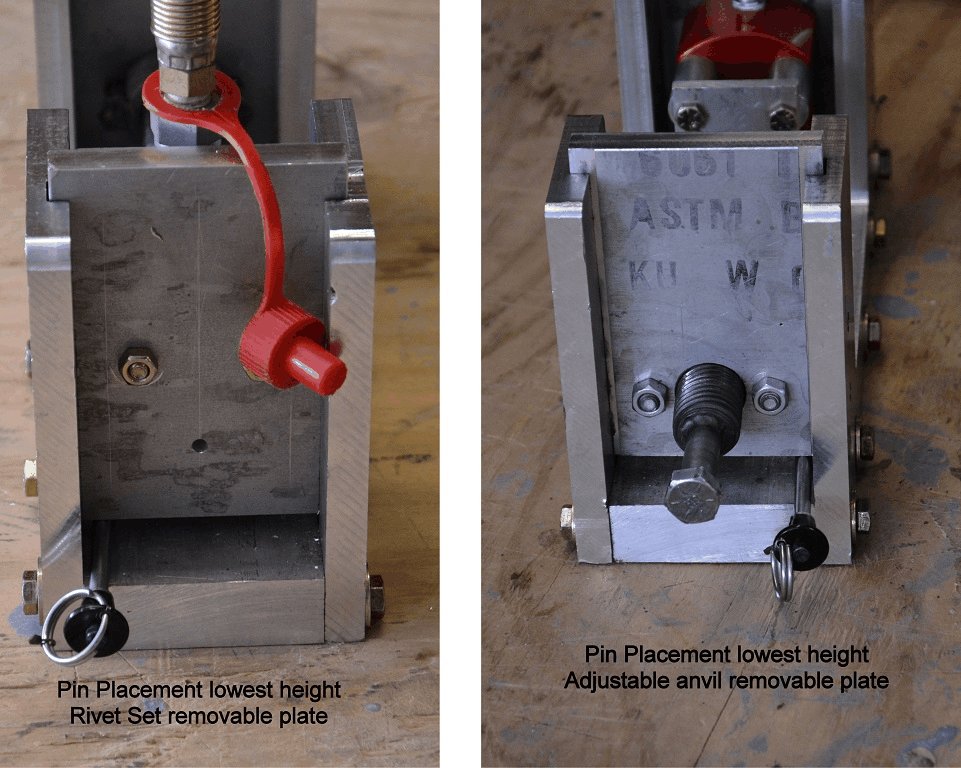
3.The squeezer has two removable plates, one has the hydraulic cylinder and the other an adjustable anvil. There are height adjustment holes for both plates to allow for the 3 different heights required on the Panther spar. For the lowest height, set the adjustment pin under sliding plate, this is for the rivets on the spar cap flanges. For the other 2 heights, raise the plate and insert the pin in the appropriate hole, set the plate down on the pin.
4.To insert the spar, remove one of the plates, insert the spar, and then reinstall the plate.
5.Insert rivets in the holes of the section you are working on, if the rivet does not slide in easily, use the reamer or drill bit originally used for preparing the rivet holes to clean out the holes. A rivet that has to be tapped into the hole may not form properly. We cleaned the holes, insert and squeeze the rivets for one section between ribs at a time.
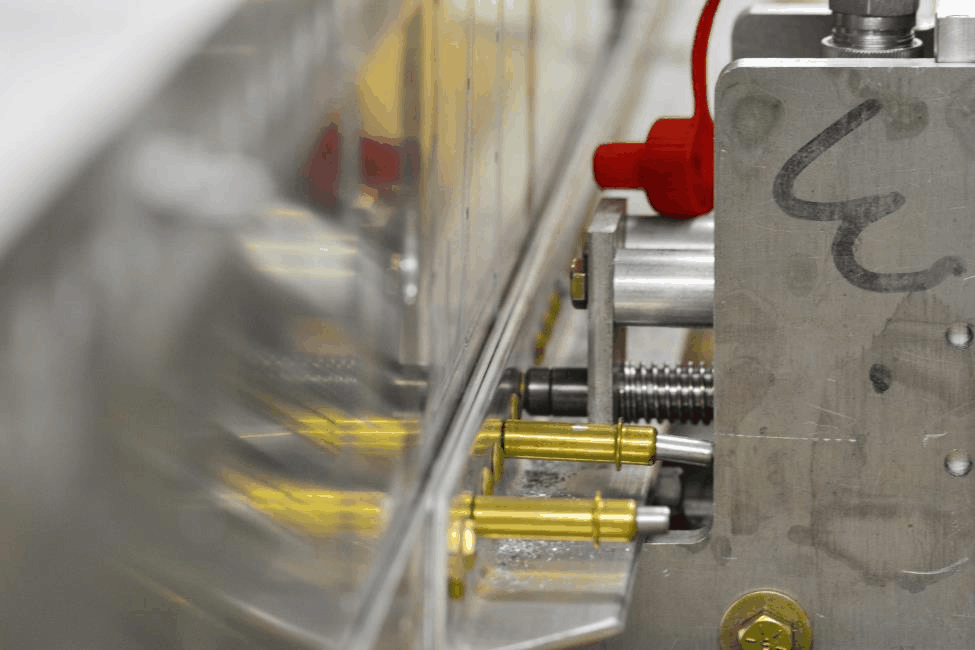
6.Push the spar so the rivet head is up against the rivet die, and snug the anvil against the rivet tail.
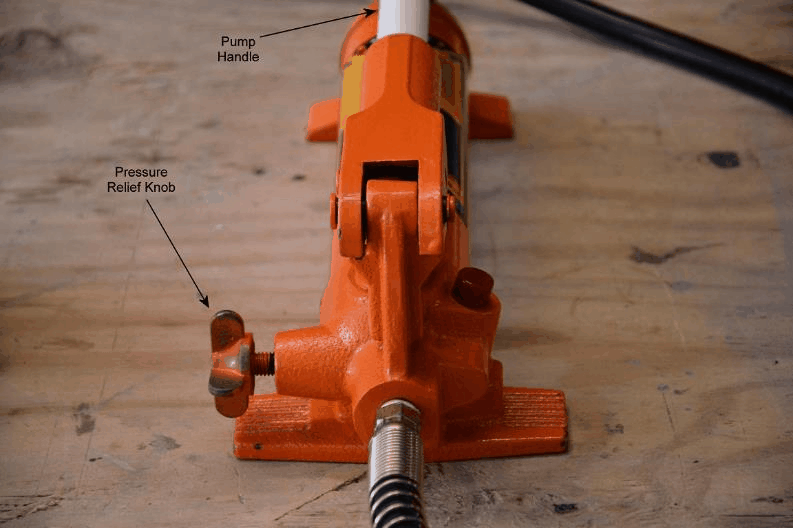
7.Tighten the pressure relief knob on the pump and pump 4-6 times until there is a proper tail formed. A rivet gauge can be used to verify the rivet is set correctly. As the rivet becomes fully formed, the force required to pump the handle will increase. After a few rivets you will get a feel for how much force a fully formed rivet requires.
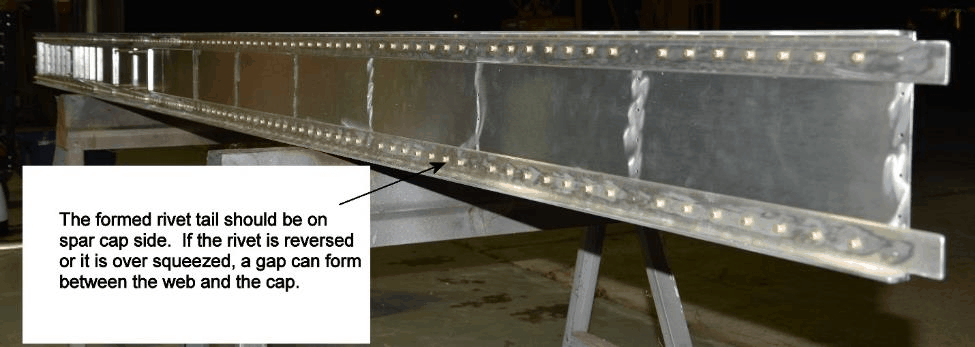
NOTE: be sure to hold the spar square to the squeezer, the head of the rivet should be firmly against the spar, and verify there are no gaps between any of the stacked elements of the spar before squeezing the rivet. A brisk movement of the pump handle sets the rivets better than slow movement.
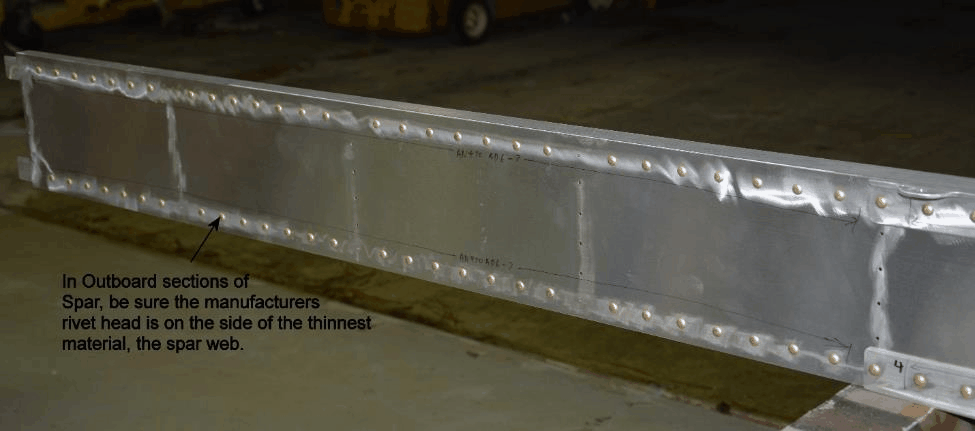
Note: on the right hand spar, the rivet head is reversed on the outboard section as compared to the center section of the spar. This is particularly important on the far outboard section where there is only one cap and the web. The head of the rivet should be against the web to minimize warping of the web. Also, over squeezed rivets at this section can cause a gap between the web and the cap.
8.Loosen the relief knob on the pump, loosen the anvil, and move the spar to the next rivet and repeat steps 6 through 8. One of the plates may need to be slid up to clear clecos or temporary screws.
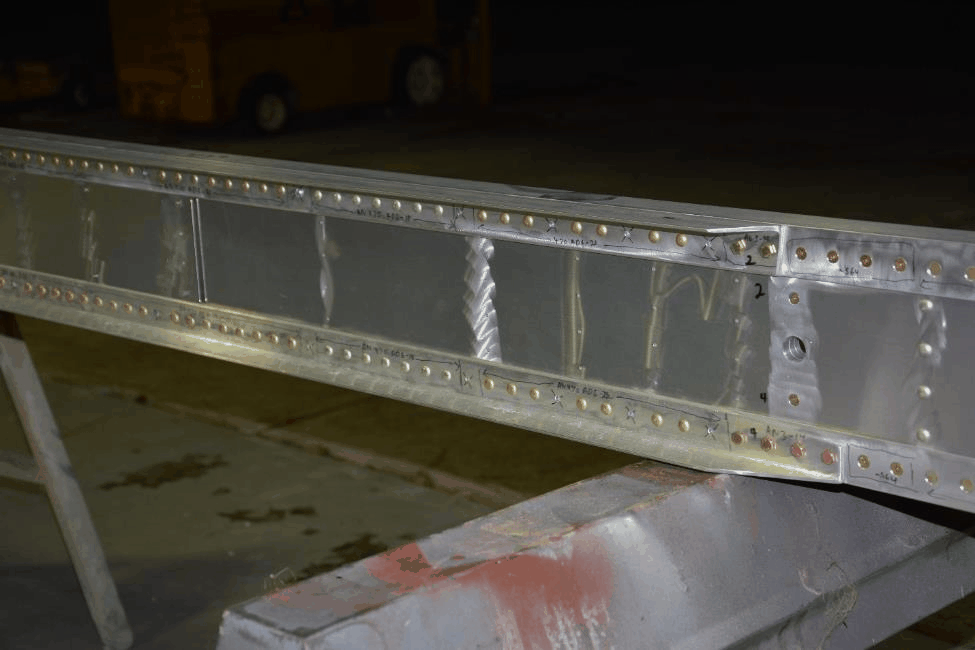
Rivet fasteners in position in middle section