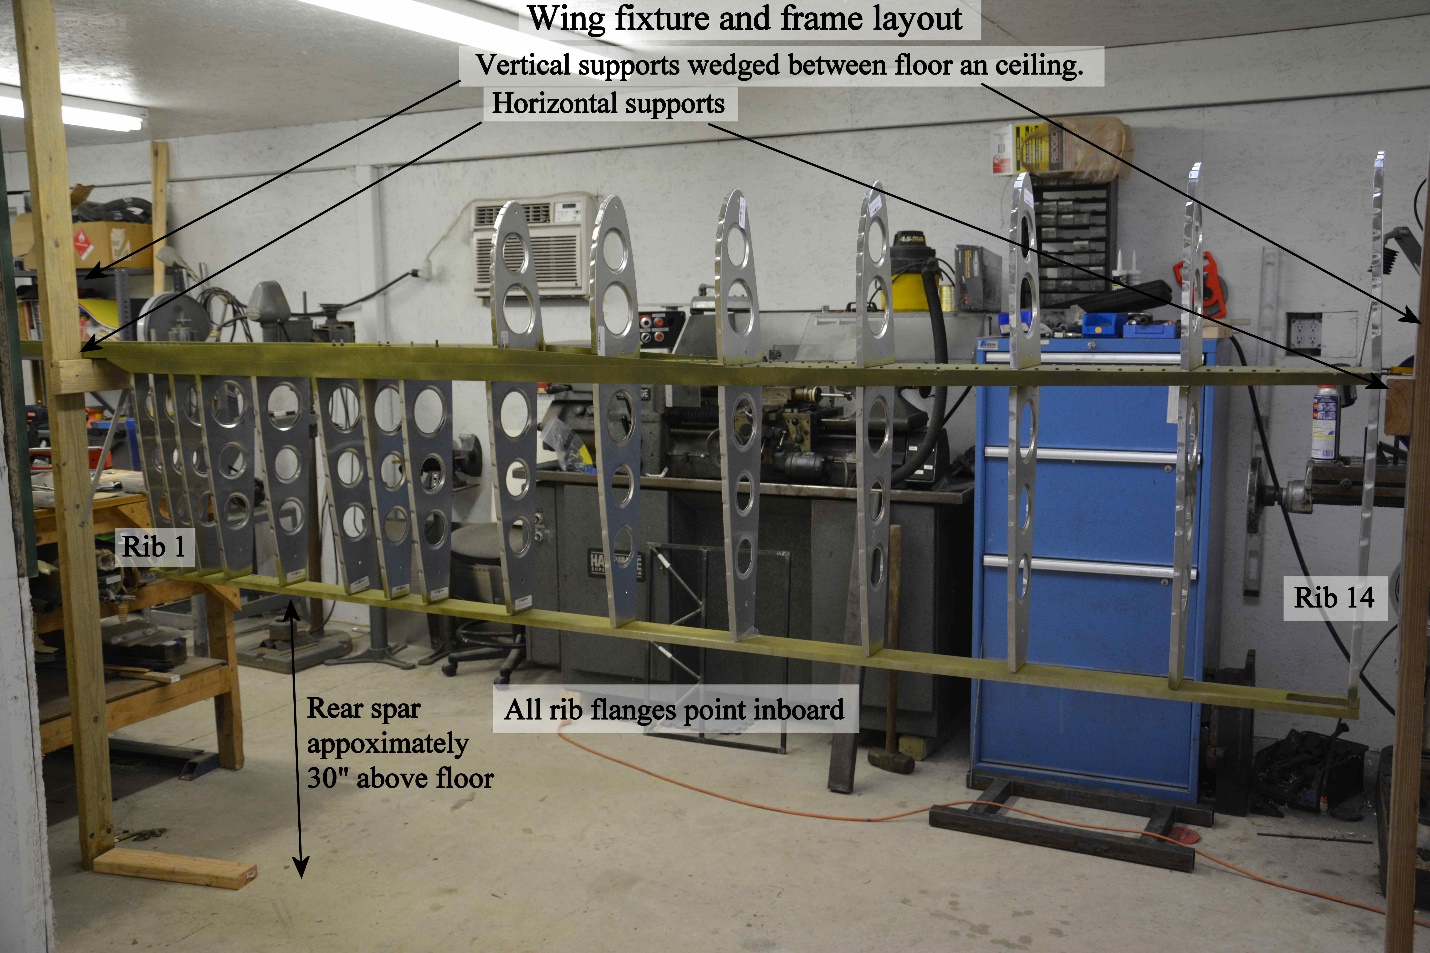
1. Our wing fixture is basically 2 vertical 2x4's wedged between the floor and ceiling of the shop, with 2 smaller 2x4's attached to the vertical 2x4's with a metal diagonal brace for support. The vertical 2x4's should be plumb, and the horizontal 2x4's should be level and at the same height. The height above the floor is not important, ours is set so the rear spar is approximately 30" above the floor. This height allowed the use of a roll around stool for most of the holes, but did require a work stand to reach a few of the holes on the leading edge skin. There are times that you might need to look under the rear spar, so I would not set it to low either.
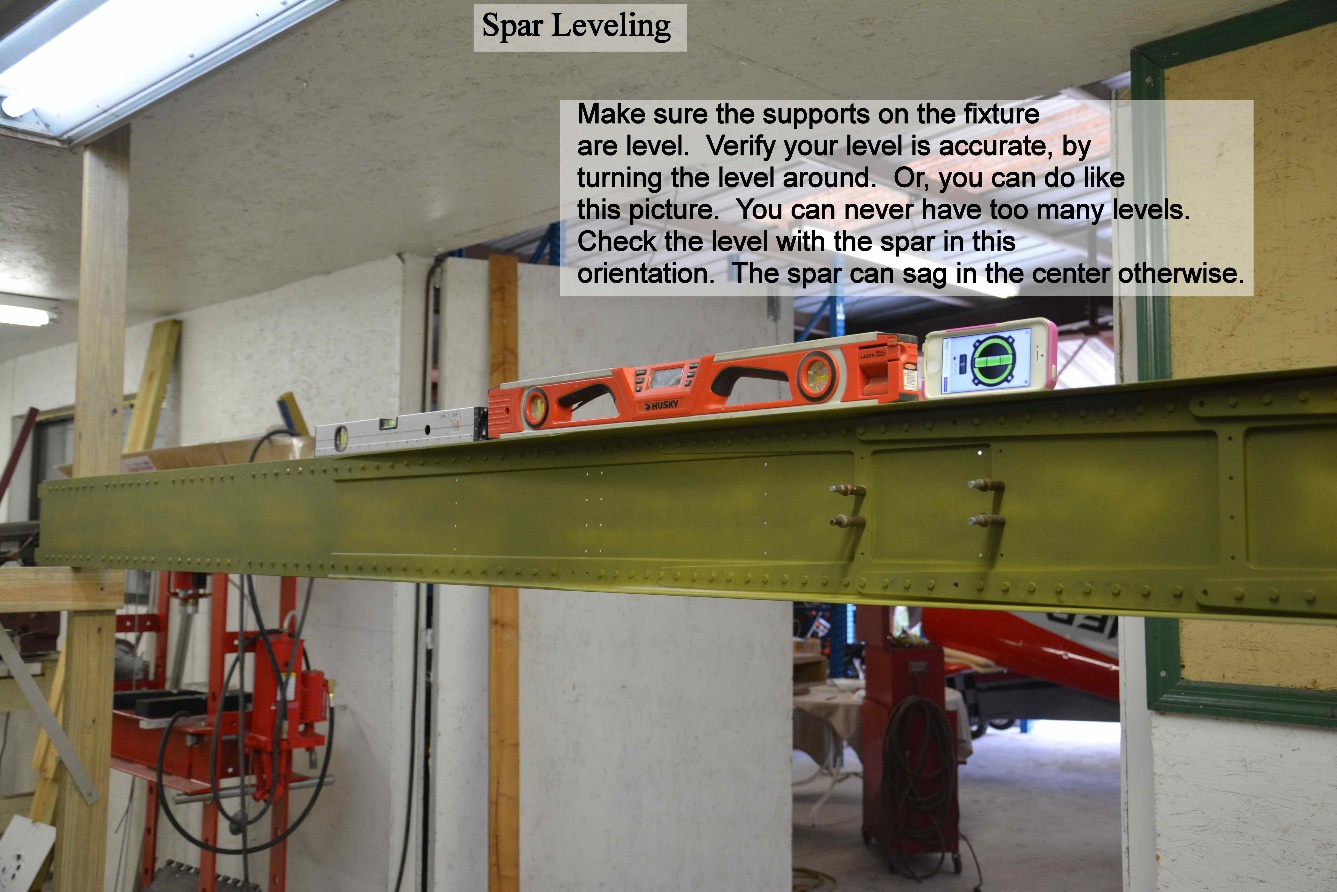
2. Use the main spar set vertically to verify that the horizontal supports are at the same height.
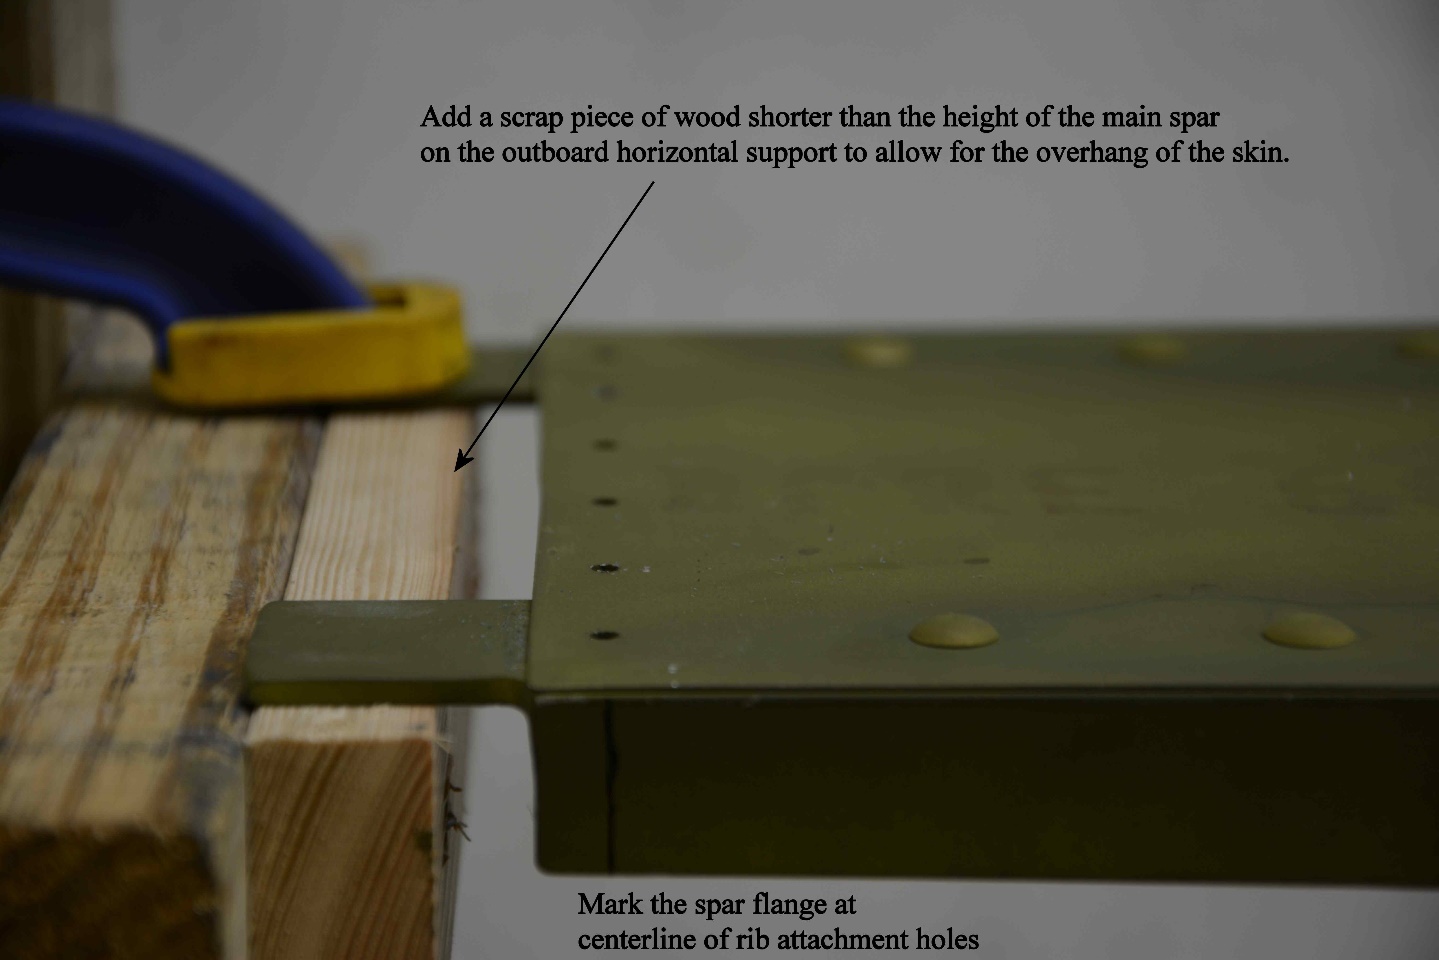
3. Add a scrap piece of wood shorter than the height of the main spar to allow for the skin overhang.
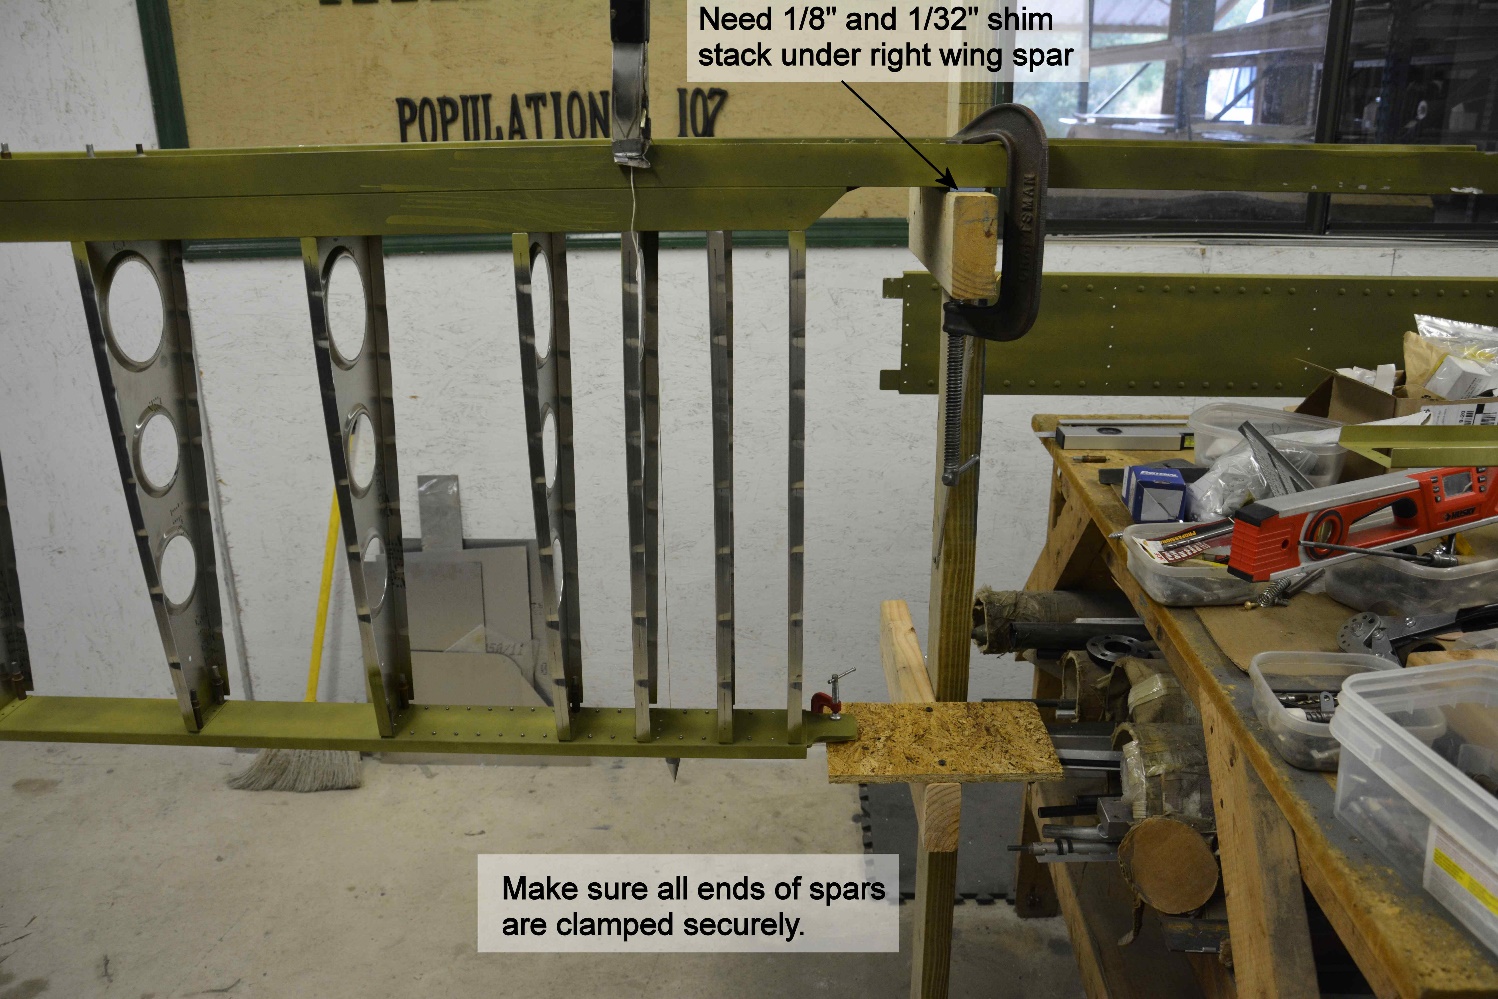
4. To account for the spar stackup, place some shims under the inboard portion of the main spar. The right wing requires an 1/8" and 1/32" shim. Clamp main spar to supports.
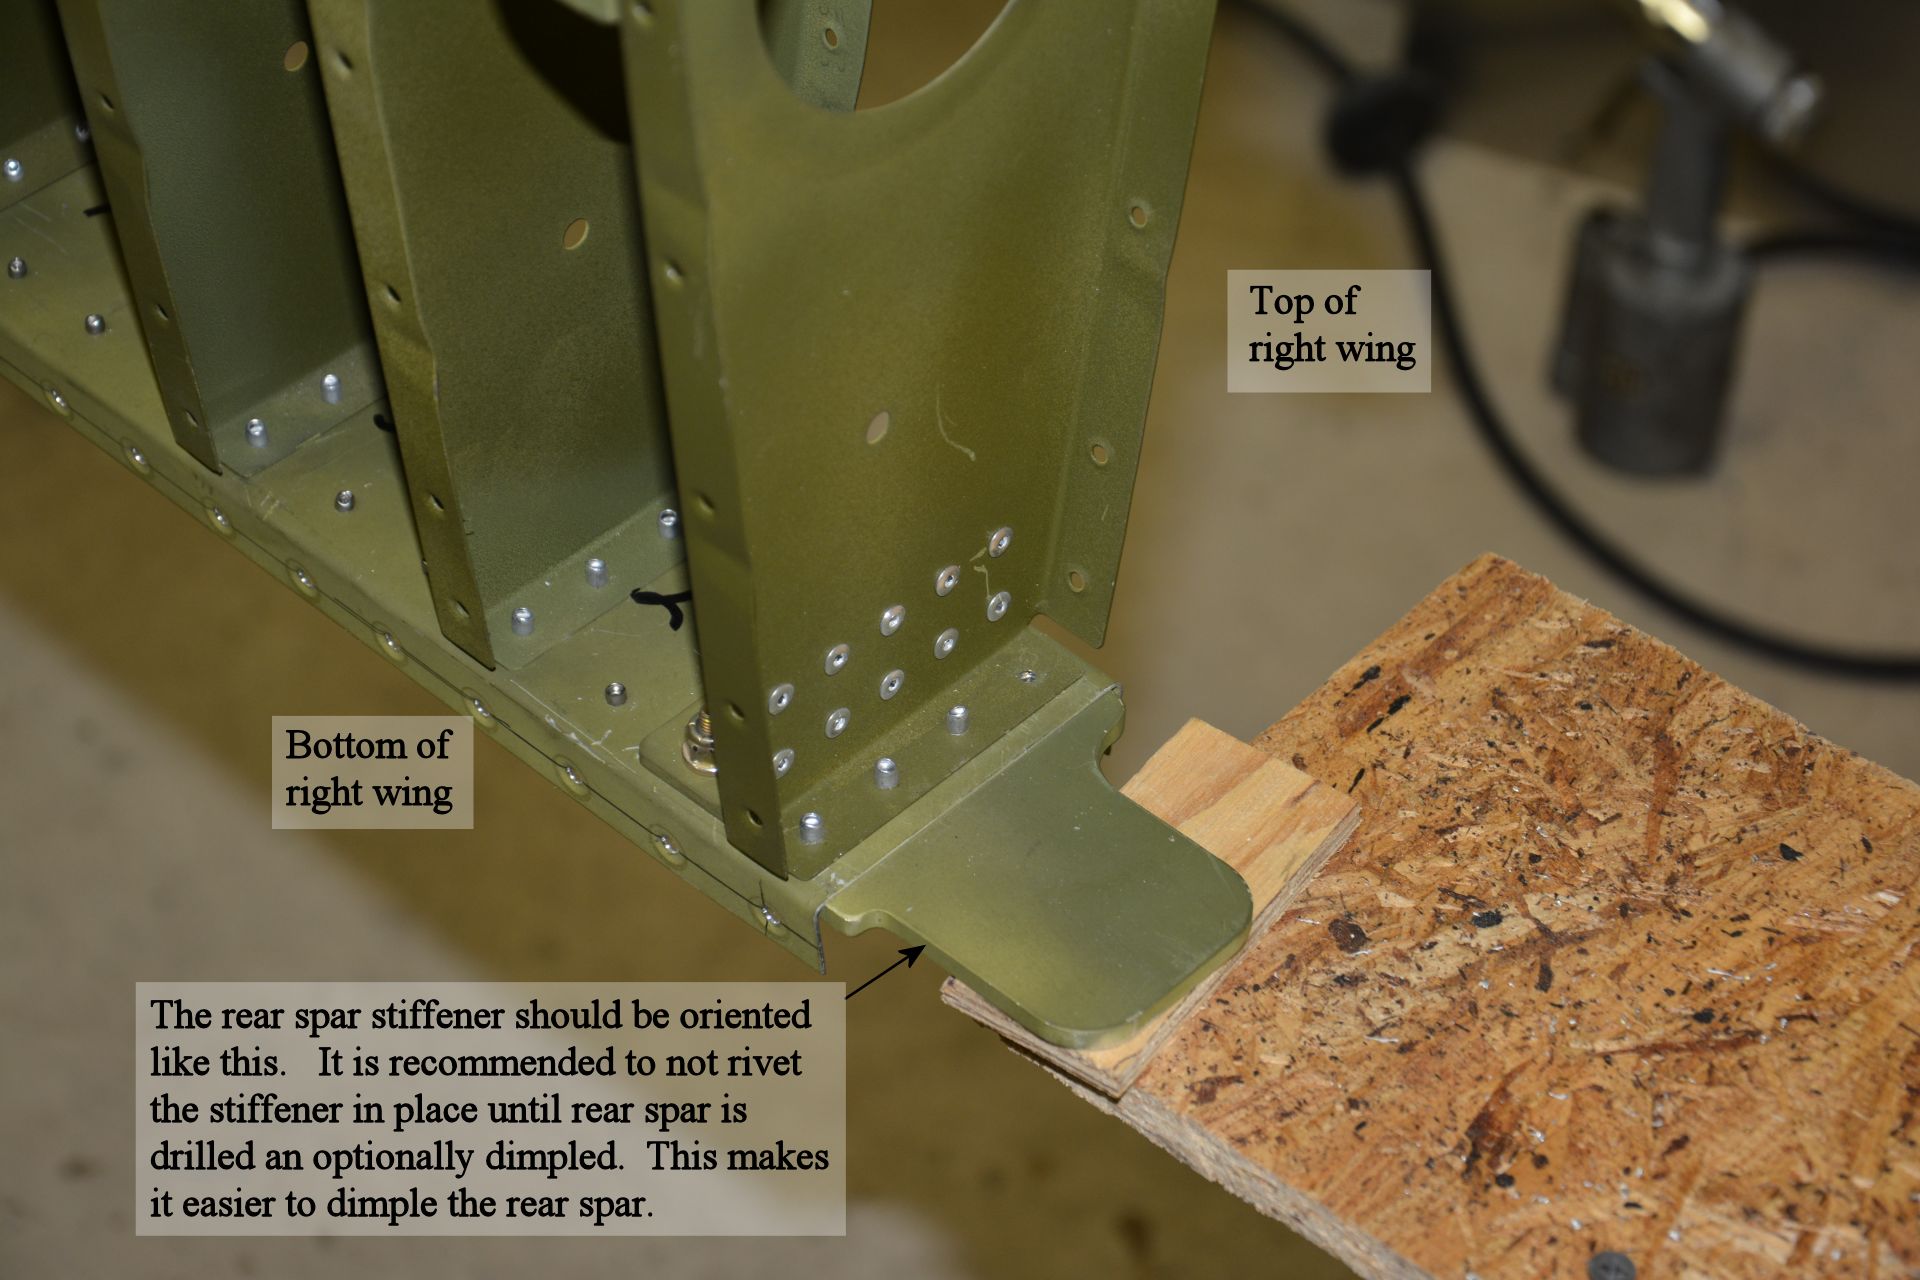
5. Cleco all of the ribs and the rear spar together. Rib 1 is inboard end (fuselage) an rib 14 is the outboard (wing tip) most rib. All rib flanges on the wing point inboard. The first nose rib is located at rib position 8. The space left in front of the spar on the inboard portion is for the fuel tanks.
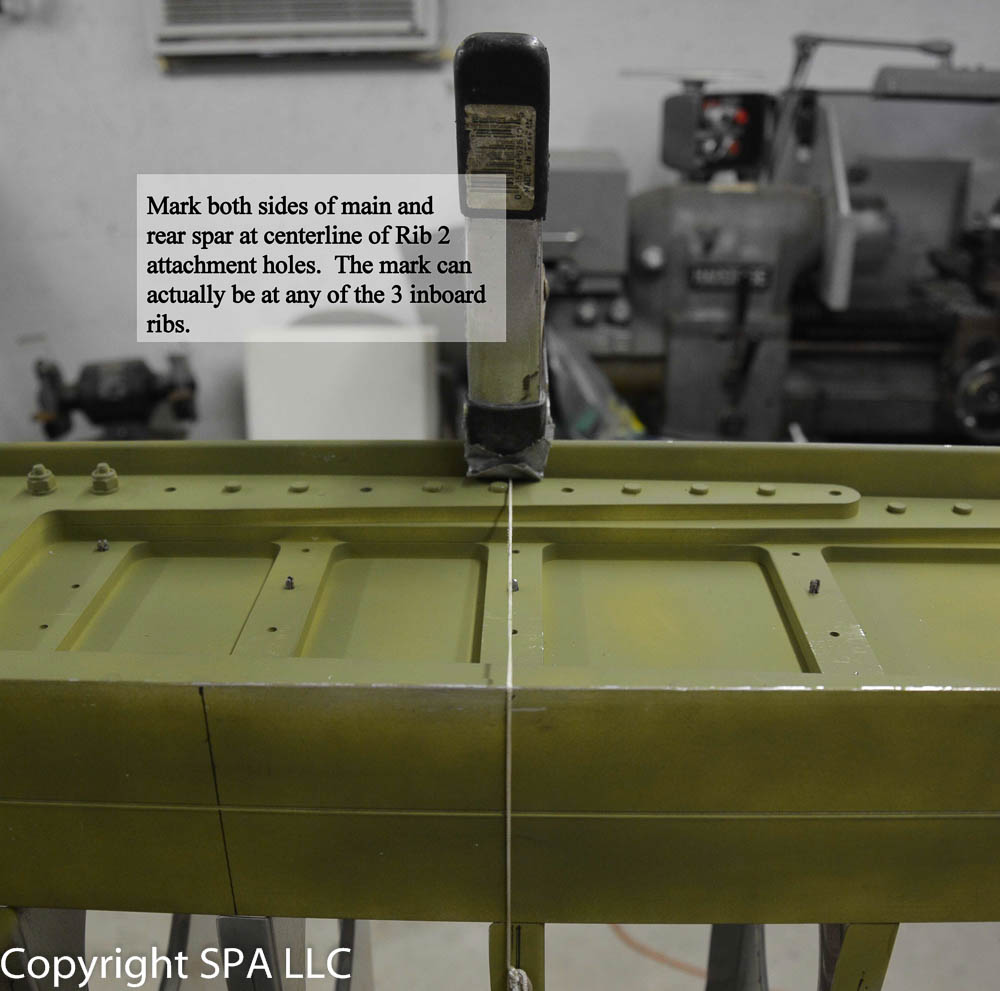
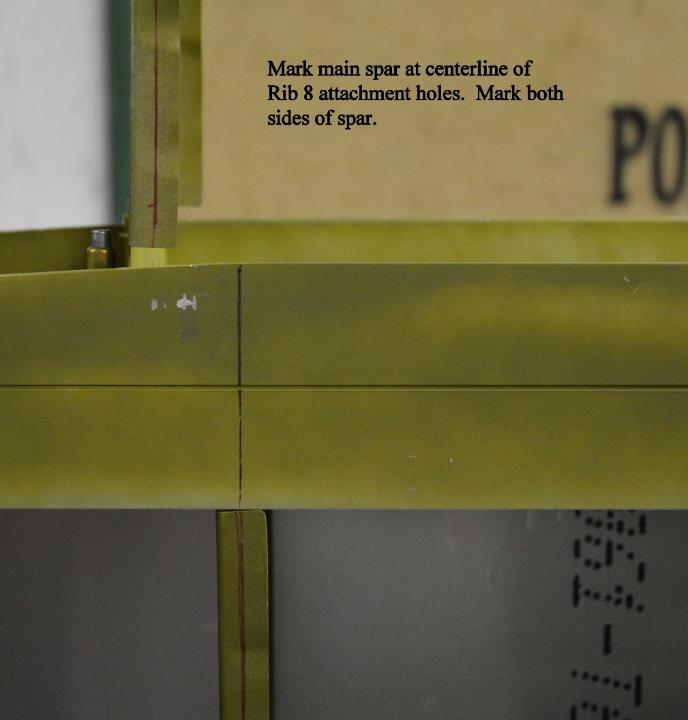
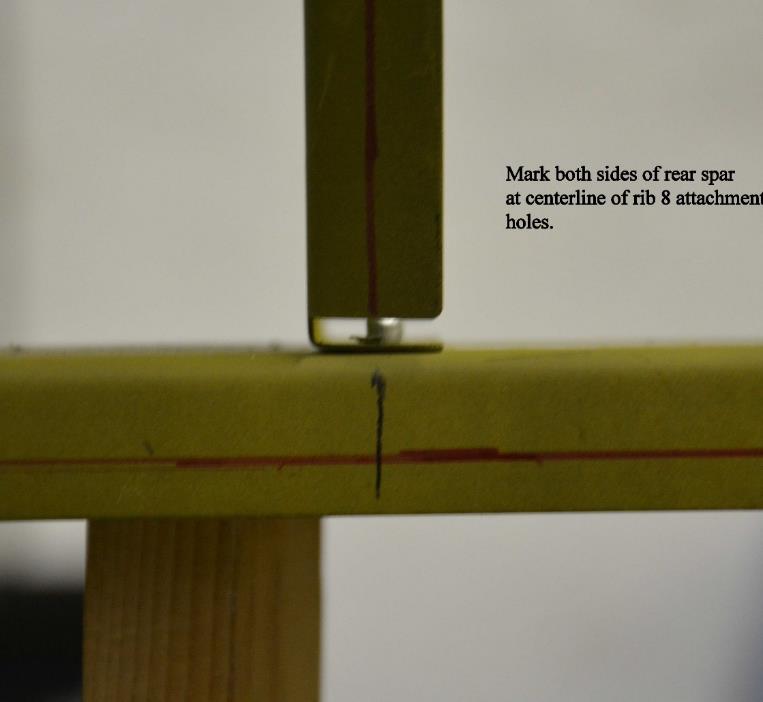
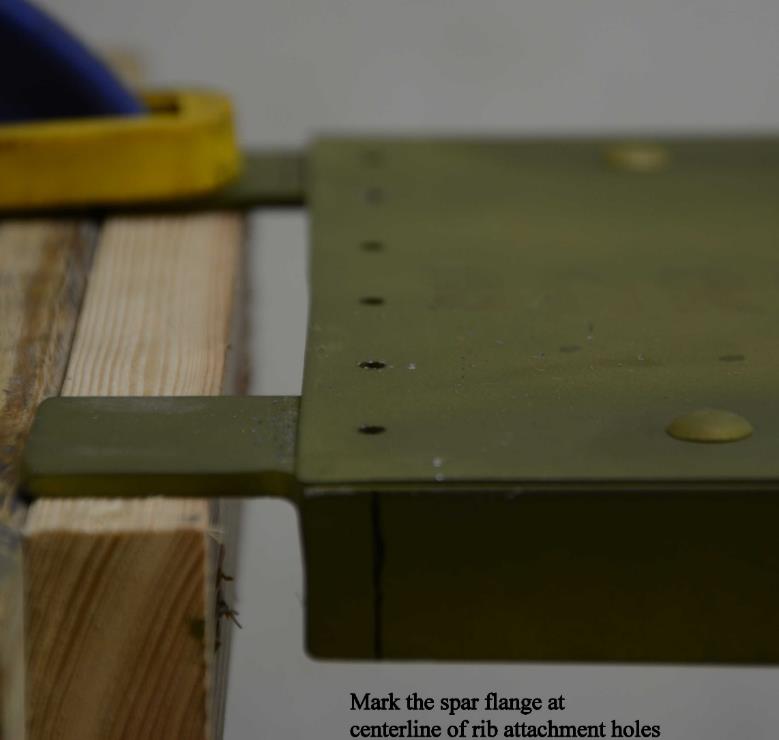
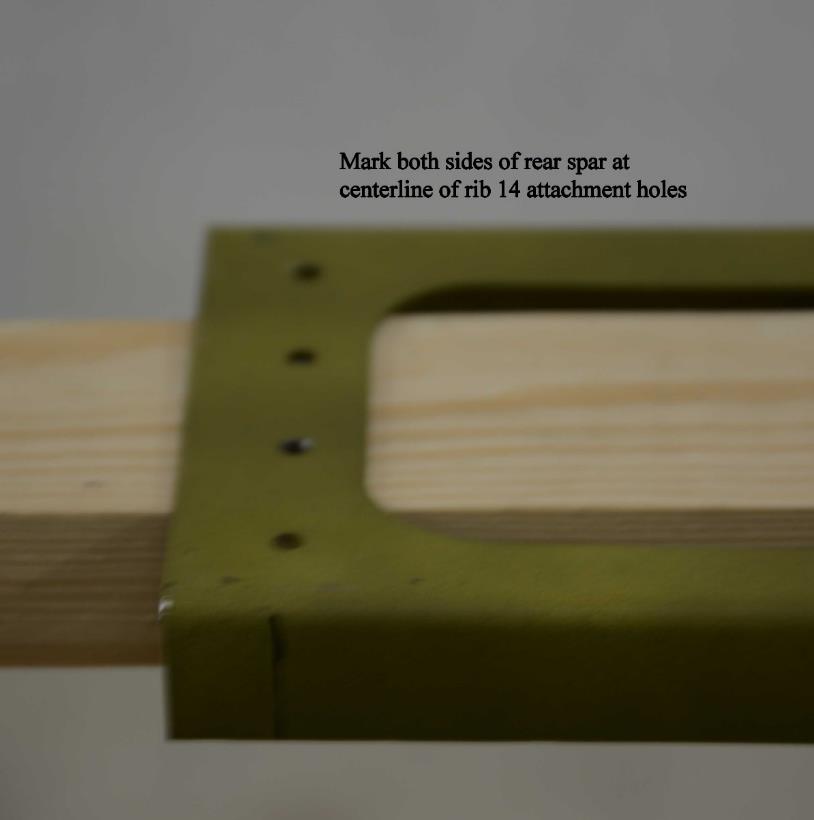
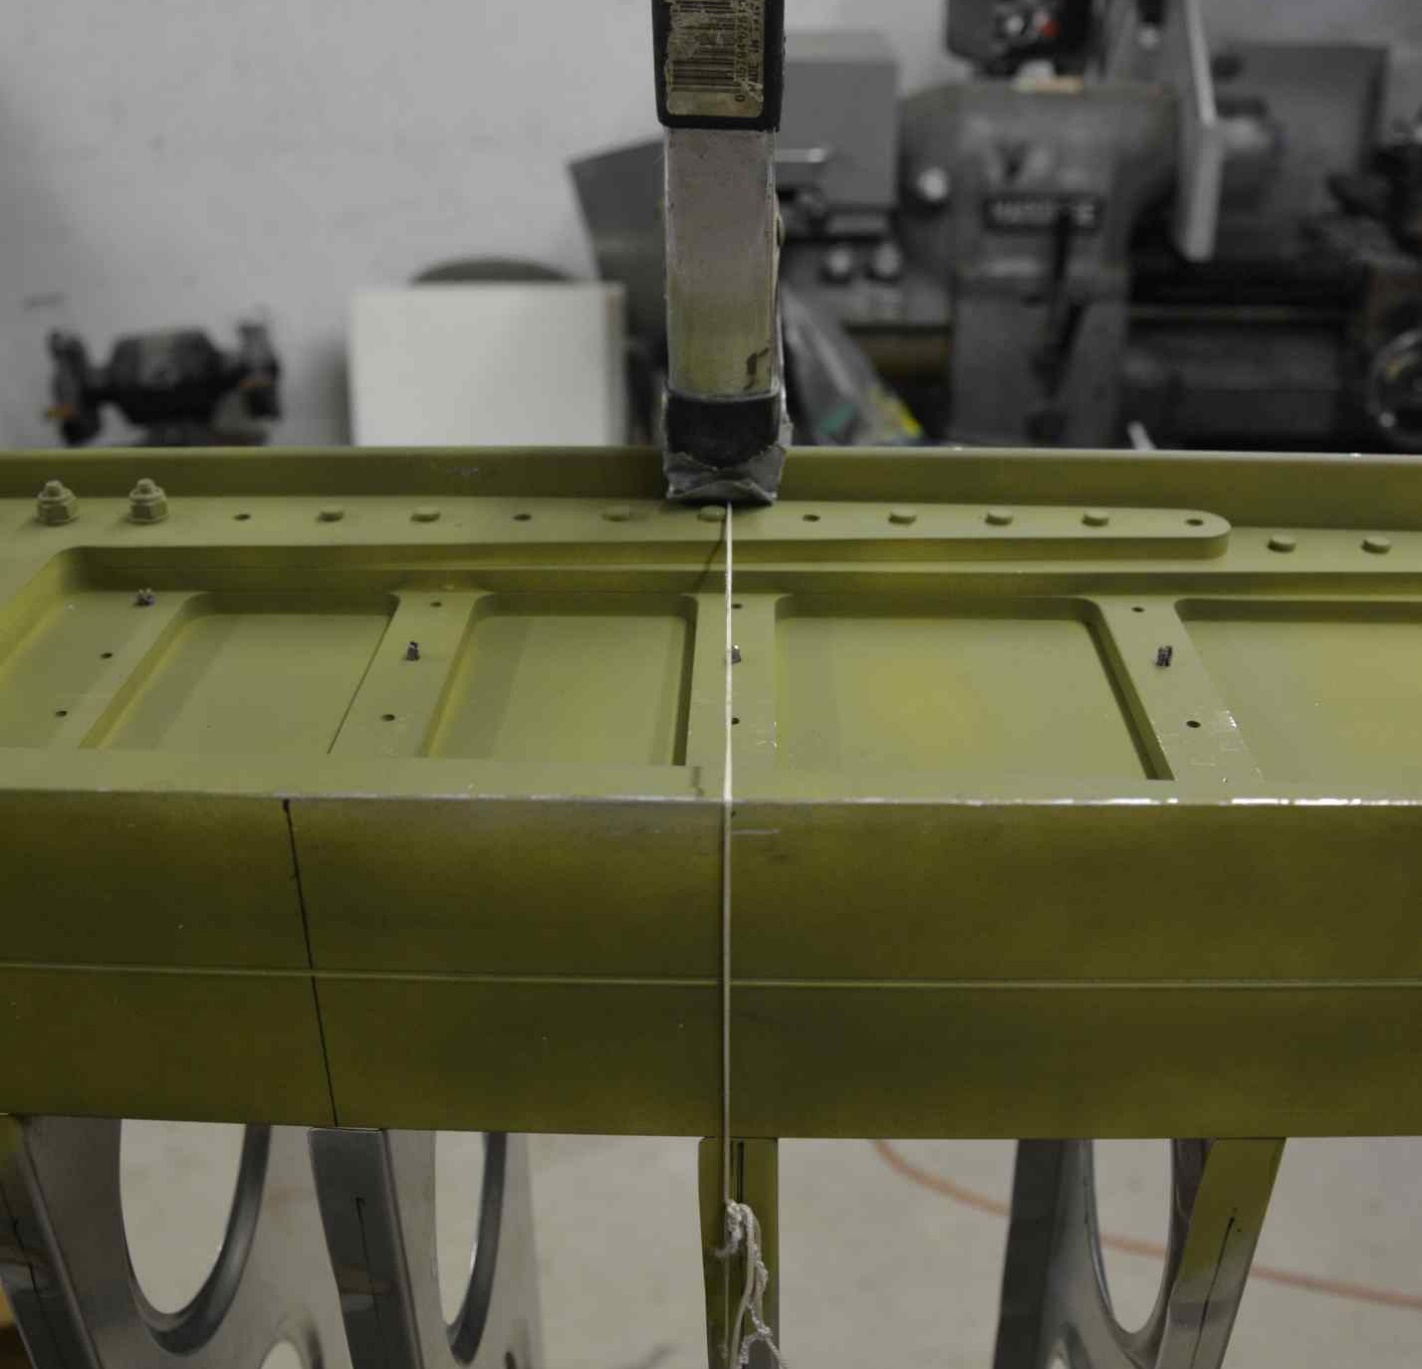
6. Make a line on the main spar and rear spar at the center of attachment holes for ribs 2, 8 and 14. These lines will help align the structure and later to fit the skin.
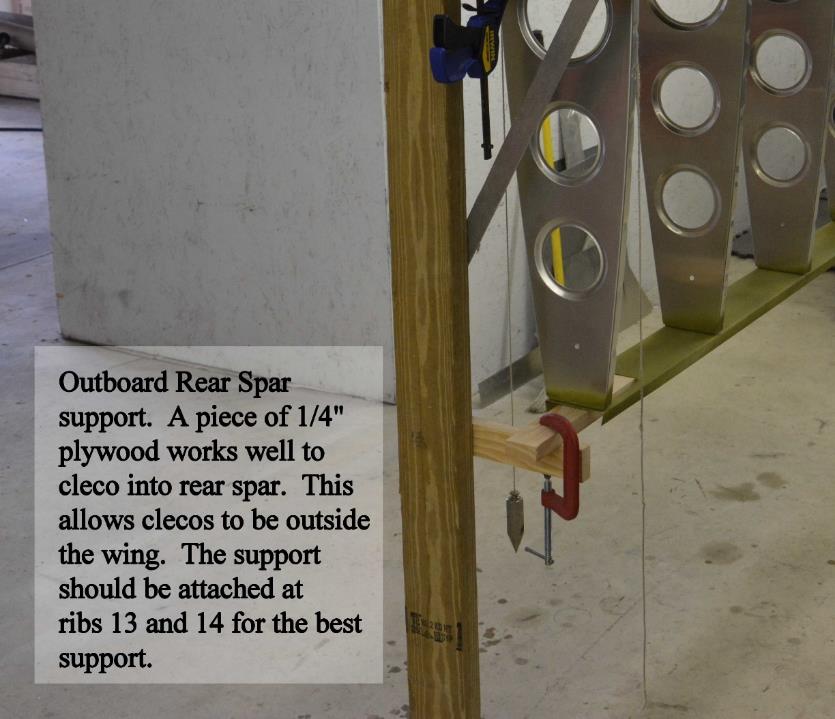
7. Attach a support structure on the vertical fixture supports to hold both ends of the rear spar in place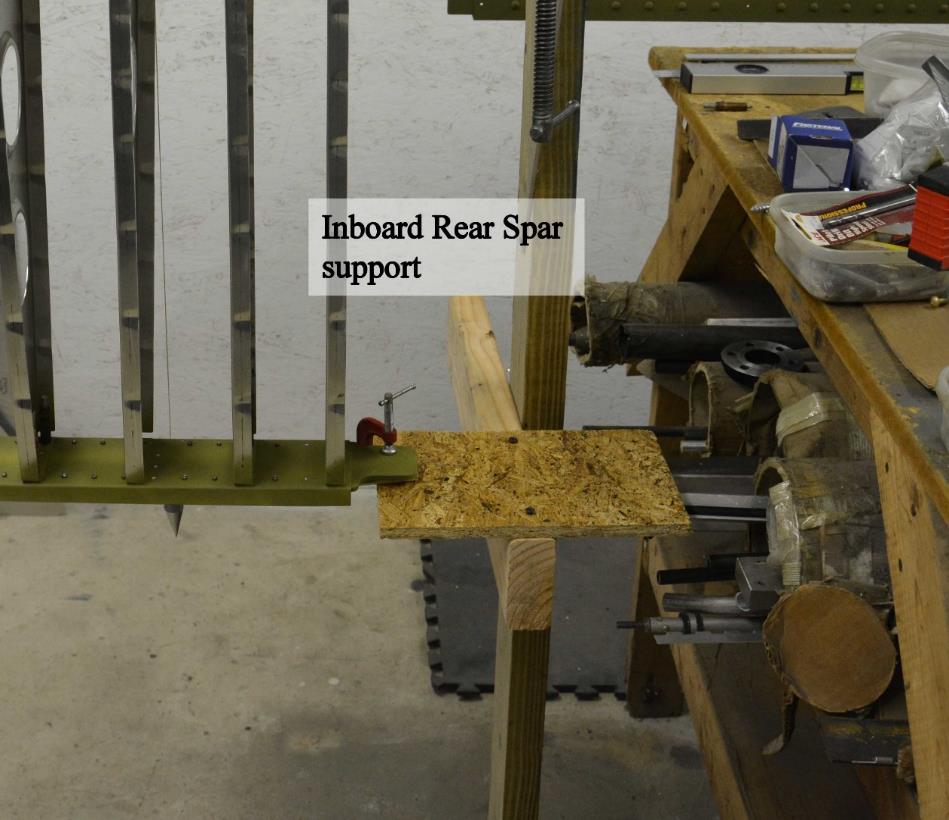 .
.
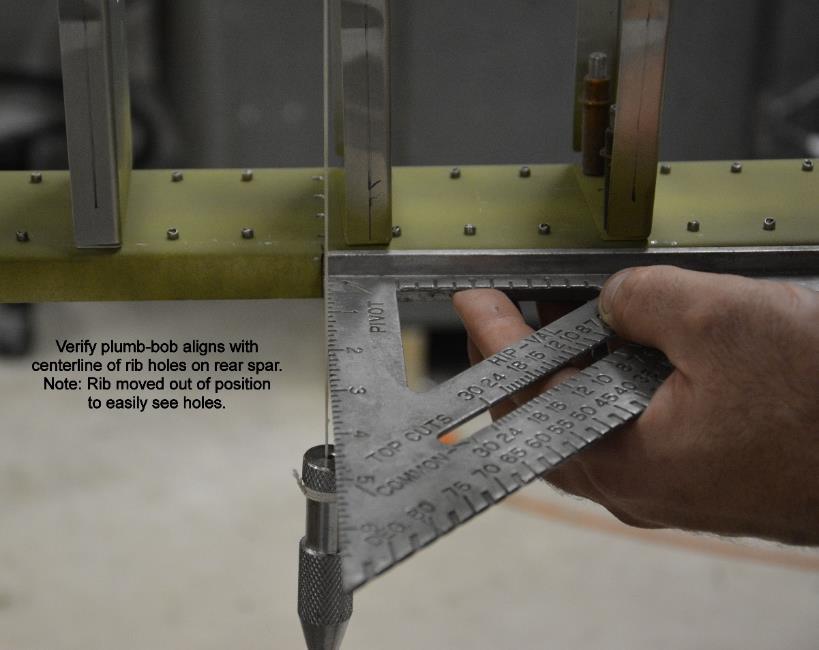
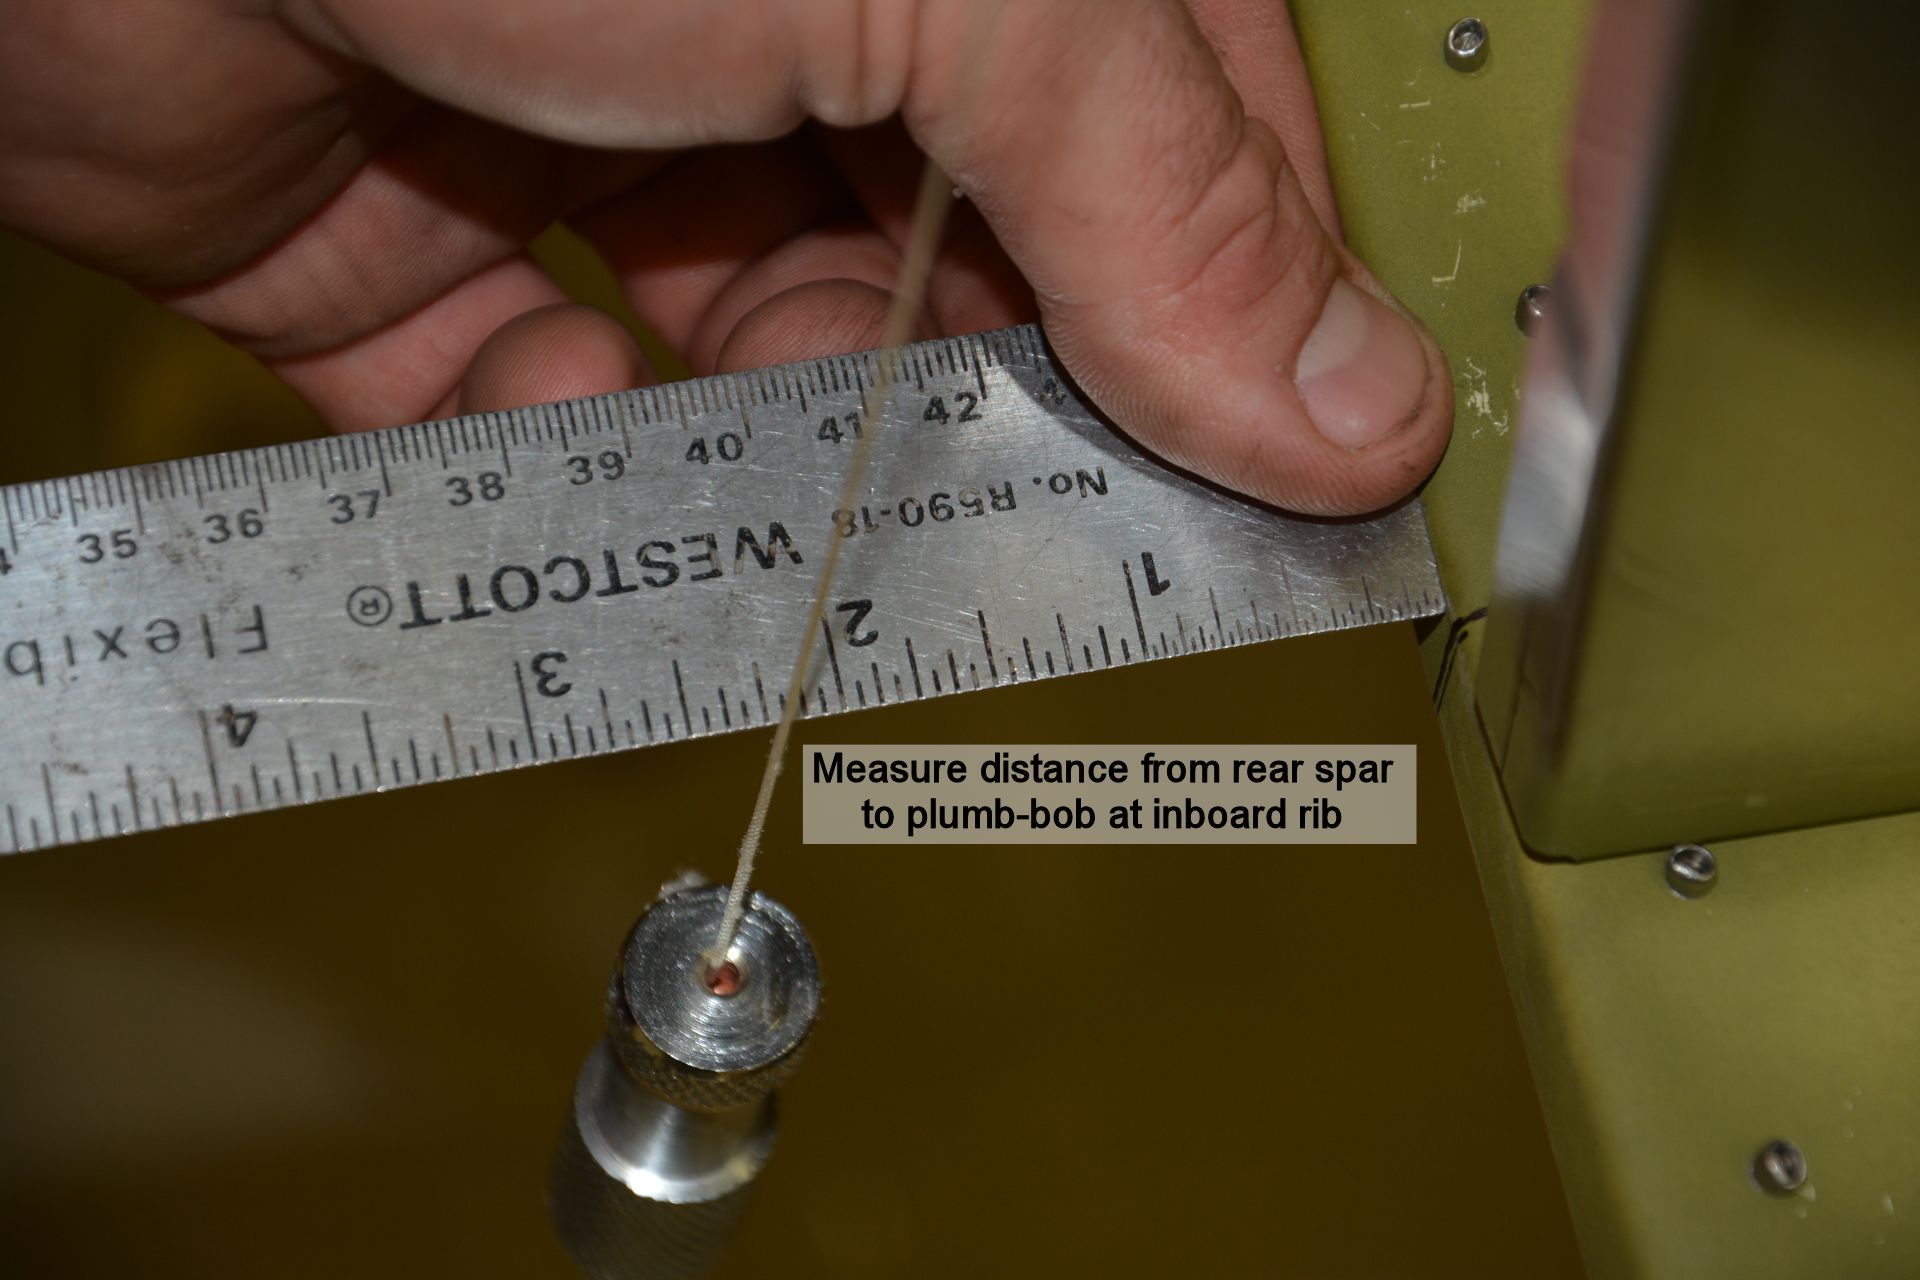
8. Attach plumb bob to main spar over mark made for inboard rib in previous step, and let hang down past rear spar. This picture shows it over rib 3 instead of rib 2. Move rear spar until plumb bob aligns with mark on rear spar. This assures wing frame is square, clamp rear spar in place.
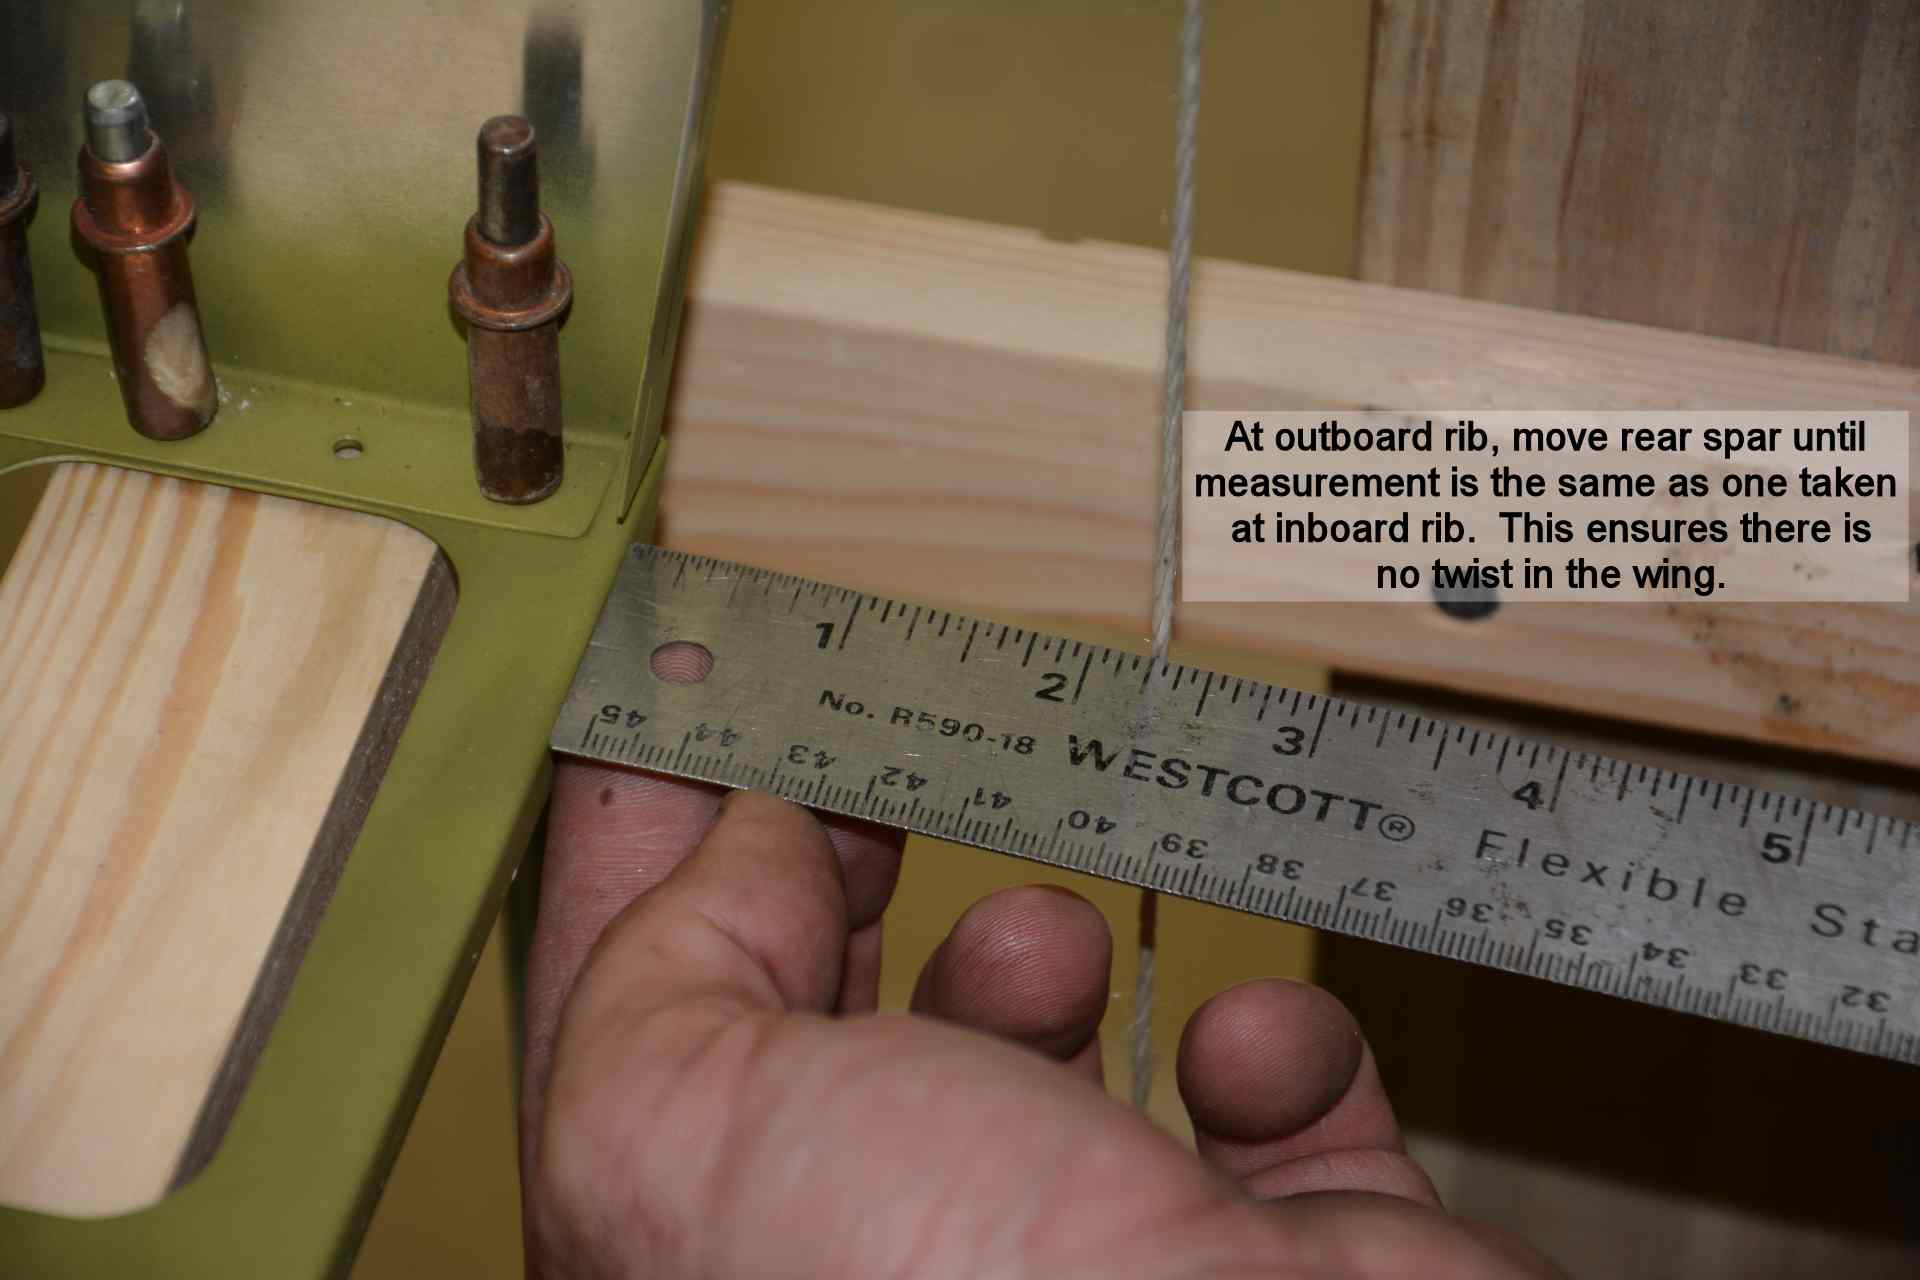
9. At the inboard end of the rear spar, measure distance from the rear spar to the plumb bob string. Record the measurement. Hang plumb bob over line made on main spar by rib 14. Measure distance from rear spar to plumb bob string, and move outboard end of rear spar until measurement is the same as the inboard one. Clamp outboard end of rear spar in position. This assures there is no twist in the wing.
10. Repeat all measurements with plumb bob to verify the wing is still square with no twist.
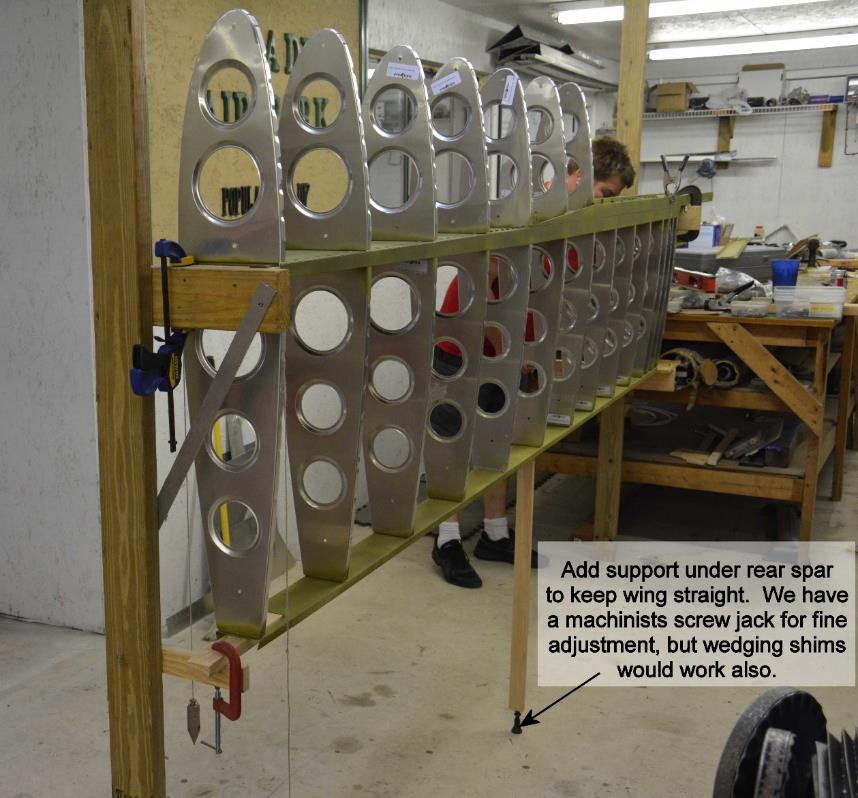
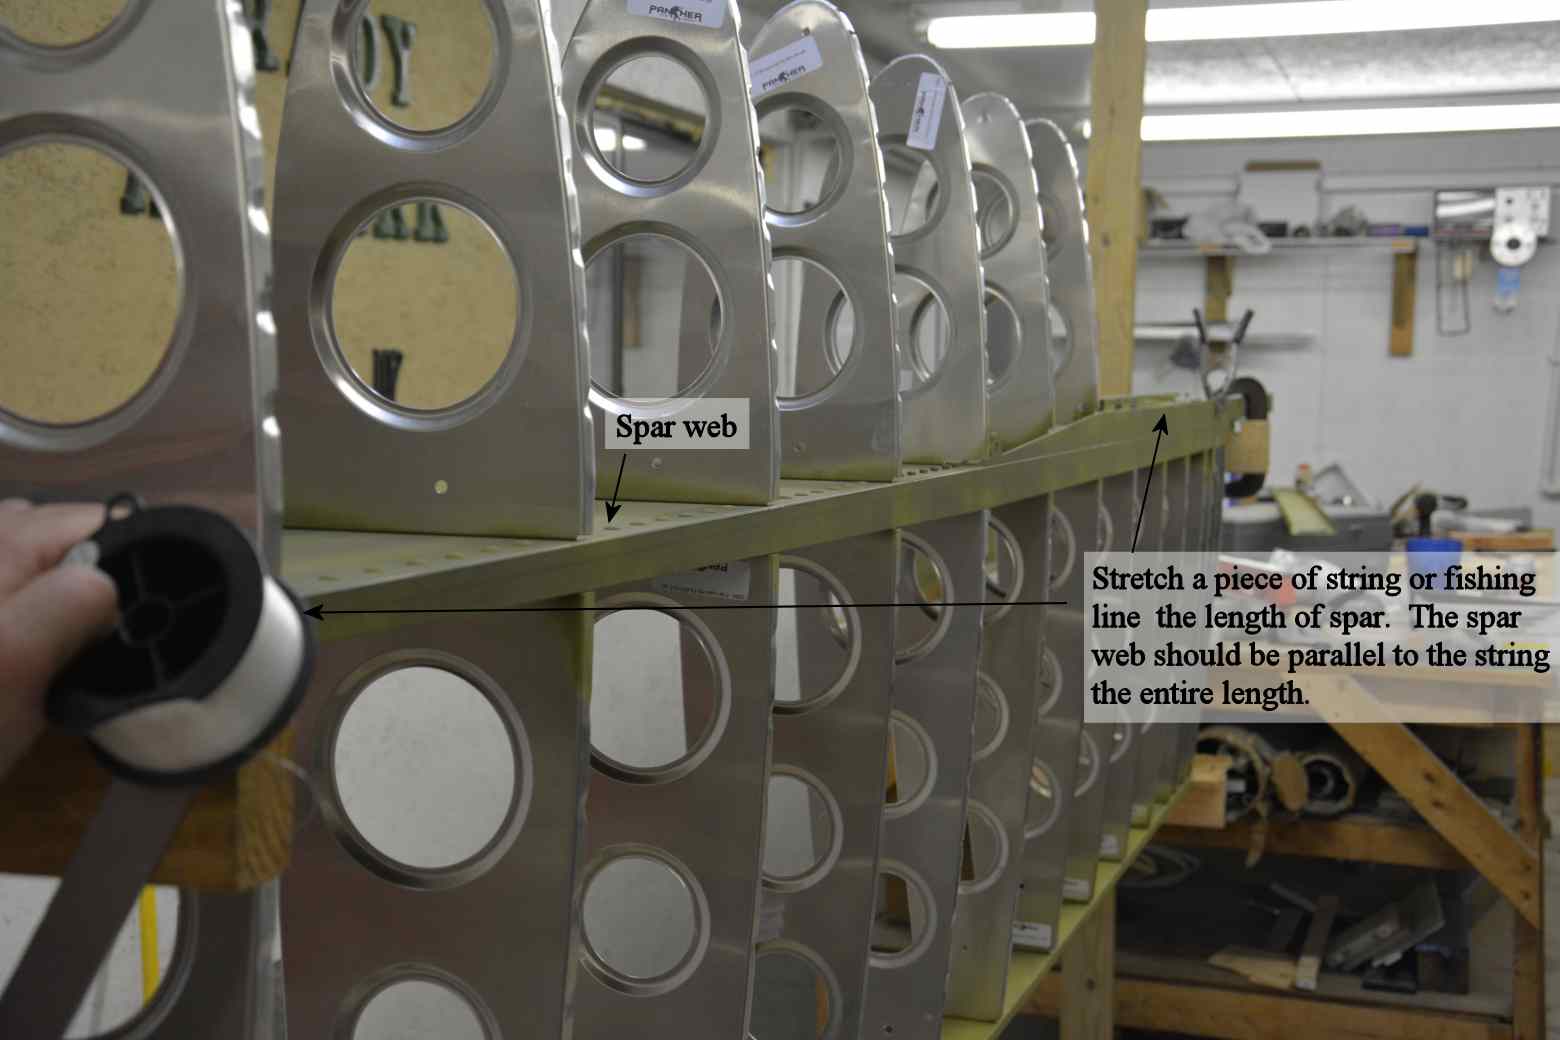
11. The wing will sag in the center without the skins attached. In order to keep the wing straight it is recommended to wedge a support under the rear spar near rib 8. We used a little machinist jack under the support for fine adjustments, but shims would work also. A string or fishing line stretched from the inboard end of the main spar to the outboard end can help in assuring the spar is straight.