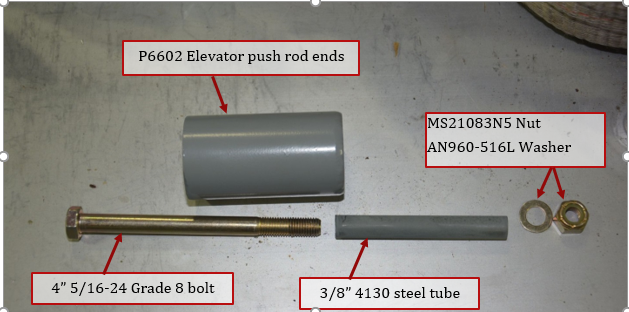
1. The aft end fitting is assembled first. It consists of the welded end, 4” Grade 8 bolt, steel sleeve, washer and nut. The long grade 8 bolt is used to give clearance between the pushrod and the aft deck of the tailcone. The forward fitting will be installed after tube is cut to length.
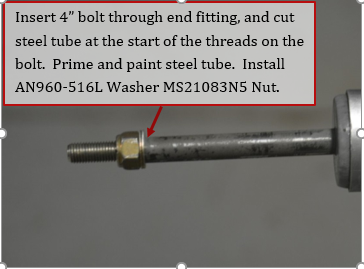
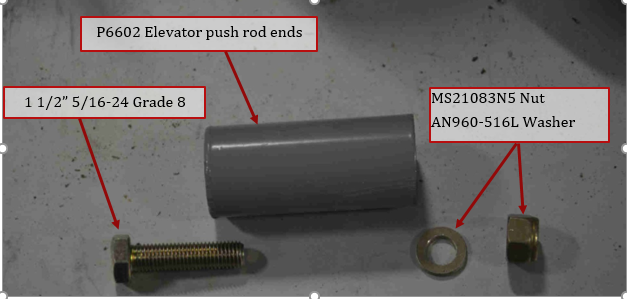
2. Insert bolt through the end of the fitting, and cut the steel tube to length, so it ends where the threads begins on the bolt. It is recommended to prime and paint the steel tube. Install MS21083N5 nut and AN960-516L washer, and tighten. The head of the bolt will not be accessible after the end fitting is installed on the pushrod tube.
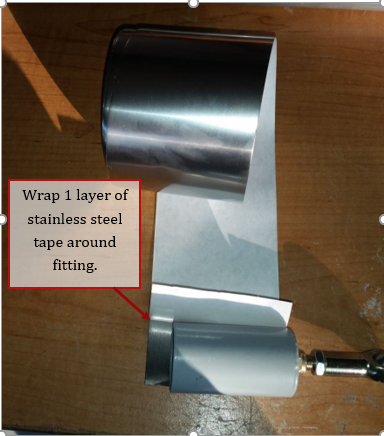
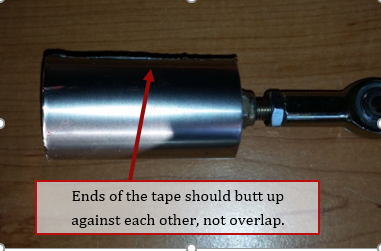
3. Wrap 1 layer of stainless steel tape around end fitting. This acts as a shim between the end fitting and the aluminum tube. The 2 ends of the tape should but against each other, not overlap.
4. Printout the rivet pattern templates available on the website at
http://flywithspa.com/documentation/panther/pushrodrivetpatterns.pdf for the elevator.
Be sure to select ACTUAL SIZE in print options for Adobe Acrobat Reader. Cut template out, and wrap template around tube as shown. Both ends should touch or at least be very close to touching. If it doesn’t you need to check your print settings. Tape in position. Use a center punch and make a center mark at each “+” on the template. There will be 12 rivet holes in total. Leave the template on until all holes are drilled.

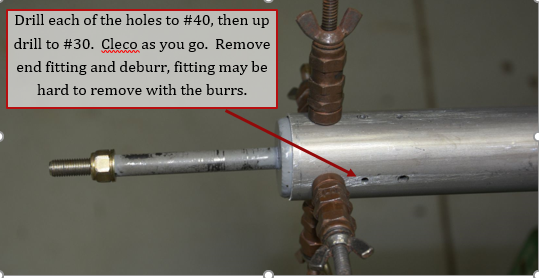
5. Deburr the end of the 1.5” aluminum elevator tube. Insert end fitting in tube until weld is at the end of the tube. Drill a #40 hole at each mark (12 in total). Cleco as you go. Updrill all holes to #30. Mark fitting and tube to show proper orientation, remove fitting (may be tight because of the burrs). Deburr holes, touch up any paint on steel fitting, and reinstall fitting into tube and cleco in position.
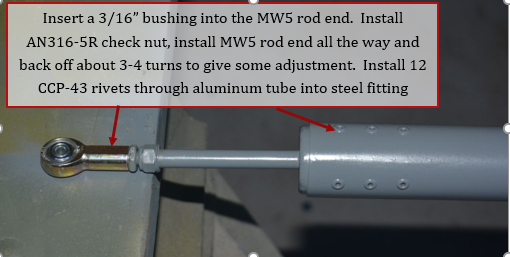
6. Install 12 CCP-43 rivets through aluminum tube and into steel end fitting. Press a 3/16” ID 5/16” OD bushing into MW5 rod end. Install AN316-5R check nut and MW5 Rod end. Screw rod end all the way (some grease will ooze out of the rod end), the back off about 3-4 turns. This will give you some adjustment later on. Finished end of pushrod is shown here.
Note: Rod end must have 15/32 inches (11.9mm) minimum of bolt thread into the rod end
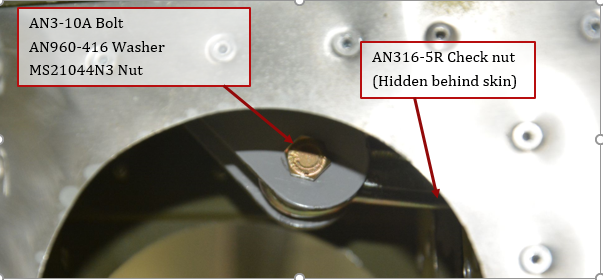
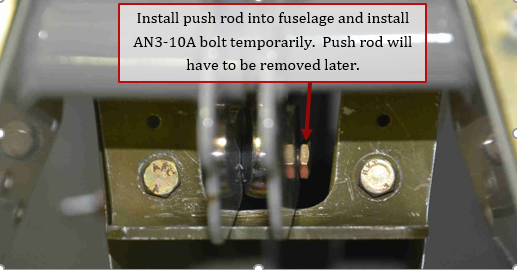
7. Insert pushrod into fuselage and install a temporary AN3 bolt to attach push rod to the elevator joiner control horn. Pushrod will have to be removed later on, so do not use a locking nut at this time.
Note: On early kits the top end of pushrod slot in P-F-TC-bulkhead may need to be trimmed
Per detail in lower left corner of plans sheet P-T-HT,VT install prep
8. Tube is longer than necessary, and will be cut down to size next, after assembling the forward fitting.

9. Assemble the forward end fitting using P6602, 1.5” 5/16-24 Grade 8 bolt, AN960-516L washer and MS21083N5 nut.

10. Press a ¼” ID 5/16” OD bushing into a MW-5 rod end. Install AN316-5R check nut and rod end onto end fitting bolt as far as they will go.
Note: Rod end must have 15/32 inches (11.9mm) minimum of bolt thread into the rod end.

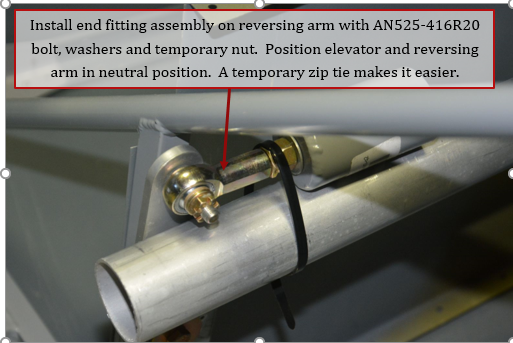
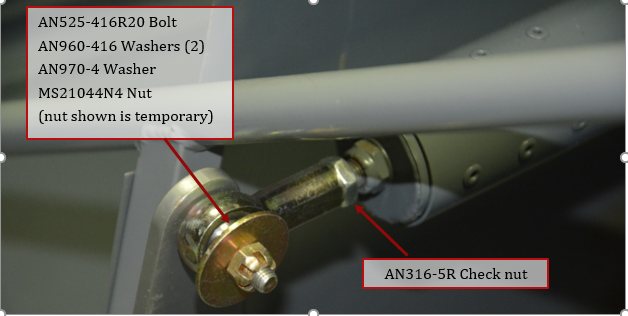
11. Install end fitting assembly on reversing arm upper hole with AN525 bolt, washers and temporary nut. Position the elevator at the neutral position again. Position elevator reversing arm so the center of the hole/bolt aligns with the front edge of the square tube. A zip tie will make it easier to hold the tube to fitting for marking.
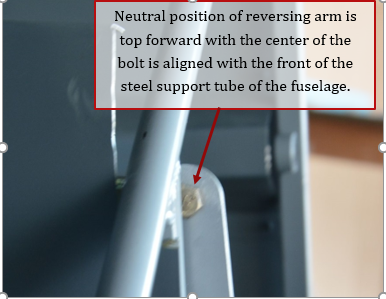
NOTE: neutral position of the reversing arm is not vertical, but angled top forward slightly (center of bolt lined up with front of steel tube).
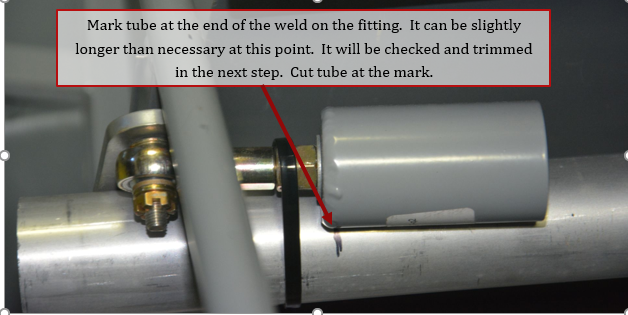
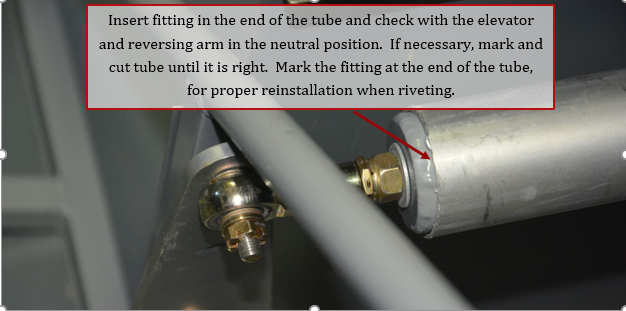
12. Mark the tube at the edge of the weld on the fitting. It is better to be slightly long at this point than slightly short, the tube will be checked and can be trimmed again in the next step. Remove the tube and cut at the mark.
13. Reinstall the tube in the fuselage, but with the fitting inside of the tube. Make sure elevator and reversing arm is at the neutral position as described previously. Check that the tube is at the end of the weld. Mark and cut tube as needed until tube is at the end of the weld of the fitting.
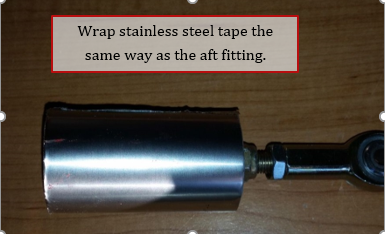
14. Wrap stainless steel tape around fitting same way as for aft fitting.
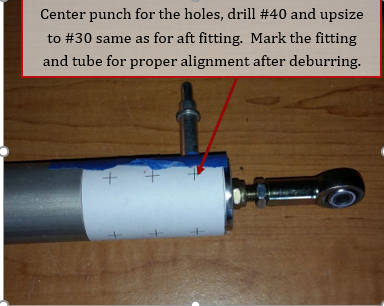
15. Remove pushrod tube, and wrap elevator rivet pattern template around the tube as done previously for the aft end. Center punch and drill the 12 #40 holes, cleco as you go. Updrill holes to #30. Mark the tube and fitting, so aligning fitting is easier, remove the fitting and deburr.
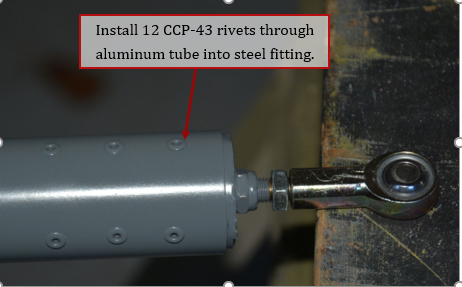
16. Reinstall fitting and install 12 CCP-43 rivets. The forward end of the pushrod will be visible in certain positions of the control stick. If you want to paint the pushrod, now is the time.
17. Completed pushrod assembly.

18. Reinstall pushrod with AN525 bolt, 2 AN960-416 washers on the reversing arm. Verify that with the elevator in neutral position, the reversing arm is also in neutral position. If not, adjust rod end until reversing arm is in neutral position. Install AN970-4 safety washer and MS21044N5 locking nut. Tighten AN316-5R check nut against the MW-5 rod end.
Note: Rod end must have 15/32 inches (11.9mm) minimum of bolt thread into the rod end.
18. Reinstall AN3 bolt temporarily on elevator joiner. The elevators will need to be removed later. Tighten AN316-5R check nut against the MW-5 rod end.