
Note: When fitting the skirt to the frame the canopy bubble must be in place with at least clecos. When fitted to the skirt the bubble makes it more rigid and will affect the fit and placement of the skirt on the fuse/ frame
1.On the right side at the forward upper deck and the turtled deck skin mark line projecting from the lower side of the canopy frame angle
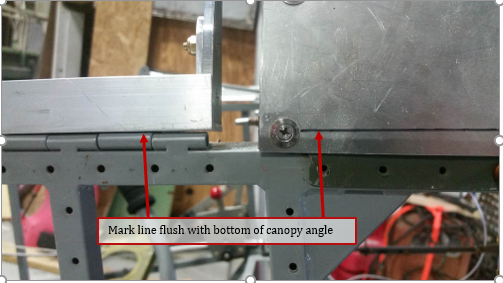
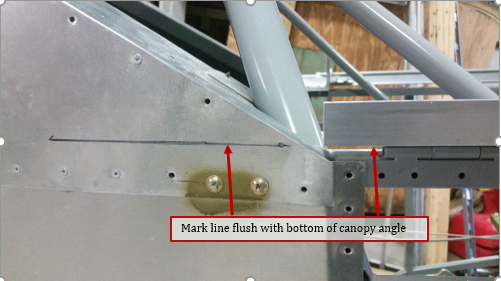
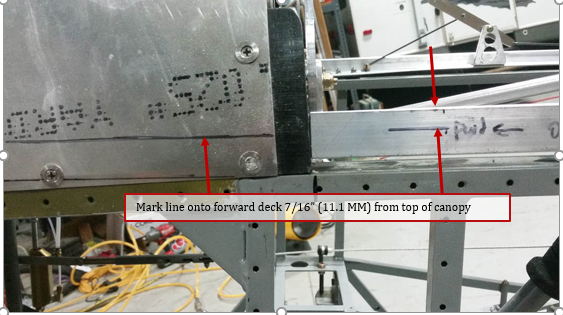
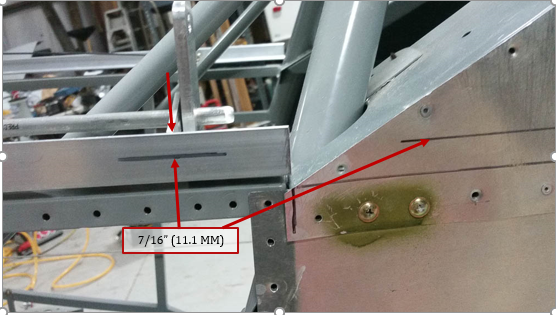
2.On left side canopy angle, mark a line 7/16 below the top of the angle, then project these onto the forward deck, and the turtle deck skins.
3.Disconnect the latch pins from the P8902 latch handle (leave the latch pins in place) and push the handle inward so the skirt can fit.
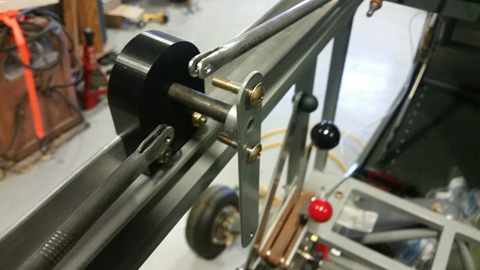
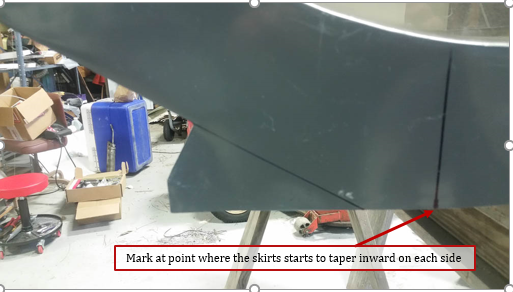
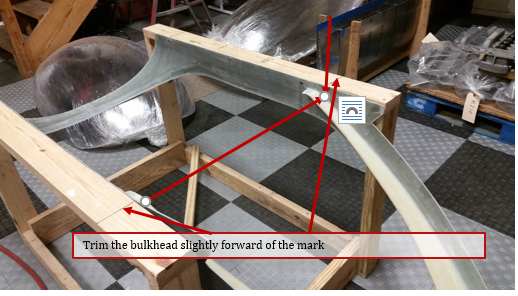
4.You will need to trim the bulkhead on the canopy skirt to clear the frames side angles. Trim the bulkhead slightly forward of the mark you made at the point where the skirt starts to taper inward.
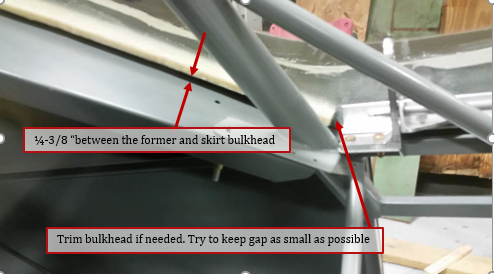
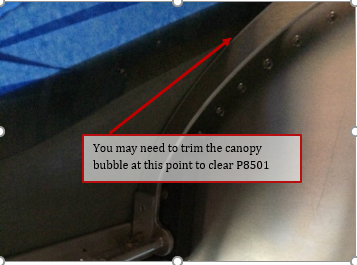
5.Set the frame/bubble onto the airframe. The aft end should be at, or slightly forward of the skin joint of aft upper skins. Adjust skirt so it is centered at both ends and even on both sides. The rear skirt bulkhead should be ¼”-3/8 above former 1(see photo). You can shift the skirt/canopy around slightly for the best fit. You may need to trim little more off the bulkhead so it can fit in the proper location. You may also need to trim the edge of the canopy bubble at the P8501 canopy bow so the forward edge of the skirt will lay against the forward deck
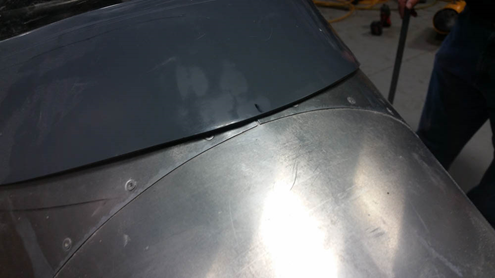
6. You may need to sand the inside of the skirt where it meets the fuse in several spots for a good fit. If you have areas that do not fit well around the front try removing the cleco(s) at the front of the bubble and see if the skirt will rest against the forward deck. If so you can use a strap or tape to hold it in place and re drill the hole in the fiber glass. If not you can fix any minor gaps during finishing.
Note: you will have a small even gap (about 1/8-3/16 inch) along the aft lower ¼ of the skirt on each side. This is needed to allow the canopy to open and close.
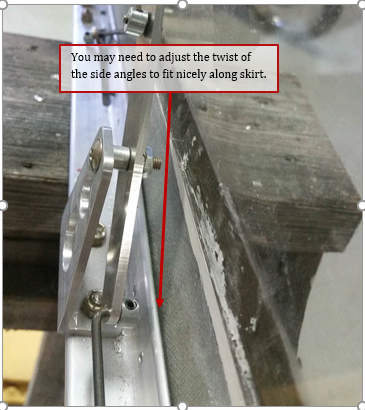
7. Check the fit between the canopy frame side angles and the skirt. You may need to adjust the twist of the side angle to meet the skirt reasonably well. The skirt will “bulge” some above the rails and adding more twist may result in a better fit.
8. With the best fit achieved tape or strap the canopy in place. Do not pull the canopy down to tight or it will be very difficult to close and latch.
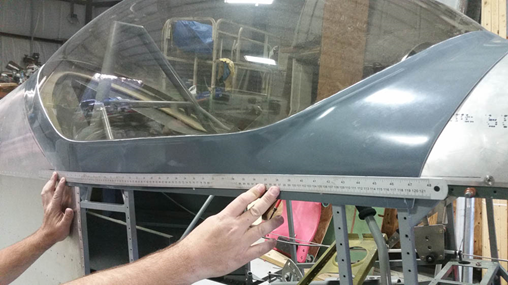
9. Mark lines on both left and right side along the skirt that connect the lines made in step 1 and 2 above.
10. On the right and left side lay out the holes for the skirt to frame rivets (or screws)and drill/ cleco #40
Note: you may want to drill only every 4th or so hole at this time and verify fit etc. before drilling all holes
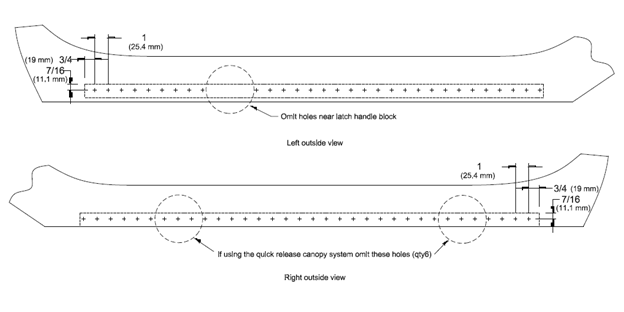
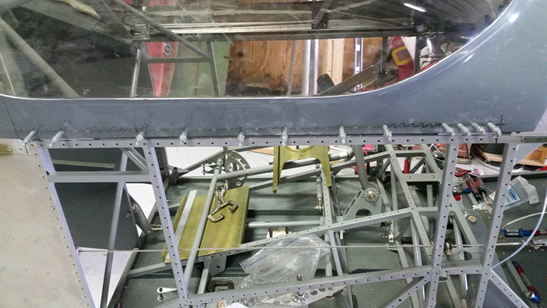
6.Remove the canopy frame and skirt from the airframe and trim the right side flush with the bottom of the frame side angle.(left side will be trimmed later)
7.Drill a 3/8 hole through the P8906 Latch block for the inner handle.
8.Remove the skirt from frame and up drill the hole from 3/8” to ¾”
9.Reassemble the canopy frame to skirt and install the latch handle and pins
10.Hold the P8508 Canopy skirt attach brackets in place per photo and mark for the bend
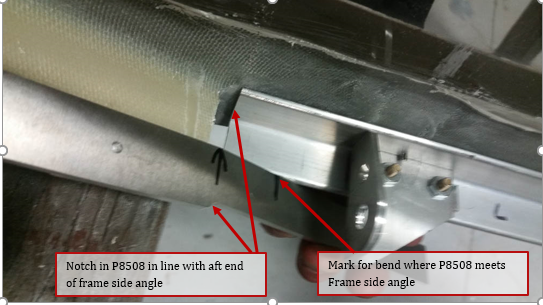
11.On the left side remove the P8502 Canopy rail latch angle and temporary spacer. On the right side remove the hinge.
12.Bend the P8508s for the right and left side.
13.Bevel the outer edge as needed for a good fit in the radius of the side angle and the fiberglass skirt. You may need to twist them slightly to fit nicely
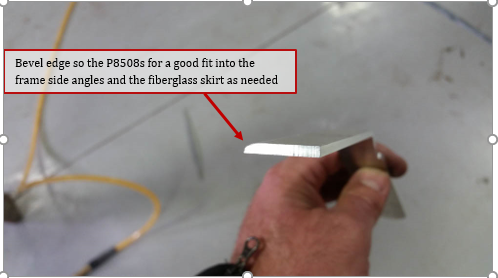
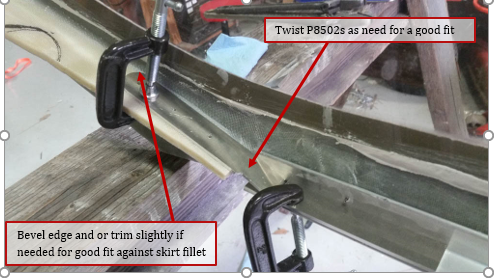
14.Drill and cleco the P8508s #30 at the bulkhead.
15.Drill the P8508S at the side angles .These should be 3/16 on the left and #18 (0.169) on the right side.
16.On the left side set the P8502 latch angle in place. Mark then trim the P8508 flush with the front of the P8502, then bolt/ cleco in place
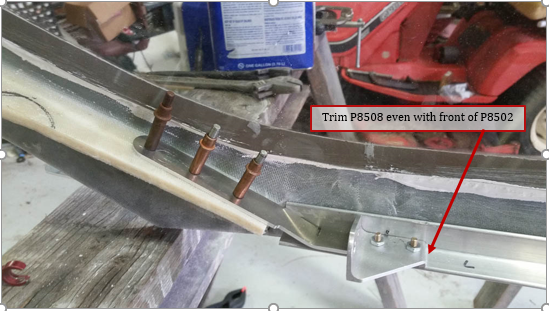
17.On the right side trim the P8508 3/8inch (9.5mm) in front of the first screw hole, then bolt/cleco in place
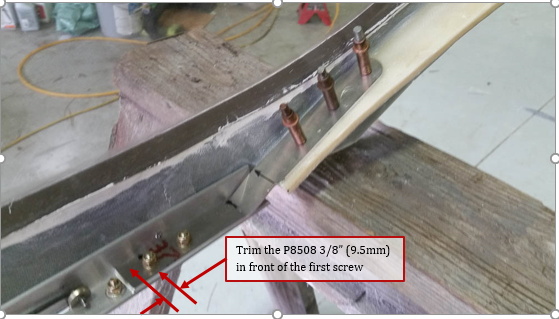
18.Place skirt / frame onto the airframe and slide in the hinge pins.
19.Raise the canopy until the rear bulkhead touches the roll bar. Mark and trim the bulkhead so it has 1/4” (6.4mm) clearance
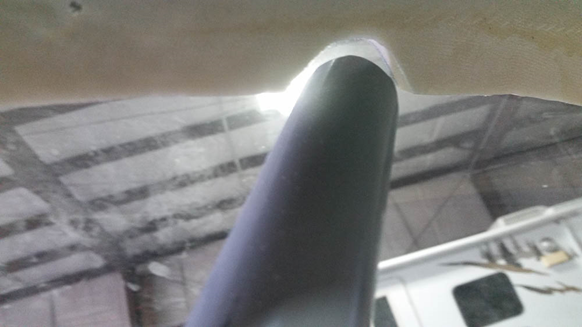
20.Lower the canopy and latch the left side.
Note: You may need to chamfer and enlarge the holes in the P8905 and the P8511 so the pins slide in and out easily.
Note: If your forward side skins are permanently in place carefully use pliers on the P8902 inner handle shaft to rotate handle from the outside.
21.Verify the latch handle is fully forward!
22.Slide the 3/8 ID x3/4 OD x1/2 LG Aluminum spacer (Mc Master Carr # 92510A798) onto the latch handle shaft.
23.Mark the shaft 7/16 (11.1mm) from the spacer, and trim (we use a thin cutoff wheel)
24.Slide the P8907 canopy latch outer handle into place, verify the inner handle is still fully forward, level the outer handle with the longeron.
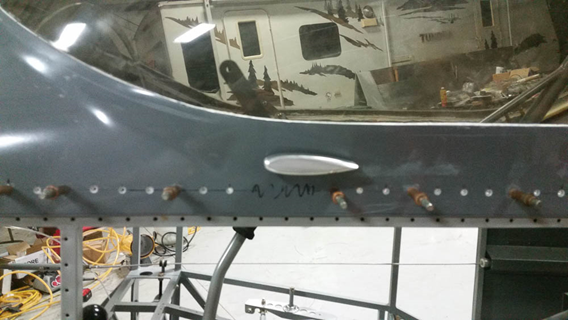
25.Using the hole in the front of the P8907 drill the latch shaft #18 (0.169) using core not drill into the threads of the P8907. We drill through the first wall of the shaft tube then into the second wall, but not through. We remove the handle then finish the hole, deburr and reinstall the handle
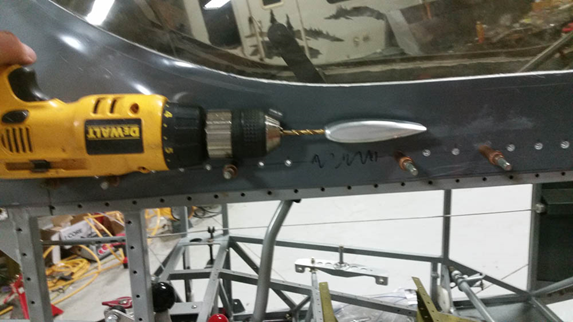
26.Install the 8-32 socket head screw.
27.Verify the canopy latch smoothly, and opens fully. When closing the canopy you will need to slightly “spread” the skirt at the rear so it clears the rear formers/skin.
28.With canopy full latched mark the left lower side of the skirt so it will overlap the forward fuselage skin about 1/16”. Remove the canopy from the fuse and trim.
29.You can now up drill any fasteners to the final size. Deburr and counter sink as needed.
30.Install the closer angle as shown between hinges on the right side. We use 3 M body adhesive tape for nice appearance, but it can be installed with rivets if desired.
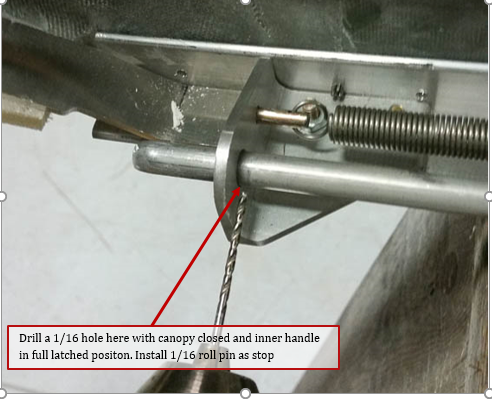
Note: the return spring will pull the latch to the full latched position when the canopy is open. To close the canopy you will need manually put the inner handle in the “unlatched” position. In some cases the canopy latch pins may be able to “over travel” and strike the forward deck damaging the paint. You may want to add an over travel stop so the latch pins will not be able to damage the forward deck if you forget to put the inner handle in the unlatch position before closing the canopy.
With canopy closed and the inner latch handle in the fully latched position, , drill a 1/16 hole in the aft latch pin and install as roll pin to act as over travel stop see photo
Note: SPA is working on a gas strut to restrain the canopy when open. Contact SPA support for more information.
